
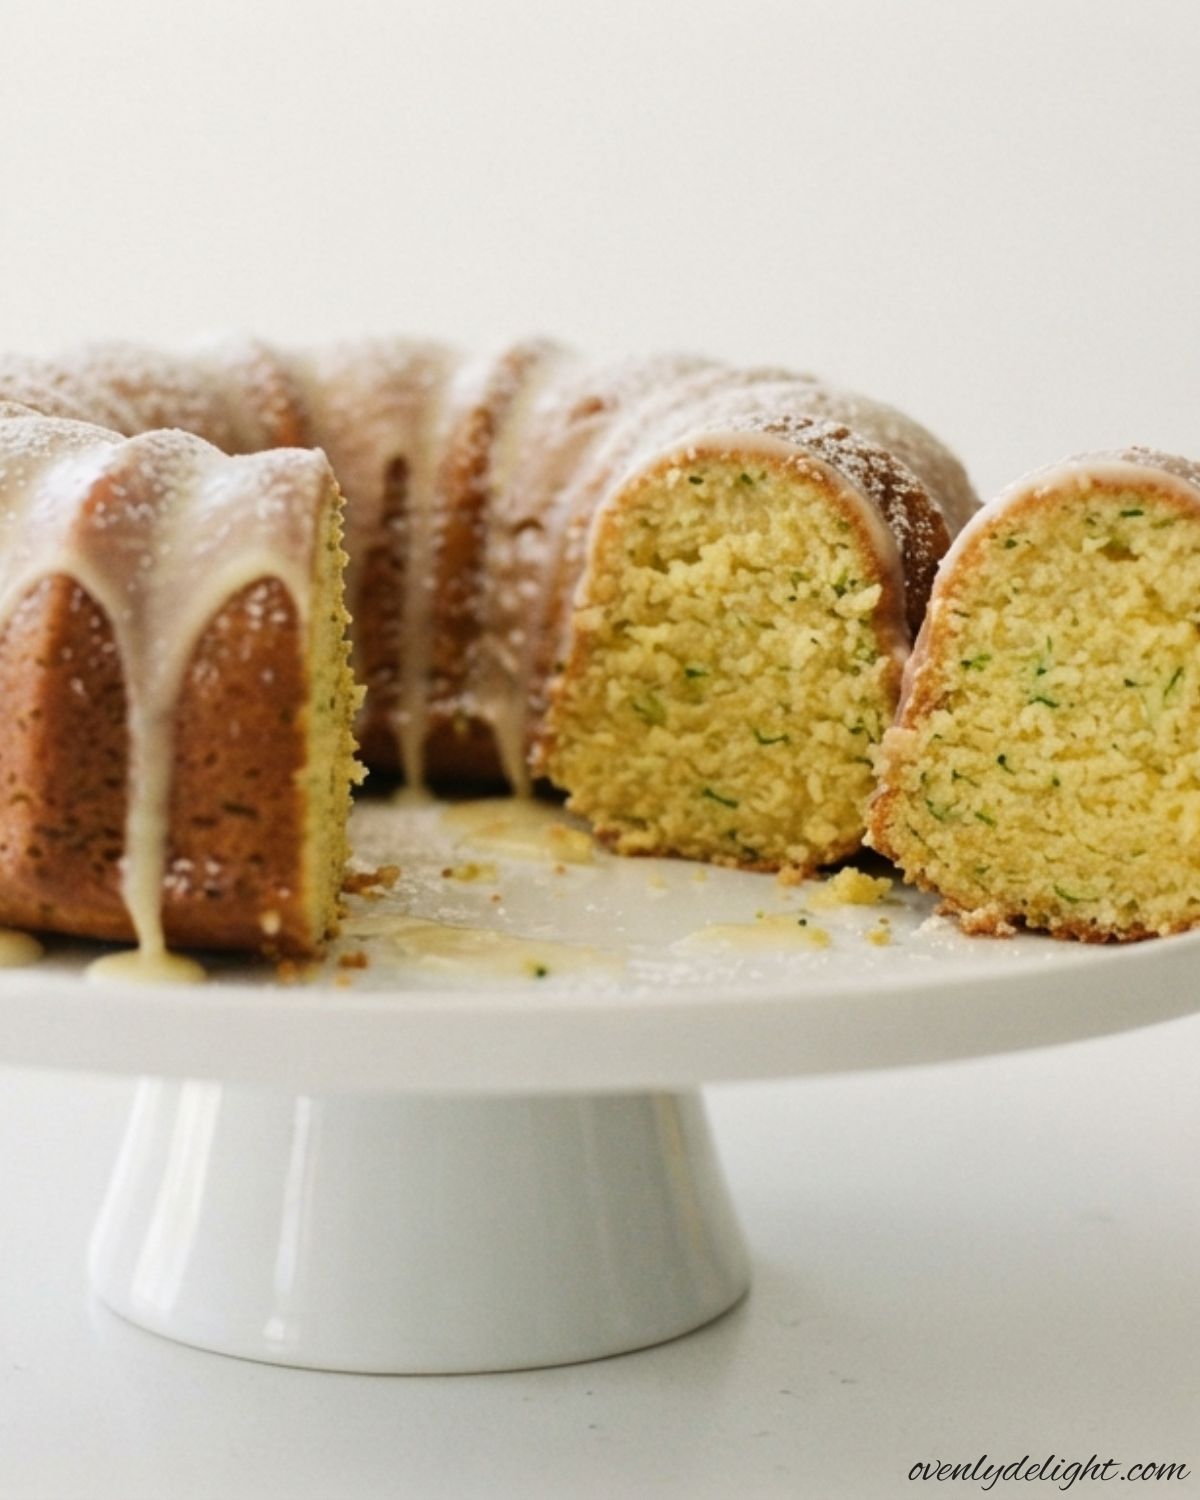
I love baking this Lemon Zucchini Cake when I want something that feels fresh, light, and a little different from the usual desserts. The zucchini keeps every slice incredibly moist without adding a noticeable vegetable flavor, while the fresh lemon adds a bright, sunny taste that makes this cake perfect for spring, summer, or anytime you need a simple homemade treat. If you’re looking for an easy lemon zucchini cake that’s soft, flavorful, and always a hit with family and friends, this recipe is one you’ll come back to again and again. Why You’ll Love This Lemon Zucchini Cake Wonderfully Moist Texture Fresh grated zucchini melts into the batter as the cake bakes, creating an incredibly soft, tender crumb. It adds natural moisture without leaving a vegetable taste, so every bite stays light and delicious. Bright, Fresh Lemon Flavor Fresh lemon juice and fragrant lemon zest give this cake a vibrant citrus flavor that perfectly balances the sweetness. The refreshing taste makes it an ideal dessert for spring, summer, or any time you’re craving something light. Simple Pantry Ingredients This easy lemon zucchini cake comes together with everyday baking staples and a few fresh ingredients. There’s no need for complicated techniques or specialty items, making it perfect for beginner and experienced bakers alike. Perfect Way to Use Fresh Zucchini If your garden is overflowing or you’ve picked up extra zucchini at the market, this recipe transforms it into a beautiful homemade dessert. It’s a delicious way to reduce food waste while creating something everyone will enjoy. Great for Any Occasion Whether you’re serving it at a family gathering, summer barbecue, afternoon coffee break, brunch, or casual celebration, this versatile cake fits almost any occasion. It slices beautifully and is easy to transport for sharing. Easy to Make Ahead The cake stays moist and flavorful for days, making it an excellent make-ahead dessert. Bake it in advance for parties or busy weeks, and enjoy a slice whenever you’re in the mood for a fresh homemade treat. Ingredients for Easy Lemon Zucchini Cake For the Lemon Zucchini Cake For the Lemon Glaze How to Make Homemade Lemon Zucchini Cake 1. Prepare the Oven and Pan Preheat your oven to 350°F (175°C) and position a rack in the center. Generously grease a 10-cup Bundt pan, including the center tube, to ensure the cake releases easily after baking. 2. Prepare the Zucchini and Dry Ingredients Grate the zucchini using the large holes of a box grater, but don’t squeeze out the moisture since it helps create a soft, moist cake. In a medium bowl, whisk together the all-purpose flour, baking soda, baking powder, and salt until well combined. 3. Mix the Wet Ingredients In a large mixing bowl, rub the granulated sugar and fresh lemon zest together with your fingertips for about a minute to release the natural citrus oils. Add the vegetable oil, sour cream, fresh lemon juice, vanilla extract, and eggs, then whisk until the mixture is smooth. 4. Combine the Batter Gradually fold the dry ingredients into the wet ingredients using a spatula. Mix just until no dry streaks remain, then gently fold in the grated zucchini until evenly distributed. Avoid overmixing to keep the cake light and tender. 5. Bake the Cake Pour the batter into the prepared Bundt pan and smooth the top. Bake for 50 to 55 minutes, or until a toothpick inserted into the center comes out clean or with a few moist crumbs attached. 6. Cool the Cake Let the cake cool in the pan for 15 minutes before carefully inverting it onto a wire rack. Allow it to cool completely before glazing so the topping sets properly. 7. Make the Lemon Glaze Whisk the fresh lemon juice and powdered sugar together until smooth and pourable. Drizzle the glaze evenly over the cooled cake and let it set for about 10 minutes before slicing and serving. Expert Tips for the Best Lemon Zucchini Cake Choose Fresh, Smaller Zucchini Use small or medium zucchini whenever possible. They have a milder flavor, fewer seeds, and a more tender texture. If you’re using a large zucchini, trim off both ends before grating to avoid any bitterness. Zest the Lemons First Always zest the lemons before squeezing the juice. It’s much easier to remove the zest from whole lemons, and you’ll get the maximum fresh citrus flavor for the cake. Measure the Flour Correctly Spoon the flour into the measuring cup and level it with a knife instead of scooping directly from the bag. This prevents adding too much flour, which can make the cake dense and dry. Grease the Bundt Pan Well Coat every part of the Bundt pan, including the center tube and all the grooves, with butter or baking spray. Proper greasing helps the cake release easily without sticking. Cool Before Adding the Glaze Allow the cake to cool completely on a wire rack before drizzling on the lemon glaze. This helps the glaze set beautifully and creates a smooth, even finish. Test for Doneness Early Begin checking the cake after 50 minutes by inserting a toothpick into the center. If it comes out clean or with a few moist crumbs, the cake is ready to remove from the oven. Ingredient Substitutions for Lemon Zucchini Cake Replace the Sour Cream If you don’t have sour cream, use the same amount of plain full-fat Greek yogurt. It provides a similar creamy texture with a slightly tangier flavor while keeping the cake moist. Use a Different Oil Vegetable oil can be replaced with canola oil or light olive oil in equal amounts. Both options create a soft, tender crumb without noticeably changing the flavor. Make It Gluten-Free For a gluten-free version, substitute the all-purpose flour with a 1:1 gluten-free baking flour blend. The cake may be slightly denser, but it will still bake up soft and moist. Make It Dairy-Free Replace the sour cream with your favorite dairy-free plain yogurt alternative. It adds moisture and richness while keeping
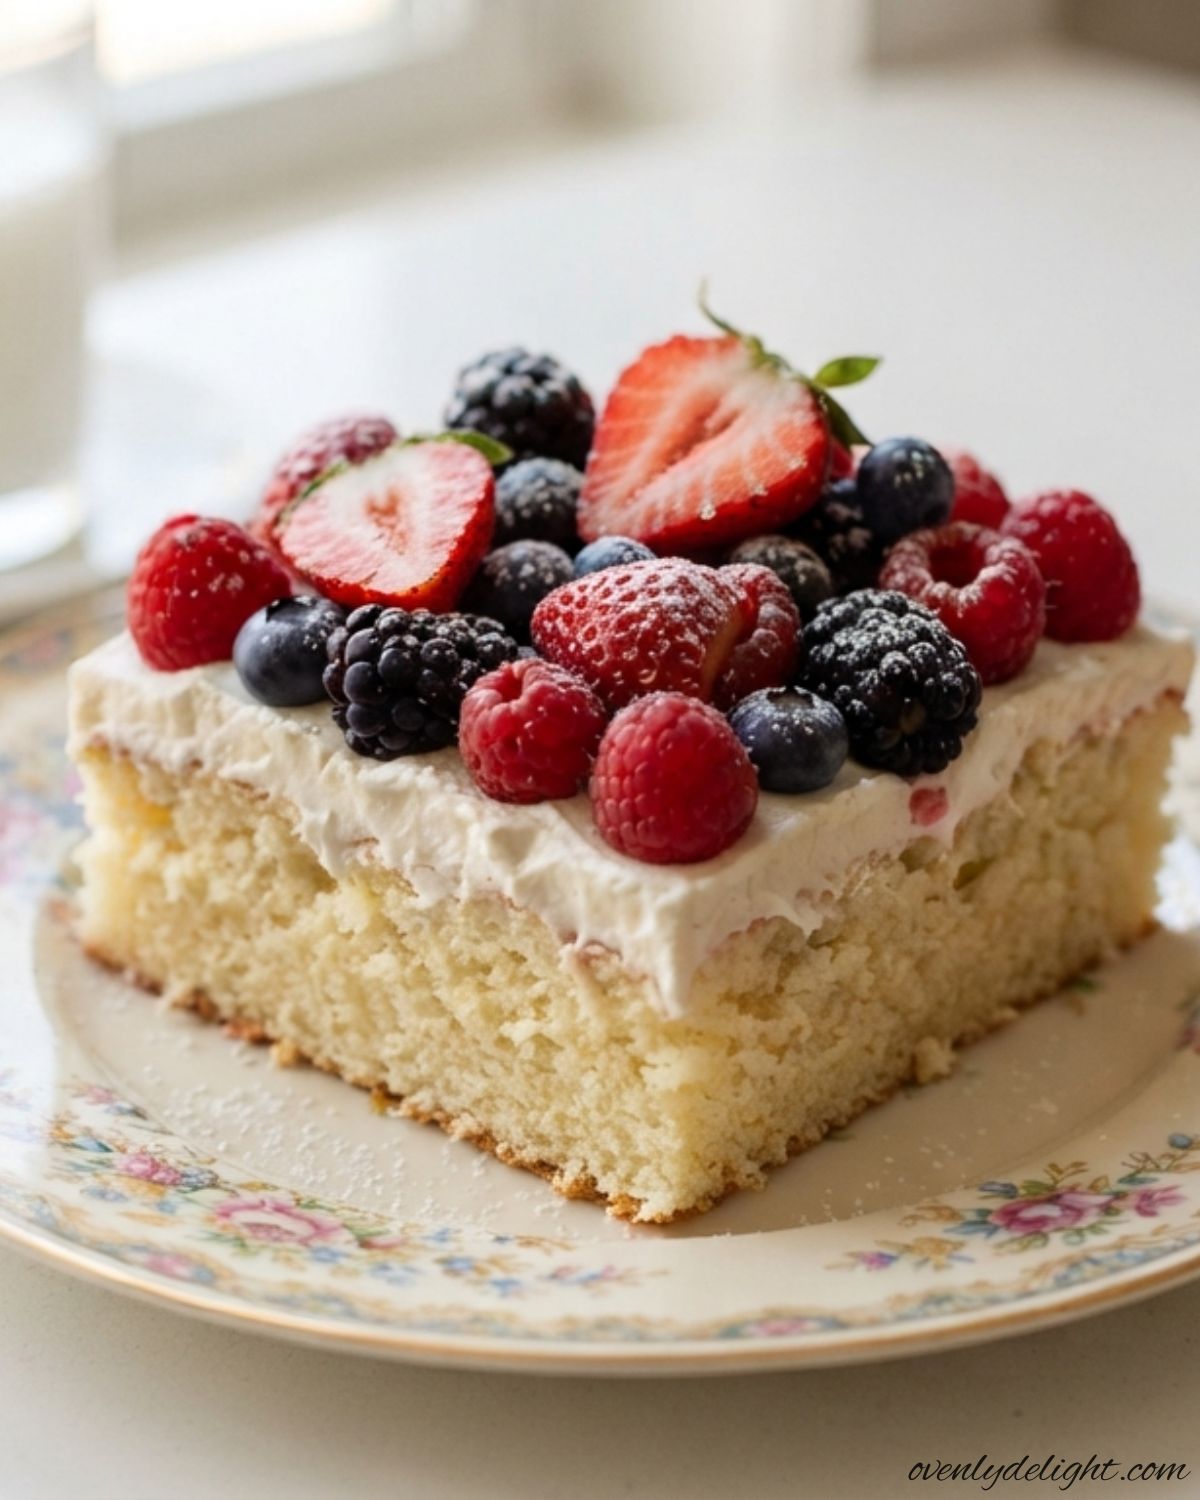
Berries and Cream Sheet Cake (Easy No-Fail Summer Recipe)
I love making this Berries and Cream Sheet Cake whenever I need an easy dessert that looks beautiful and tastes fresh. With a soft vanilla cake, light whipped cream frosting, and juicy mixed berries, it’s perfect for summer gatherings, birthdays, or family celebrations. If you’re looking for a simple berries and cream cake that’s easy to make and always a crowd favorite, this recipe is one you’ll want to bake again and again. Why You’ll Love This Berries and Cream Sheet Cake Soft and Light Texture Every bite is incredibly soft, fluffy, and tender thanks to the moist vanilla cake base. Paired with a light whipped cream frosting, this cake has a delicate texture that feels refreshing instead of heavy. Fresh Berry Flavor A generous layer of strawberries, blueberries, and raspberries adds natural sweetness and a burst of juicy flavor. The fresh fruit balances the creamy topping beautifully, making every slice bright and delicious. Perfect for Summer Gatherings This easy sheet cake is a wonderful choice for barbecues, birthdays, baby showers, picnics, and family get-togethers. It serves a crowd with ease and looks beautiful on any dessert table. Simple to Make You don’t need complicated decorating skills or special baking techniques. With easy-to-find ingredients and straightforward steps, this homemade dessert comes together without stress. Easy to Customize You can use your favorite seasonal berries or whatever is available. Blackberries, sliced strawberries, blueberries, or raspberries all work well, allowing you to enjoy this recipe throughout berry season. Great for Making Ahead The cake can be baked in advance and topped with the whipped cream frosting and fresh berries before serving. This makes party planning much easier while keeping every slice fresh, creamy, and full of flavor. Ingredients for this Berries and Cream Sheet Cake For the Vanilla Cake For the Cream Topping How to Make Berries and Cream Sheet Cake at Home 1. Prepare the Baking Pan Preheat your oven to 350°F (175°C). Grease or line a 9×13-inch baking pan with parchment paper, leaving an overhang on two sides so you can easily lift the cake out after baking. 2. Mix the Dry Ingredients In a medium bowl, whisk together the all-purpose flour, baking powder, and baking soda until evenly combined. This helps distribute the leavening agents throughout the batter for an even rise. 3. Beat the Eggs and Sugar In a large mixing bowl, beat the eggs and granulated sugar for about 2–3 minutes until the mixture becomes pale, light, and slightly thick. This step creates air in the batter, giving the vanilla cake a soft and fluffy texture. 4. Add the Wet Ingredients Mix in the melted butter, vegetable oil, vanilla extract, and almond extract until smooth. Then stir in the milk and sour cream, mixing just until everything is well combined. 5. Combine the Batter Gradually add the dry ingredients to the wet mixture. Fold gently with a spatula or mix on low speed until no dry streaks remain. Avoid overmixing, as it can make the cake dense instead of light and tender. 6. Bake the Cake Pour the batter into the prepared pan and spread it evenly. Bake for 30–35 minutes, or until a toothpick inserted into the center comes out clean or with a few moist crumbs. Let the cake cool completely in the pan before adding the topping. 7. Make the Cream Topping Beat the softened cream cheese, sugar, and vanilla extract until smooth and creamy. In a separate bowl, whip the cold heavy whipping cream until stiff peaks form, then gently fold it into the cream cheese mixture until light and fluffy. 8. Assemble and Decorate Spread the cream topping evenly over the completely cooled cake. Arrange the fresh mixed berries over the top, covering the surface with strawberries, blueberries, raspberries, and blackberries for a colorful finish. 9. Chill and Serve Refrigerate the cake for at least 30–60 minutes before slicing. Chilling allows the cream topping to set and enhances the fresh berry flavor. Slice, serve, and enjoy this refreshing Berries and Cream Sheet Cake with family and friends. Expert Tips for the Best Berries and Cream Sheet Cake Ingredient Substitutions How to Store Berries and Cream Sheet Cake Refrigerator Cover the cake tightly with plastic wrap or store it in an airtight container and refrigerate for up to 3 days. Since the topping is made with whipped cream and cream cheese, the cake should always be kept chilled. For the best texture and freshest flavor, For the best flavor and texture, enjoy it within the first 24–48 hours. Freezer If you’d like to make this recipe ahead, freeze only the unfrosted vanilla cake. Once the cake has cooled completely, wrap it tightly in plastic wrap followed by a layer of aluminum foil. Freeze for up to 2 months. Thaw it overnight in the refrigerator, then add the cream topping and fresh mixed berries just before serving for the best results. Can You Freeze the Assembled Cake? It’s not recommended. The whipped cream topping and fresh berries release moisture as they thaw, which can make the cake watery and affect its smooth, creamy texture. Decorating with fresh berries after thawing gives the best appearance and flavor. Serving Tip This Berries and Cream Sheet Cake is best served chilled. Before serving, let each slice sit at room temperature for 5–10 minutes so the cake softens slightly and the cream topping becomes perfectly creamy. More Dessert Recipes You’ll Love Frequently Asked Questions Final Thoughts This Berries and Cream Sheet Cake is a simple yet beautiful dessert made with a soft vanilla cake, creamy topping, and fresh berries. It’s perfect for summer gatherings, celebrations, or whenever you want a homemade treat that feels special. Easy to make and full of fresh flavor, this recipe is one you’ll want to enjoy again and again.
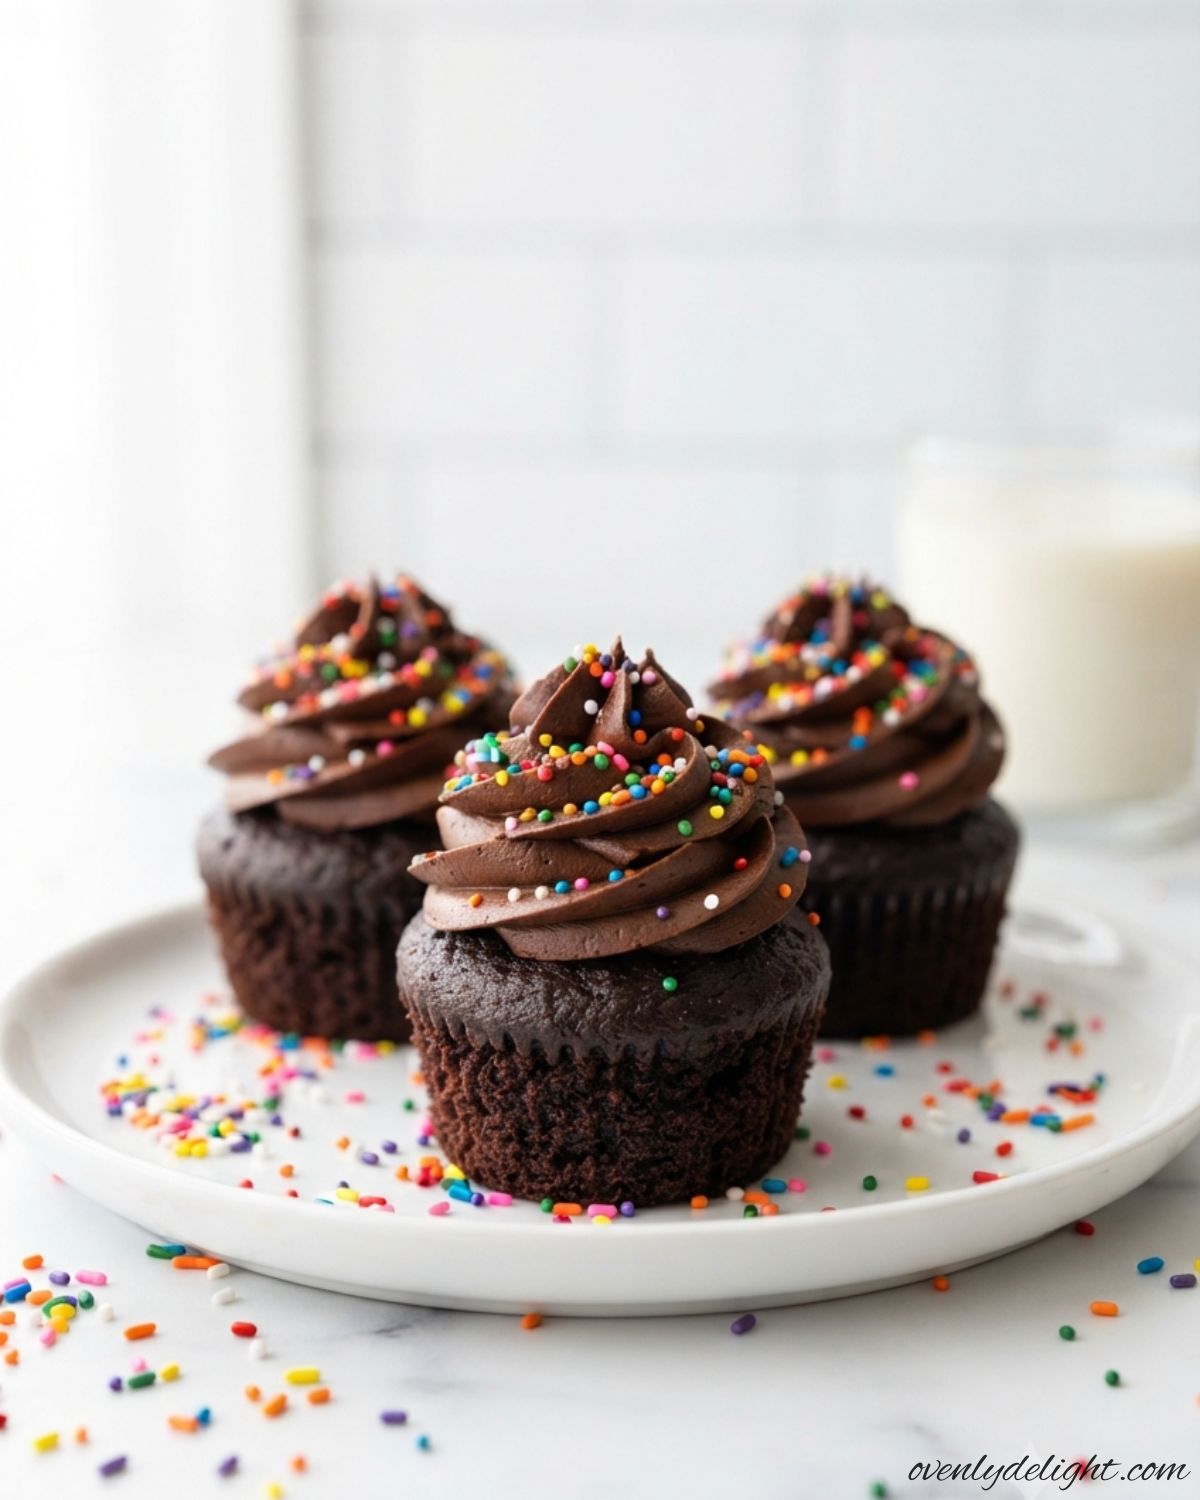
Double Chocolate Cupcakes – Moist, Fudgy & Better Than Bakery
I love baking these Ultimate Double Chocolate Cupcakes whenever I’m craving a rich chocolate dessert that’s easy to make and always impresses. They’re incredibly soft, moist, and topped with creamy chocolate buttercream, making them perfect for birthdays, celebrations, or simply satisfying a chocolate craving. If you enjoy bakery-style cupcakes with deep chocolate flavor, this recipe is one you’ll want to make again and again. Why You’ll Love These Bakery-Style Ultimate Double Chocolate Cupcakes Rich and Intense Chocolate Flavor Made with cocoa powder and plenty of chocolate, these cupcakes deliver a deep, fudgy taste in every bite. They’re the perfect dessert for chocolate lovers who enjoy rich homemade treats. Soft, Moist, and Fluffy Texture Each cupcake bakes up with a light, tender crumb that stays moist and delicious. You’ll get bakery-quality results without using complicated techniques. Easy Homemade Chocolate Cupcake Recipe With simple pantry ingredients and easy-to-follow steps, this recipe is perfect for beginner bakers as well as anyone looking for a reliable chocolate dessert. Smooth and Creamy Chocolate Buttercream The silky chocolate buttercream adds the perfect finishing touch, creating a balanced combination of fluffy cake and rich frosting that looks just as good as it tastes. Perfect for Every Celebration These chocolate cupcakes are ideal for birthdays, holidays, bake sales, family gatherings, baby showers, or whenever you want an impressive homemade dessert. Great for Making Ahead You can bake the cupcakes in advance and frost them later, making this recipe a convenient choice for parties, special occasions, or weekly dessert planning. Ingredients You’ll Need for Ultimate Double Chocolate Cupcakes Chocolate Cupcakes Chocolate Buttercream Frosting Ingredients How to Make Bakery-Style Ultimate Double Chocolate Cupcakes These bakery-style Ultimate Double Chocolate Cupcakes are easy to make and deliver a soft, moist crumb with rich chocolate flavor in every bite. Follow these simple steps for homemade chocolate cupcakes that look and taste like they came from your favorite bakery. Step 1: Prepare the Oven Preheat your oven to 350°F (175°C). Line a standard 12-cup muffin pan with paper cupcake liners and position the oven rack in the center for even baking. Preparing the pan first makes it easier to fill the liners once the batter is ready. Step 2: Mix the Dry Ingredients In a large mixing bowl, whisk together the all-purpose flour, Dutch-process cocoa powder, baking soda, baking powder, and salt until everything is evenly combined. Breaking up any cocoa lumps at this stage helps create a smooth cupcake batter. Step 3: Combine the Wet Ingredients In a separate bowl, whisk the vegetable oil and granulated sugar until combined. Add the room-temperature egg and vanilla extract, then whisk until the mixture looks smooth and slightly creamy. This helps create a light, tender cupcake texture. Step 4: Make the Batter Pour the buttermilk into the wet mixture, then gradually mix the dry ingredients into the wet ingredients until just combined. using a spatula. Mix only until no dry streaks remain. Overmixing can develop the gluten, making the cupcakes dense instead of soft and fluffy. Step 5: Add the Hot Coffee Slowly stir in the hot brewed coffee until the batter is smooth. Don’t worry if it looks thinner than regular cupcake batter—that extra moisture is what creates incredibly moist, rich chocolate cupcakes with a deep cocoa flavor. Step 6: Bake the Cupcakes Divide the batter evenly between the cupcake liners, filling each about two-thirds full. Bake for 16–18 minutes, or until a toothpick inserted into the center comes out with just a few moist crumbs. Avoid overbaking to keep the cupcakes soft. Step 7: Cool Before Frosting Let the cupcakes cool in the pan for about 5 minutes, then transfer them to a wire rack. Allow them to cool completely before adding the frosting, otherwise the buttercream will melt instead of holding its shape. How to Make Rich Chocolate Buttercream Frosting This creamy chocolate buttercream is smooth, fluffy, and the perfect finishing touch for homemade double chocolate cupcakes. Step 1: Beat the Butter Place the softened unsalted butter in a large mixing bowl and beat it for 2–3 minutes until it becomes light, pale, and fluffy. Properly whipped butter creates a silky frosting with plenty of volume. Step 2: Add the Cocoa and Sugar Mix in the sifted cocoa powder and half of the powdered sugar on low speed until combined. Once incorporated, increase the speed and beat until smooth and creamy. Sifting prevents lumps and creates a velvety buttercream. Step 3: Finish the Frosting Add the remaining powdered sugar, alternating with the whipping cream or milk until the frosting reaches your desired consistency. Stir in the vanilla extract and salt, then beat for another 2 minutes until light, fluffy, and easy to pipe. Step 4: Decorate the Cupcakes Transfer the chocolate buttercream to a piping bag fitted with your favorite decorating tip, or simply spread it over each cooled cupcake with an offset spatula. Garnish with chocolate curls, mini chocolate chips, chocolate sprinkles, or a dusting of cocoa powder for a beautiful bakery-style finish. Expert Tips for the Best Ultimate Double Chocolate Cupcakes Use Hot Brewed Coffee Hot brewed coffee intensifies the cocoa flavor without making the cupcakes taste like coffee. It simply enhances the richness of the chocolate, giving your homemade cupcakes a deeper, more decadent flavor. Use Room-Temperature Ingredients Bring the egg and buttermilk to room temperature before mixing. Room-temperature ingredients combine more easily, creating a smooth batter that bakes into soft, fluffy cupcakes with an even texture. Don’t Overmix the Batter Once the dry ingredients are added, mix only until everything is combined. Overmixing develops too much gluten, which can make the cupcakes dense and chewy instead of light and tender. Measure the Flour Correctly Always spoon the flour into the measuring cup and level it with a knife instead of scooping directly from the bag. Accurate measuring helps prevent dry, heavy cupcakes and ensures a moist, delicate crumb. Bake Just Until Done Start checking the cupcakes after 16 minutes. A toothpick inserted into the center should come out
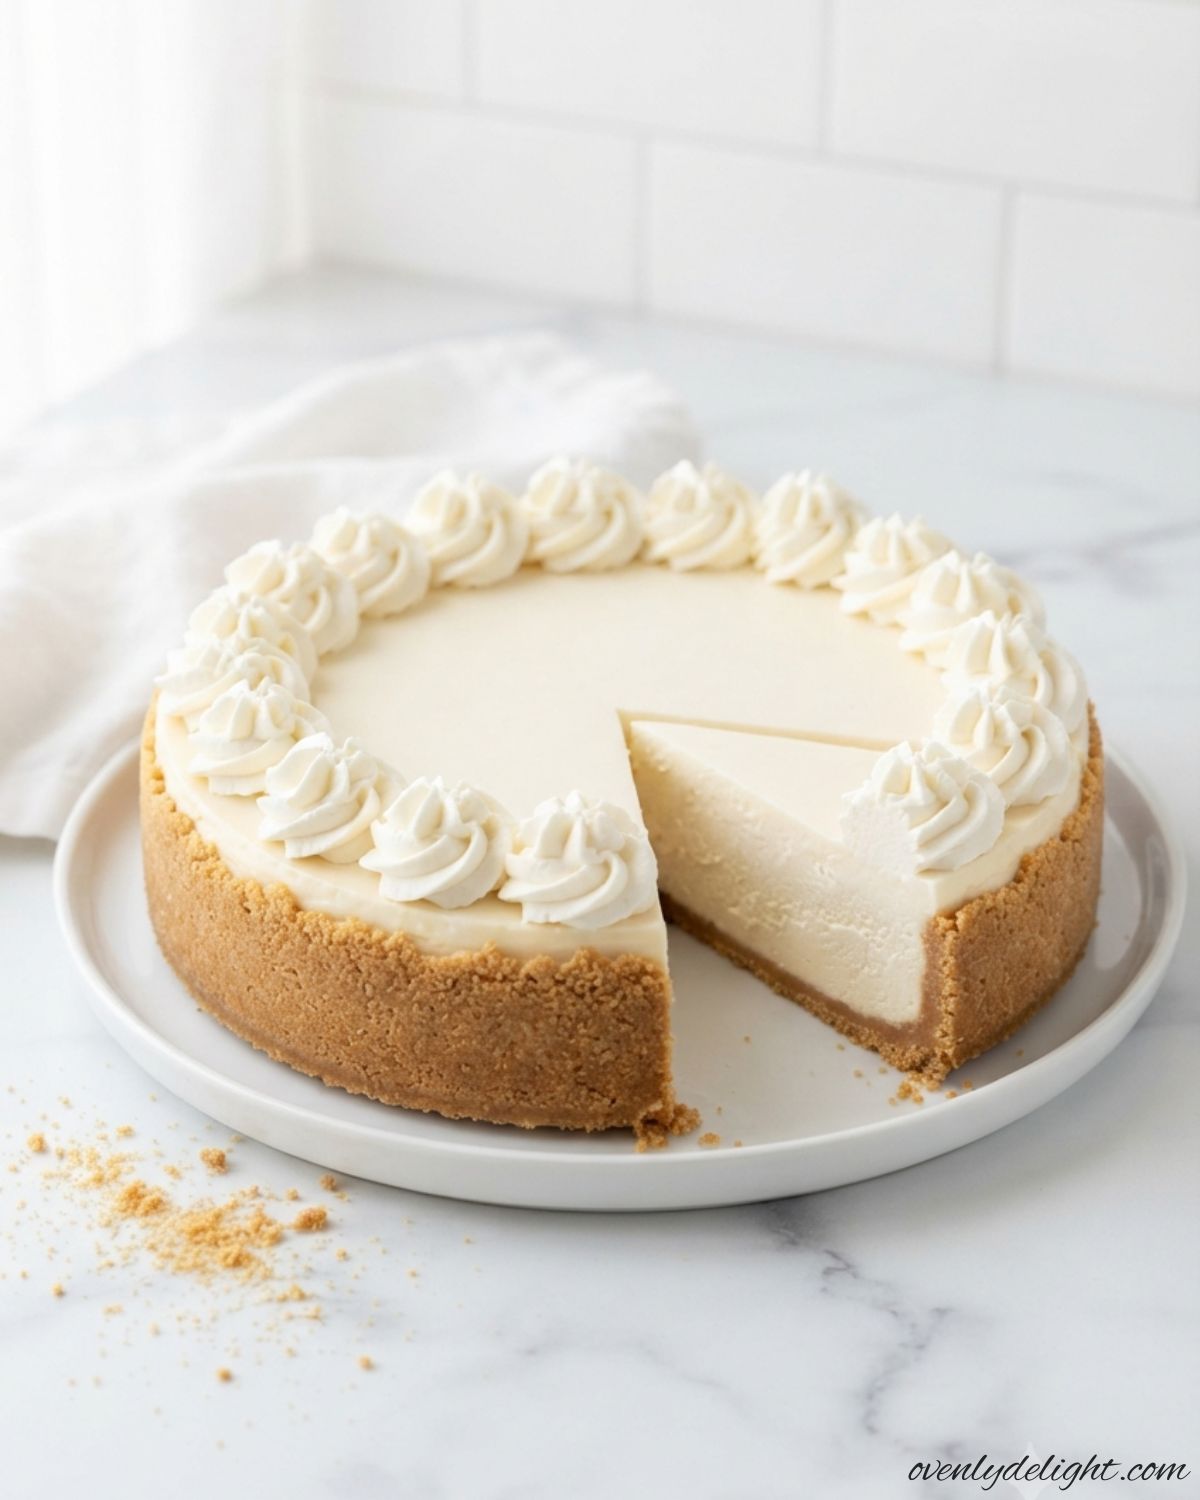
Easy No-Bake Cheesecake Recipe (Creamy Graham Crust, No Gelatin)
I love making this Easy No-Bake Cheesecake whenever I want a simple dessert that feels special without spending hours in the kitchen. With a buttery crust and a creamy, smooth filling, this chilled treat is perfect for family gatherings, holidays, or whenever you’re craving a delicious homemade cheesecake without turning on the oven. Why You’ll Love This Easy No-Bake Cheesecake Recipe Simple and No Oven Needed:This no-bake dessert comes together easily without using an oven, making it perfect for warm days or when you want a quick and hassle-free sweet treat. Creamy Texture and Classic Flavor:The rich filling creates a smooth, melt-in-your-mouth experience with the traditional cheesecake taste everyone loves. Perfect for Any Occasion:Whether you’re preparing a holiday dessert, a family gathering treat, or a weekend sweet craving, this chilled cheesecake is always a crowd-pleaser. Easy to Make Ahead:You can prepare this cheesecake in advance and let it chill until perfectly set, making it a convenient choice for entertaining guests. Ingredients You’ll Need for This Easy No-Bake Cheesecake For the Graham Cracker Crust For the Cheesecake Filling For Serving (Optional) How to Make This Easy No-Bake Cheesecake (Step by Step) Prepare the Graham Cracker Crust Make the Creamy Cheesecake Filling Add Toppings and Serve Tips for Creating the Perfect No-Bake Cheesecake Choose the Right Cream Cheese for a Firm Filling Always use full-fat, brick-style cream cheese instead of spreadable tub varieties. Brick cream cheese has a thicker consistency and less moisture, which helps the cheesecake hold its shape after chilling. Allow it to soften properly before mixing so the filling becomes smooth and free of lumps. Whip the Cream Until It Holds Its Shape Cold heavy cream is essential for creating a light and fluffy cheesecake filling. Whip it until stiff peaks form, meaning the cream should stand up when the beaters are lifted. Under-whipped cream can make the dessert too soft, while properly whipped cream helps maintain the structure. Fold the Mixture Gently for a Fluffy Texture When combining the whipped cream with the cheesecake base, use a gentle folding motion instead of vigorous stirring. This keeps the air in the whipped cream, creating a smooth and creamy texture that feels light with every bite. Make a Strong and Buttery Crust Press the graham cracker crust firmly into the pan using the bottom of a measuring cup or glass. A tightly packed base prevents the crust from breaking apart when sliced and provides a sturdy foundation for the creamy filling. Give the Cheesecake Enough Time to Chill Patience is important when making a chilled cheesecake. Let it refrigerate for at least 6 hours, although leaving it overnight gives the filling more time to set perfectly. This results in cleaner slices and a richer texture. Add Fresh Ingredients for Better Flavor Use fresh lemon juice instead of bottled juice for a brighter, cleaner taste. Chilling your bowl and beaters before whipping the cream can also improve the texture, especially when working in a warm kitchen. These small details make a noticeable difference in the final dessert. Easy No-Bake Cheesecake Ingredient Substitutions Swap Graham Cracker Crumbs with Digestive Biscuits Instead of graham cracker crumbs, you can use crushed digestive biscuits for the crust. They create a similar buttery base with a slightly less sweet flavor. If you use this alternative, you can reduce or skip the added sugar in the crust mixture. Use Greek Yogurt Instead of Sour Cream Plain full-fat Greek yogurt is a great substitute for sour cream in this recipe. It keeps the filling creamy while adding a slightly tangy flavor that balances the sweetness of the cheesecake. Try Dairy-Free Alternatives For a dairy-free version, replace traditional cream cheese with a full-fat dairy-free cream cheese alternative and use coconut whipping cream instead of regular heavy cream. The texture may be a little softer, but the dessert will still have a rich and creamy taste. Replace Heavy Whipping Cream When Needed If heavy whipping cream is unavailable, use about 2 cups of thawed whipped topping as an alternative. Fold it directly into the cream cheese mixture to create a smooth and fluffy filling without whipping it separately. Choose Quality Ingredients for Better Results Using reliable ingredients can make a difference in the final texture and flavor. Brands like Philadelphia cream cheese and Nabisco graham crackers are popular choices and are commonly available in many grocery stores. How to Store No-Bake Cheesecake Properly Keep This Chilled Dessert Fresh in the Refrigerator Store your No-Bake Cheesecake in an airtight container or cover it tightly with plastic wrap before placing it in the fridge. It will stay fresh for up to 3 days while maintaining its creamy filling and buttery crust. The base may soften slightly after a couple of days, but the flavor and texture will still remain enjoyable. Freeze the Creamy Cheesecake for Longer Storage For longer storage, wrap the homemade chilled cheesecake tightly with plastic wrap and then add a layer of foil to protect it from freezer moisture. You can freeze the whole dessert or individual slices for up to 1 month. When ready to enjoy, thaw it overnight in the refrigerator so the filling returns to a smooth and creamy consistency. Serve Cold for the Best Texture This easy no-bake dessert is meant to be served chilled, so avoid warming it in the microwave. Keeping it refrigerated helps preserve the rich cheesecake filling, firm crust, and refreshing taste. Remove it from the fridge just before serving for the best experience. Transport It Carefully for Special Occasions If you are taking this creamy cheesecake recipe to a gathering, keep it inside the springform pan until you reach your destination. The pan helps maintain the shape and keeps the edges neat. Remove the ring before serving to create clean, attractive slices. Store Leftovers Correctly Place any remaining slices in a covered container and return them to the refrigerator as soon as possible. Proper storage helps maintain the dessert’s smooth texture and fresh flavor for the next few days.
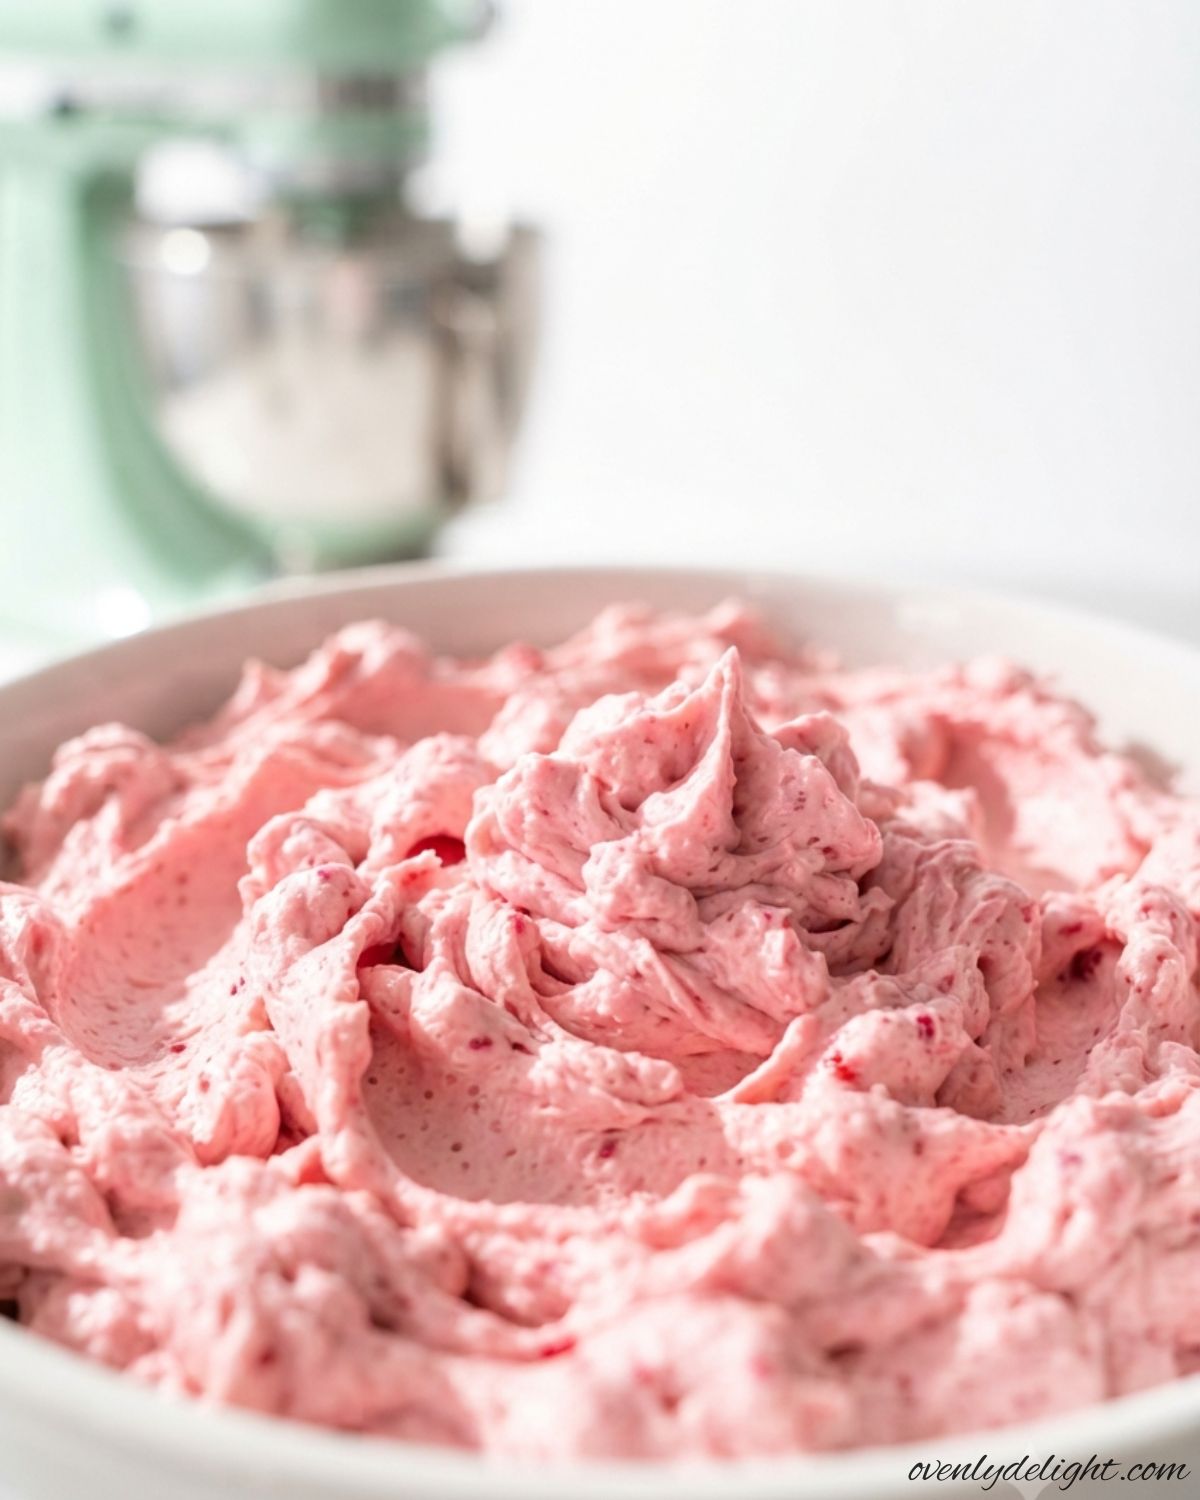
Raspberry Buttercream Frosting – Easy & Fluffy (Fresh or Frozen)
I love making this Raspberry Buttercream Frosting whenever I want to add a fresh, fruity touch to my favorite desserts. The combination of sweet raspberries and rich butter creates a perfectly balanced frosting that feels both homemade and special. Why You’ll Love This Raspberry Buttercream Frosting 1. Fresh Raspberry FlavorThis frosting brings a delicious fruity twist to classic buttercream. The sweet and slightly tangy raspberry taste adds a refreshing flavor that pairs beautifully with vanilla cakes, chocolate desserts, sugar cookies, and cupcakes. 2. Smooth and Creamy TextureYou’ll love the soft, fluffy consistency of this homemade frosting. It spreads easily over cakes and pipes beautifully onto cupcakes, creating a bakery-style finish without any complicated techniques. 3. Simple IngredientsThis easy raspberry frosting recipe uses basic pantry staples along with raspberry flavor to create a rich and flavorful topping. You don’t need any special equipment or hard-to-find ingredients to make it at home. 4. Perfect for Any DessertWhether you’re decorating birthday cakes, holiday treats, cupcakes, cookies, or layered desserts, this creamy buttercream adds a beautiful finishing touch and makes every sweet treat more inviting. 5. Easy to CustomizeYou can adjust the flavor and texture according to your preference. Add more raspberry flavor for a stronger fruity taste, or modify the consistency to create the perfect frosting for spreading or piping. 6. Beautiful Homemade FinishThe pretty color and smooth appearance make this frosting look impressive on any dessert table. It’s an easy way to transform simple baked goods into something that feels special and celebration-worthy. Ingredients for Homemade Raspberry Frosting How to Make Creamy Raspberry Buttercream Frosting (Step by Step) 1. Make the Raspberry Puree Blend the raspberries until smooth, then strain the mixture through a fine-mesh sieve to remove the seeds. This creates a silky texture and prevents the frosting from feeling gritty. 2. Reduce the Raspberry Puree Cook the raspberry puree over medium-low heat for 5–7 minutes, stirring occasionally, until thickened and reduced by half. Let it cool completely before adding it to the frosting 3. Beat the Butter Whip the softened butter on medium-high speed for 3–4 minutes until it becomes light, pale, and fluffy. This step helps create a soft and airy frosting texture. 4. Add Powdered Sugar Gradually Slowly mix in the powdered sugar, adding one cup at a time while beating well after each addition. Scrape the bowl as needed to ensure everything blends evenly. 5. Mix in Raspberry Puree and Salt Add the cooled raspberry puree and salt, then beat until fully combined and fluffy. The frosting will develop a beautiful natural pink color and fresh berry flavor. 6. Adjust the Frosting Consistency If the frosting is too thick, add heavy cream one teaspoon at a time until smooth. If it feels too soft, mix in a little more powdered sugar to reach the desired texture. 7. Frost and Serve Spread or pipe the raspberry buttercream onto completely cooled cakes or cupcakes. Use right away or refrigerate and bring it back to room temperature before decorating. Expert Tips for Perfect Raspberry Buttercream Frosting 1. Always Reduce the Raspberry PureeThe secret to a smooth Raspberry Buttercream Frosting is reducing the raspberry puree before adding it to the mixture. Simmering the berries for 5–7 minutes removes excess moisture and creates a concentrated flavor. Skipping this step can make the frosting too soft and difficult to pipe. 2. Strain the Puree for a Smooth TextureAlways pass the raspberry puree through a fine-mesh sieve to remove seeds and create a silky consistency. This extra step helps give your frosting a professional bakery-style texture that spreads beautifully on cakes and cupcakes. 3. Use Properly Softened ButterRoom-temperature butter is essential for fluffy buttercream. It should feel soft when pressed but should not look greasy or melted. Butter that is too warm can affect the structure and make the frosting loose. 4. Whip the Butter Until Light and FluffyTake a few extra minutes to beat the butter before adding other ingredients. This helps incorporate air, creating a lighter texture and making the final frosting easier to spread or pipe. 5. Adjust the Consistency Before DecoratingIf the frosting feels too soft, chill it for 10–15 minutes before using. For a thicker texture, add a little more powdered sugar, or mix in a small amount of heavy cream if it feels too stiff. 6. Balance the Raspberry FlavorRaspberries can vary in sweetness, so taste your puree before combining it with the other ingredients. If the berries are more tart, slightly adjust the sweetness to create a perfectly balanced flavor. 7. Enhance the Color and Taste NaturallyFor a stronger berry flavor, add a small amount of freeze-dried raspberry powder. It boosts the natural color and intensifies the fruity taste without making the frosting runny. 8. Prepare Ingredients Ahead of TimeMaking the raspberry puree in advance can save preparation time. Chilled puree blends smoothly and helps your homemade Raspberry Buttercream Frosting stay firm and easy to decorate with. Ingredient Substitutions for Raspberry Buttercream Frosting Fresh vs. Frozen RaspberriesYou can use frozen raspberries instead of fresh ones when making Raspberry Buttercream Frosting. Simply thaw the berries completely and drain any extra liquid before preparing the puree. Once reduced, the texture and flavor will be just as delicious as using fresh fruit. Dairy-Free Butter OptionsFor a dairy-free version, replace regular butter with a plant-based butter alternative and use coconut cream instead of heavy whipping cream. The consistency may be slightly softer, but it will still work well for spreading or piping onto desserts. Try Other BerriesIf you want to experiment with different flavors, strawberries or blackberries can be used instead of raspberries. The same preparation method works, but blackberries may need extra straining because they contain more seeds. Alternative Powdered Sugar ChoicesFor a less processed option, choose an organic powdered sugar brand. It works similarly in the recipe and helps maintain the smooth, creamy texture that makes this Raspberry Buttercream Frosting perfect for cakes, cupcakes, and cookies. Storage Tips for Creamy Raspberry Frosting Room Temperature StorageFrosted cupcakes can stay
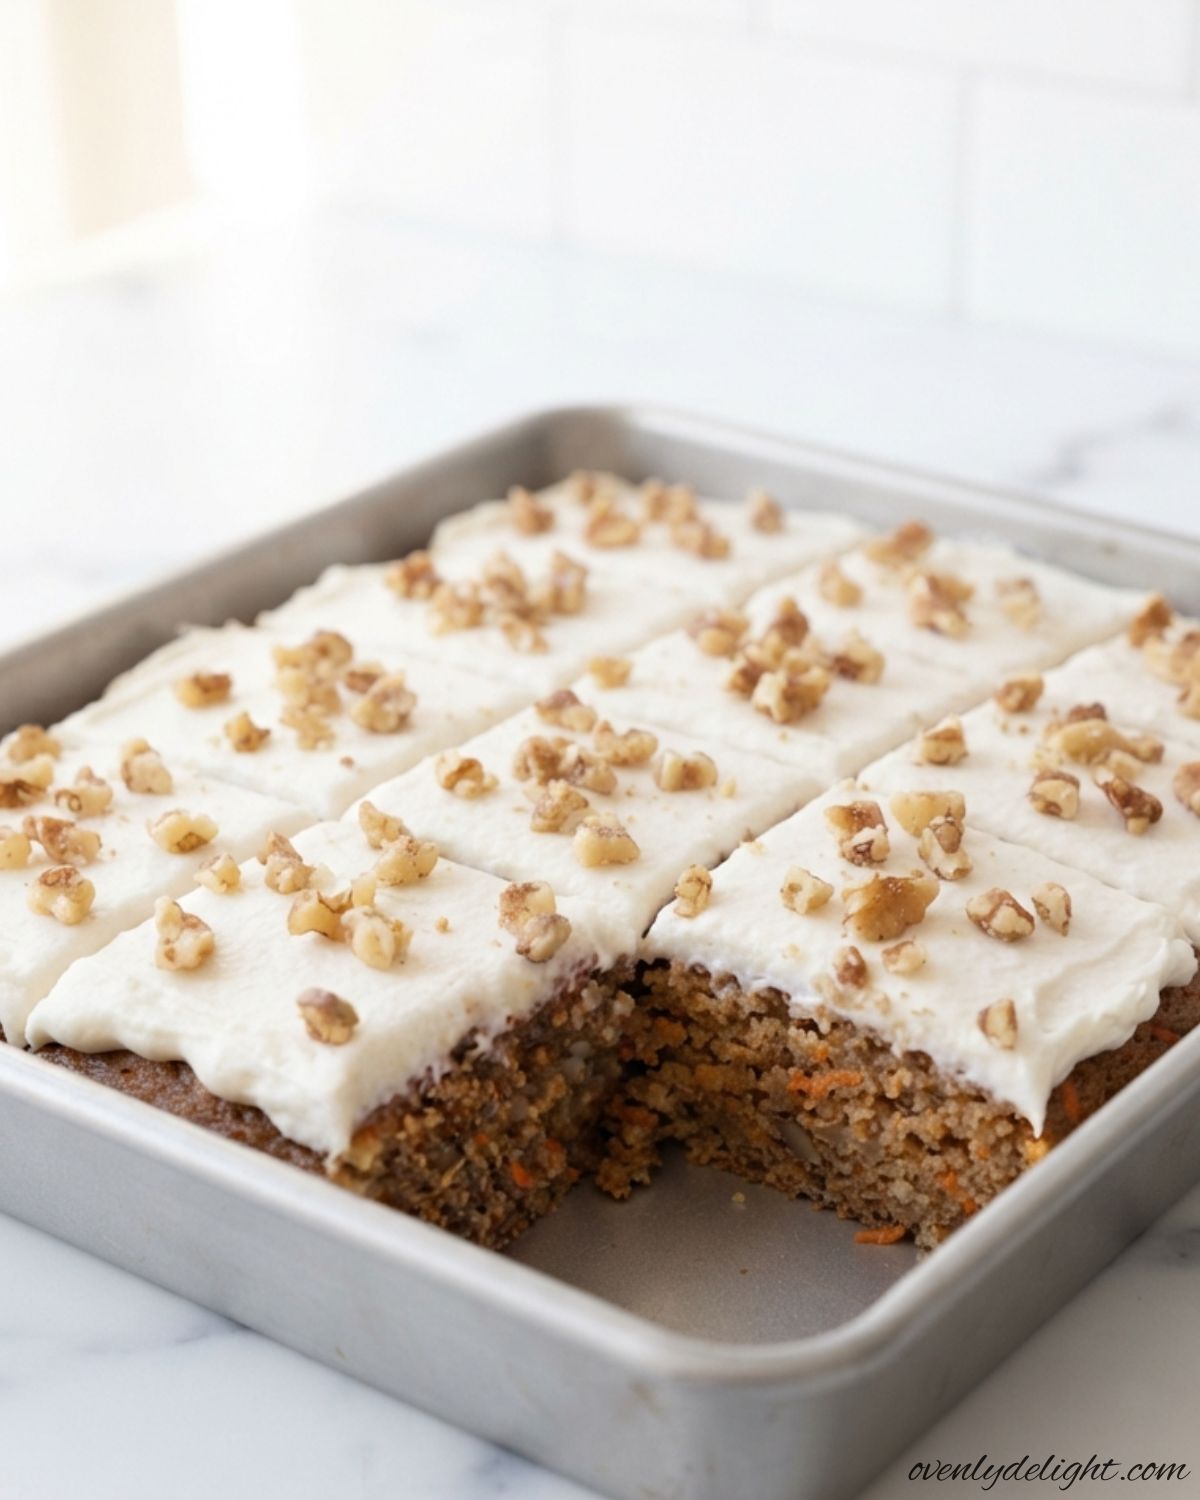
Moist Carrot Cake Recipe (With Cream Cheese Frosting)
I’ve always believed that the best desserts are the ones that bring people together, and this Moist Carrot Cake does exactly that. I first baked it for a family gathering when I wanted something classic instead of a rich chocolate cake. The warm spices, freshly grated carrots, and smooth cream cheese frosting were an instant hit, and everyone came back for another slice. Since then, it has become one of my favorite recipes whenever I want a homemade cake that never disappoints. What I love most about this Carrot Cake is how soft and flavorful it stays without being complicated to make. The simple ingredients create a perfectly tender crumb, while the creamy frosting adds just the right finishing touch. Whether you’re celebrating a special occasion or baking just because you’re craving something sweet, this recipe delivers a delicious result every time. Why You’ll Love This Moist Carrot Cake Ingredients You’ll Need For the Cake For the Cream Cheese Frosting How to Make Carrot Cake (Step-by-Step) 1. Prepare the Pan and Oven Preheat your oven to 350°F (175°C) and position the oven rack in the center. Lightly grease a 9×13-inch baking pan, then line the bottom with parchment paper. The parchment makes it much easier to lift the cake out or serve neat slices after baking. 2. Combine the Dry Ingredients In a medium bowl, whisk together the all-purpose flour, baking soda, cinnamon, ground ginger, nutmeg, cloves, and salt until the spices are evenly distributed. Whisking the dry ingredients first helps prevent pockets of baking soda or spices in the finished cake. 3. Mix the Wet Ingredients In a large mixing bowl, whisk together the vegetable oil and packed brown sugar until smooth and well blended. Add the eggs, one at a time, whisking well after each addition so they fully incorporate into the mixture. Stir in the vanilla extract until everything is smooth and fragrant. 4. Add the Buttermilk Pour in the buttermilk and whisk until completely combined. The batter will look thinner than a typical cake batter, but that’s exactly what you want. The buttermilk adds moisture while helping create a soft, tender crumb. 5. Fold Everything Together Gradually add the dry ingredients to the wet ingredients. Using a rubber spatula, gently fold the mixture together just until you no longer see streaks of flour. Resist the urge to keep mixing, as overworking the batter can develop too much gluten and make the cake heavier instead of light and tender. 6. Stir in the Remaining Ingredients Fold in the freshly shredded carrots, followed by the raisins, chopped walnuts or pecans, and well-drained crushed pineapple, if using. Mix gently until everything is evenly distributed throughout the batter without overmixing. 7. Bake Until Perfectly Done Pour the batter into the prepared baking pan and smooth the top with a spatula so it bakes evenly. Bake for 33–38 minutes, or until the top is lightly golden and a toothpick inserted into the center comes out clean or with a few moist crumbs attached. Avoid opening the oven door too early, as this can cause the cake to sink. 8. Cool Completely Transfer the pan to a wire cooling rack and let the cake cool for about 45 minutes, or until completely cool. Spreading frosting over a warm cake will cause it to melt and slide off, so be patient before decorating. 9. Prepare the Cream Cheese Frosting In a large bowl, beat the softened butter and brick-style cream cheese together for about 2 minutes until smooth and creamy. Add the fresh lemon juice and salt, then mix again until fully combined. Scrape down the sides of the bowl as needed to keep the frosting silky smooth. 10. Frost and Decorate Gradually add the sifted powdered sugar, one cup at a time, beating on low speed until the frosting becomes thick, light, and fluffy. Spread it evenly over the cooled cake using an offset spatula or the back of a spoon. Finish with a sprinkle of chopped walnuts for extra crunch and an attractive bakery-style finish before slicing and serving. Expert Tips for the Best Results These simple tips will help you achieve a soft, flavorful cake with a perfectly smooth frosting every time. Ingredient Substitutions Need to make a few changes? These simple swaps work well while still helping you create a delicious Moist Carrot Cake. Keep in mind that substitutions may slightly change the texture or flavor. Storage Tips More Cake Recipes to Try Frequently Asked Questions Final Thoughts If you’re looking for a dessert that’s simple to make yet always impressive, this Carrot Cake is a recipe worth keeping. With its tender crumb, warm spices, and rich cream cheese frosting, it’s the kind of homemade treat that’s perfect for everything from family dinners to holiday celebrations. I hope you enjoy baking this Soft Carrot Cake as much as I do. If you give it a try, I’d love to hear how it turned out! Leave a comment below, share your favorite add-ins or decorating ideas, and don’t forget to rate the recipe. Happy baking!
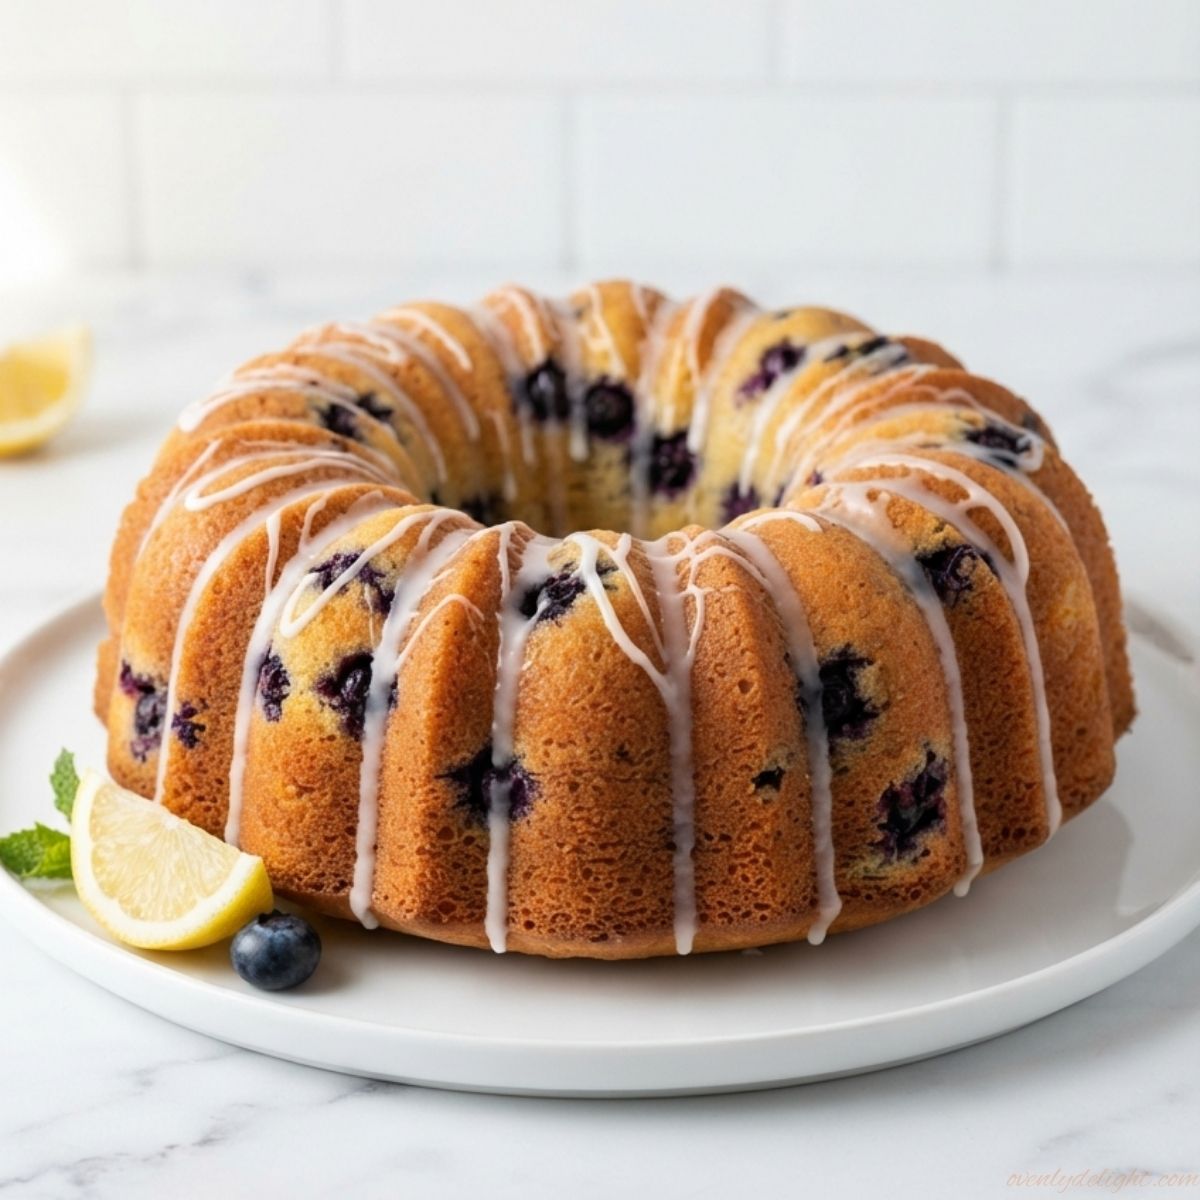
Lemon Blueberry Bundt Cake (Moist & Easy)
My mother-in-law once asked which bakery this Lemon Blueberry Bundt Cake came from, and she couldn’t believe I had made it at home. With no fancy decorating or complicated steps, this cake looks impressive while being incredibly easy to prepare. Fresh lemon zest, juicy blueberries, and a simple lemon glaze create a moist, flavorful dessert that’s perfect for brunch, family gatherings, or any sweet occasion. Why You’ll Love This Lemon Blueberry Bundt Cake Ingredients You’ll Need Dry Ingredients Wet Ingredients Blueberry Mix-In Lemon Glaze How to Make Lemon Blueberry Bundt Cake Prepare the Pan and Oven Preheat your oven to 350°F (175°C). Grease a 10-cup bundt pan thoroughly with softened butter, making sure to cover all the grooves. Lightly dust with flour, then tap out any excess. Combine the Dry Ingredients In a medium bowl, whisk together the flour, baking powder, baking soda, and salt. Set the mixture aside while you prepare the batter. Cream the Butter, Sugar, and Lemon Zest In a large mixing bowl, beat the butter, sugar, and lemon zest together until light and fluffy, about 3 minutes. Mixing the zest with the sugar helps release the natural oils and creates a stronger citrus flavor. Add the Wet Ingredients Mix in the vegetable oil and vanilla extract, then add the eggs one at a time. Beat well after each addition until the mixture is smooth and fully combined. Combine the Batter Reduce the mixer speed to low and add the dry ingredients in three additions, alternating with the sour cream, milk, and lemon juice. Begin and end with the flour mixture, mixing only until everything is combined. Avoid overmixing to keep the texture soft. Add the Blueberries Toss the blueberries with 1 tablespoon of flour, then gently fold them into the batter using a spatula. This simple step helps keep the berries evenly spread throughout the cake instead of sinking to the bottom. Bake Until Golden Pour the batter into the prepared pan and smooth the top. Bake on the center rack for 55–65 minutes, or until a toothpick inserted in the center comes out clean. Cool and Remove from the Pan Allow the cake to cool in the pan for about 15 minutes, then carefully invert it onto a wire rack. Let it cool completely for around 1 hour before adding the glaze. Add the Lemon Glaze Whisk the powdered sugar and lemon juice together until smooth and pourable. Drizzle the glaze over the cooled cake and let it naturally flow down the beautiful bundt grooves before serving. Expert Tips for the Best Results Ingredient Substitutions Gluten-Free Flour Replace all-purpose flour with a 1:1 gluten-free baking blend for a gluten-free version. The texture will remain close to the original, although the cake may have a slightly denser crumb. Avoid using single gluten-free flours, as they can affect the moisture and structure. Dairy-Free Butter Use a plant-based butter stick instead of regular butter to make the cake dairy-free. Choose a baking-friendly option for the best flavor and texture. Since some dairy-free butters are softer, you may need a small adjustment to the oil amount. Sour Cream Plain Greek yogurt can replace sour cream in an equal amount. It provides a similar creamy texture and slight tang while keeping the cake moist and tender. Fresh or Frozen Blueberries Fresh blueberries can be swapped with frozen berries without thawing them first. Coat frozen blueberries with a little flour before adding them to the batter to help prevent color bleeding and keep them evenly spread. Dairy-Free Milk Use oat milk, almond milk, soy milk, or another dairy-free milk as a substitute for regular milk. Unsweetened varieties work best and help maintain the cake’s soft texture. Lemon Juice Fresh lemon juice gives the brightest citrus flavor, but bottled lemon juice can be used if fresh lemons are unavailable. For the best taste and aroma, freshly squeezed juice is always recommended. How to Store This Cake Proper storage helps maintain the cake’s soft texture, fresh lemon flavor, and moist crumb. Whether you’re saving leftovers or making it ahead, these simple methods will keep it tasting delicious. At Room Temperature Store the glazed cake under a cake dome or cover it loosely with foil for up to 3 days. Keep it in a cool, dry place, as the glaze may become slightly sticky in warm or humid conditions. In the Refrigerator For longer storage, place the cake in an airtight container and refrigerate for up to 1 week. The crumb stays moist thanks to ingredients like sour cream and oil. Let the slices come to room temperature before serving for the best texture and flavor. In the Freezer To freeze, wrap the unglazed cake tightly in plastic wrap and place it in a freezer-safe container for up to 3 months. When ready to enjoy, thaw it overnight at room temperature and add the lemon glaze just before serving for a fresh finish. More Homemade Desserts to Try Frequently Asked Questions Final Thoughts This Lemon Blueberry Bundt Cake is the perfect example of how simple ingredients can create a truly special dessert. With its soft, moist crumb, fresh lemon flavor, juicy blueberries, and sweet glaze, it looks impressive while being surprisingly easy to make. Whether you’re baking for a family gathering, weekend brunch, a celebration, or simply craving a homemade treat, this cake is sure to become a favorite. It’s a recipe you’ll want to come back to again and again because every slice feels fresh, comforting, and made with love.
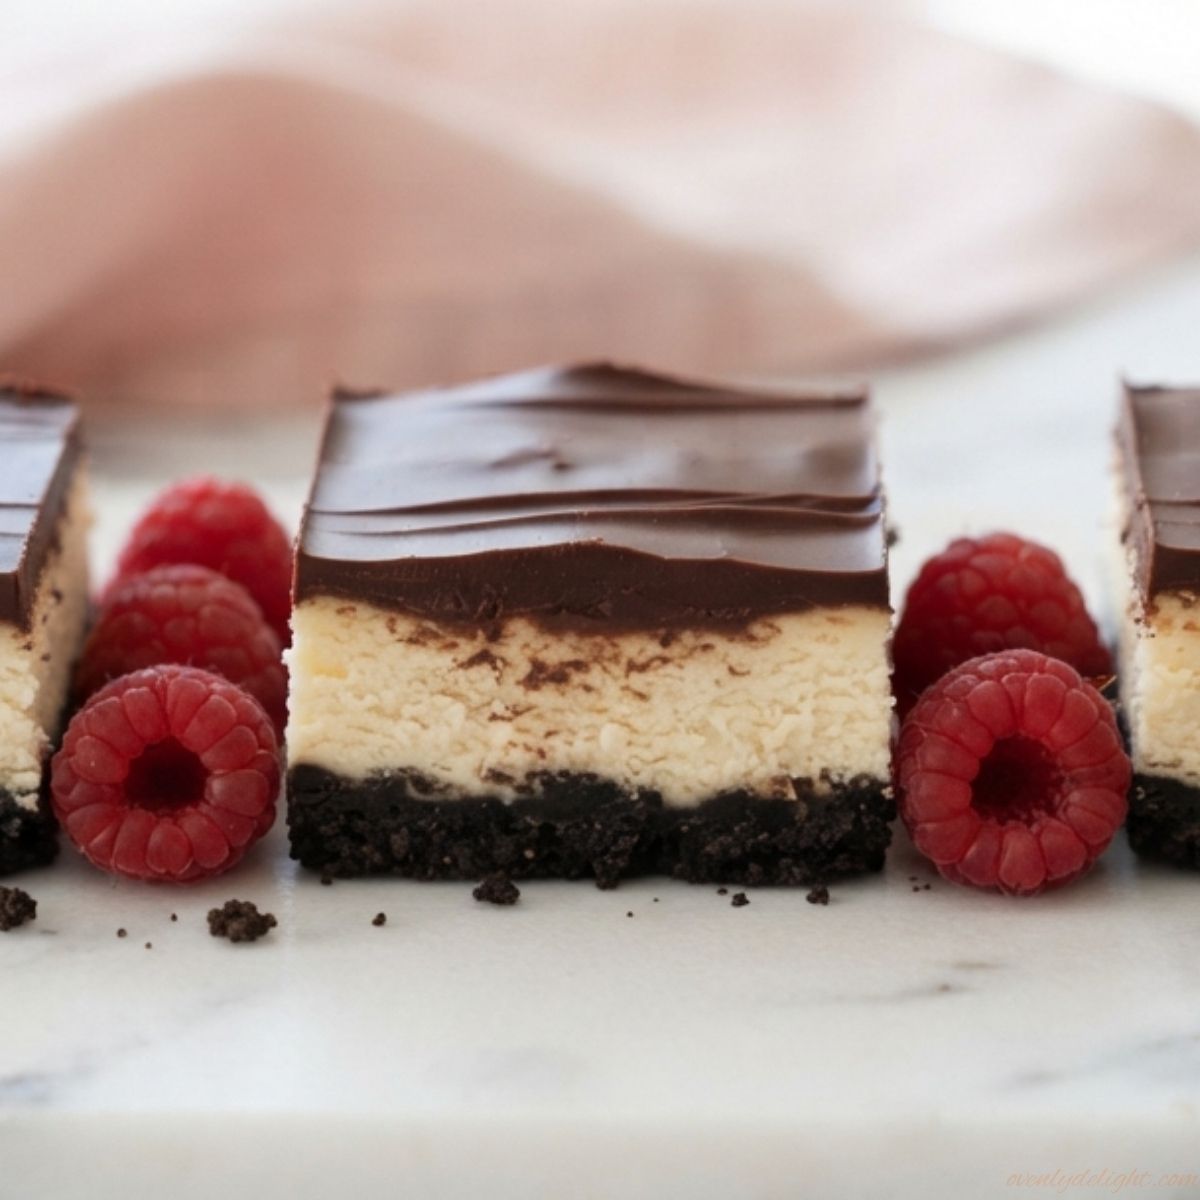
White Chocolate Cheesecake Bars (Oreo Crust & Ganache)
Some desserts never go out of style, and these White Chocolate Cheesecake Bars are one of them. With a buttery Oreo crust, a smooth white chocolate cheesecake filling, and a rich chocolate ganache topping, they’re the perfect combination of creamy, crunchy, and chocolatey. They look elegant but are surprisingly easy to make, making them a great dessert for both beginners and experienced bakers. I love making this recipe whenever I want something that feels a little extra special without spending hours in the kitchen. The bars slice beautifully, can be made ahead of time, and are always one of the first desserts to disappear at gatherings. Whether you’re serving them for the holidays, a birthday, or simply treating yourself, these White Chocolate Cheesecake Bars are sure to become a favorite. Why You’ll Love These White Chocolate Cheesecake Bars Creamy and Rich The white chocolate cheesecake filling is incredibly smooth, creamy, and full of rich flavor. Every bite melts in your mouth, giving these bars a luxurious texture that’s perfectly balanced with just the right amount of sweetness. Crunchy Oreo Crust A buttery Oreo cookie crust creates the perfect base for the creamy cheesecake filling. It adds a delicious chocolate crunch that complements the silky filling and makes every bite even more satisfying. Silky Chocolate Ganache A layer of smooth chocolate ganache finishes these cheesecake bars with a rich, glossy topping. It adds extra chocolate flavor while making the bars look elegant enough for holidays, birthdays, or special occasions. Easy to Make Ahead These cheesecake bars are even better after they’ve had time to chill, making them an excellent make-ahead dessert. Prepare them a day in advance, and they’ll be perfectly set and ready to slice when you need them. Perfect for Any Occasion Whether you’re serving them at a family gathering, holiday celebration, potluck, birthday party, or simply enjoying a weekend treat, these cheesecake bars are always a crowd favorite. Their rich flavor and beautiful layers make them suitable for both casual and special occasions. Easy to Slice and Serve Unlike a traditional cheesecake, these bars are simple to cut into neat, even squares with no special decorating required. They’re easy to transport, serve, and share, making them a convenient dessert for entertaining or gifting. What You’ll Need to Make These Cheesecake Bars Oreo Crust White Chocolate Cheesecake Filling Chocolate Ganache Topping How to Make These Cheesecake Bars Step 1: Prepare the Baking Pan Preheat your oven to 325°F (163°C). Line a 9×13-inch baking pan with parchment paper, leaving an overhang on two sides. This makes it much easier to lift the cheesecake out of the pan and cut clean, even bars after chilling. Step 2: Make the Oreo Crust Place the Oreo cookies, including the filling, into a food processor and pulse until they become fine crumbs. Add the melted butter and mix until all the crumbs are evenly coated and resemble wet sand. Step 3: Press the Crust Transfer the crumb mixture to the prepared pan and press it firmly into an even layer. Using the bottom of a measuring cup or glass helps create a compact crust that won’t crumble when the bars are sliced. Step 4: Bake the Crust Bake the crust for 10 minutes, then remove it from the oven and let it cool slightly while you prepare the cheesecake filling. Step 5: Melt the White Chocolate Heat the whipping cream until it’s hot and just beginning to steam, but don’t let it boil. Pour it over the chopped white chocolate and let it sit for about 2 minutes, then stir until completely smooth and silky. Step 6: Prepare the Cheesecake Filling In a large mixing bowl, beat the softened cream cheese until completely smooth and free of lumps, about 2 minutes. Add the granulated sugar and cornstarch, then mix until everything is well combined. Step 7: Finish the Batter Pour the melted white chocolate mixture into the cream cheese mixture and beat until smooth. Add the eggs one at a time, mixing on low speed just until each egg is incorporated. Avoid overmixing to help prevent cracks in the cheesecake. Step 8: Bake the Cheesecake Pour the filling over the cooled Oreo crust and spread it into an even layer. Bake for 35–40 minutes, or until the edges are set while the center still has a slight jiggle when gently shaken. Step 9: Cool and Chill Allow the cheesecake to cool completely at room temperature. Then refrigerate for at least 4 hours, or preferably overnight, so the filling becomes firm and easy to slice. Step 10: Make the Chocolate Ganache Heat the whipping cream until it’s steaming, then pour it over the chopped semi-sweet or dark chocolate. Let it sit for 2 minutes, then stir until the ganache is smooth and glossy. Pour it over the chilled cheesecake and spread it evenly with an offset spatula. Step 11: Chill, Slice, and Serve Return the cheesecake to the refrigerator for 15–20 minutes to allow the ganache to set. Lift it out of the pan using the parchment paper overhang, then slice into 15 bars using a warm, clean knife for neat, bakery-style slices. Expert Tips for Perfect Cheesecake Bars Use Room Temperature Ingredients For the smoothest cheesecake filling, let the cream cheese and eggs come to room temperature before you begin. Softened cream cheese blends easily, preventing lumps, while room-temperature eggs mix more evenly into the batter without overmixing. Don’t Overmix or Overbake Mix the eggs on low speed just until they’re incorporated, as too much air can cause the cheesecake to crack while baking. Bake only until the edges are set and the center still has a slight jiggle—it will continue to firm up as it cools. Chill Before Slicing Patience is key for perfectly clean slices. Let the cheesecake cool completely, then refrigerate it for at least 4 hours, or overnight for the best texture. A warm, clean knife wiped between each cut will give you smooth, bakery-style bars every time. Use
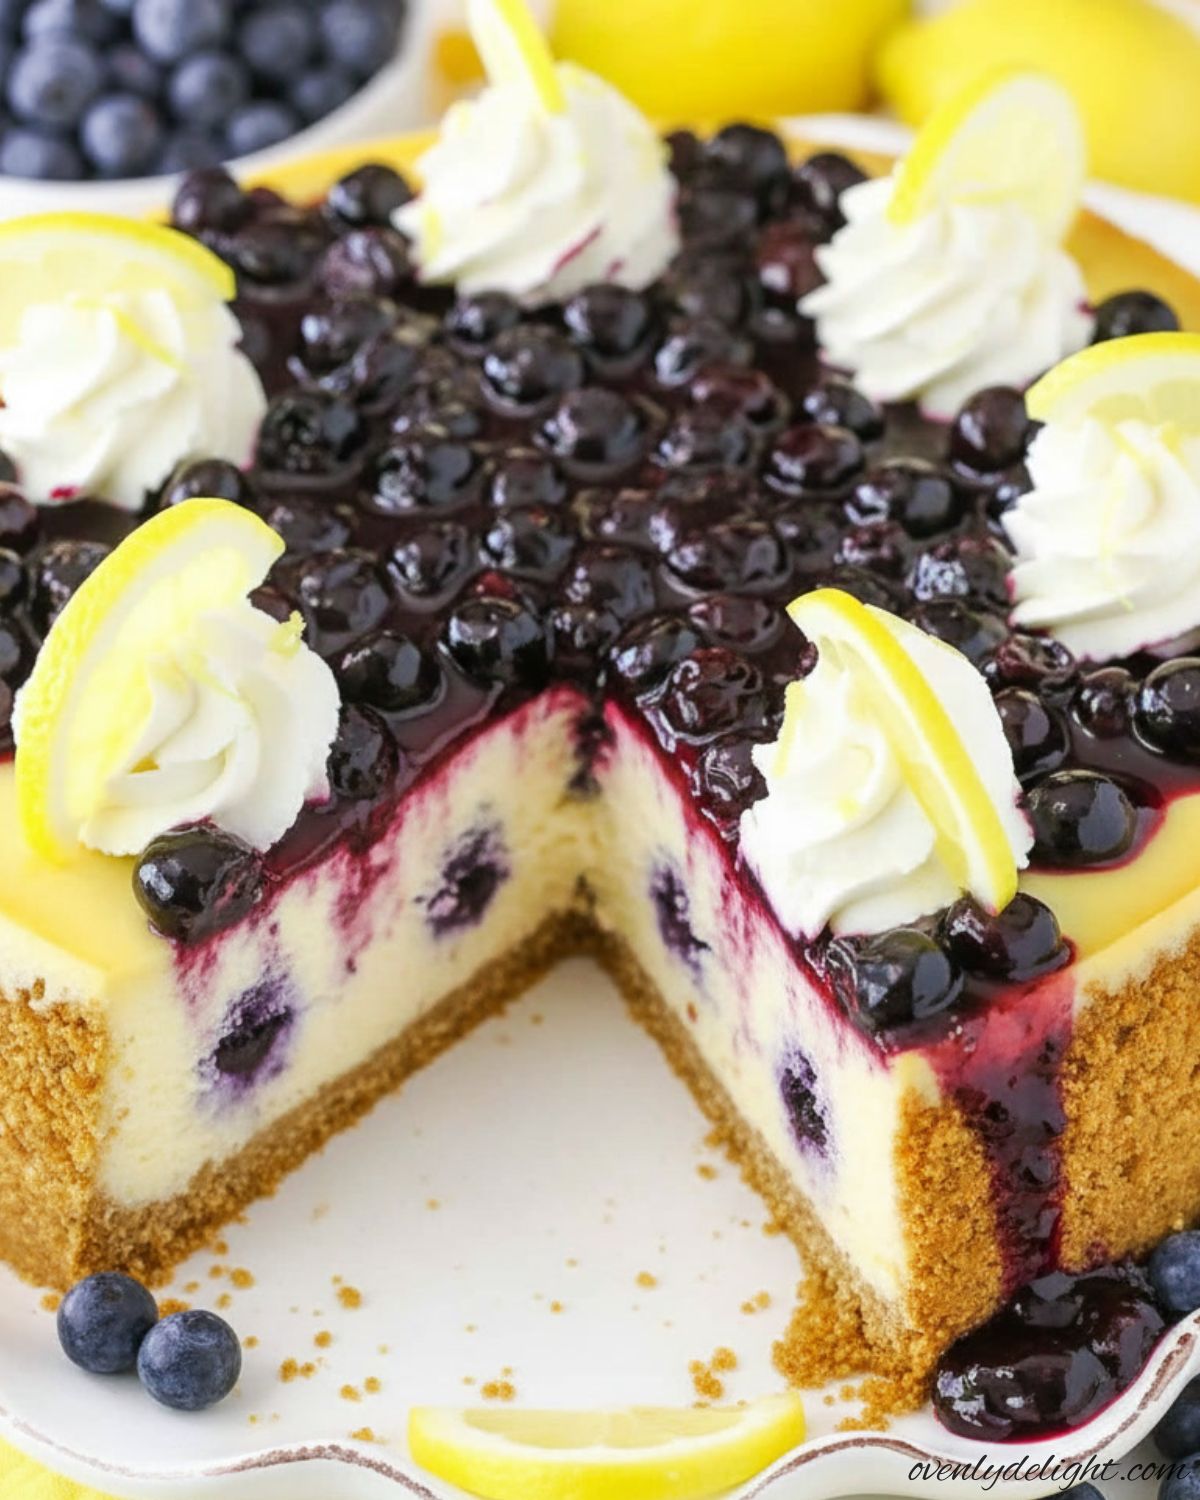
Best Lemon Blueberry Cheesecake Recipe
The first time I made this lemon blueberry cheesecake, I almost skipped the water bath because it felt like an extra step I didn’t need. That decision left me with a cheesecake that cracked right down the middle. It still tasted delicious, but I learned that a simple water bath is the secret to a smooth, creamy texture and a beautiful, crack-free top. Since then, I never leave it out, and the results have been perfect every time. Now this lemon blueberry cheesecake has become one of my favorite desserts to make for birthdays, summer gatherings, and special weekends at home. The creamy lemon cheesecake, buttery graham cracker crust, and sweet blueberry topping create a combination that’s fresh, rich, and impossible to resist. It’s the kind of dessert people go back for seconds of and if you’re lucky enough to have leftovers, they’re even better the next day. Why You’ll Love This Homemade Lemon Blueberry Cheesecake Ingredients for This Lemon Blueberry Cheesecake For the Crust For the Lemon Blueberry Cheesecake For the Blueberry Compote How to Make Lemon Blueberry Cheesecake Step 1: Prepare the Pan Preheat your oven to 325°F (163°C). Wrap the outside of a 9-inch springform pan with two layers of heavy-duty aluminum foil to keep water from seeping in during the water bath. This extra step helps ensure your cheesecake bakes evenly without leaks. Step 2: Make the Crust In a medium bowl, stir together the graham cracker crumbs, sugar, and melted butter until the mixture resembles wet sand. Press it firmly and evenly into the bottom of the prepared pan using the bottom of a measuring cup or glass to create a compact crust. Step 3: Bake the Crust Bake the crust for 10 minutes until lightly golden and fragrant. Remove it from the oven and let it cool slightly while you prepare the cheesecake filling. Step 4: Beat the Cream Cheese In a large mixing bowl, beat the softened cream cheese and sugar until completely smooth and creamy. Scrape down the sides and bottom of the bowl several times to make sure there are no lumps in the batter. Step 5: Add the Lemon Ingredients Mix in the lemon zest, fresh lemon juice, and sour cream until fully combined. The filling should be smooth, creamy, and have a bright, fresh lemon flavor. Step 6: Add the Eggs Add the eggs one at a time, mixing on low speed just until each egg is incorporated before adding the next. Avoid overmixing, as too much air in the batter can cause the cheesecake to crack while baking. Step 7: Fill the Pan Pour the cheesecake batter over the cooled crust and gently smooth the top with a spatula. Lightly tap the pan on the counter a few times to release any trapped air bubbles. Step 8: Prepare the Water Bath Place the springform pan inside a large roasting pan. Carefully pour boiling water into the roasting pan until it reaches about halfway up the sides of the springform pan. The steam from the water bath helps the Lemon Blueberry Cheesecake bake gently and develop a silky texture. Step 9: Bake the Lemon Blueberry Cheesecake Bake for 50 minutes, or until the edges are set while the center still has a slight jiggle. The cheesecake will continue to set as it cools, so avoid baking until the center is completely firm. Step 10: Cool the Cheesecake Slowly Turn off the oven and leave the door slightly open. Let the cheesecake rest in the warm oven for 1 hour. This gradual cooling process helps prevent sudden temperature changes that can lead to cracks. Step 11: Chill Until Firm Remove the cheesecake from the water bath and carefully peel away the foil. Run a thin knife around the edge of the pan to loosen it, then refrigerate for at least 6 hours, or preferably overnight, until fully set. Step 12: Make the Blueberry Compote In a small saucepan, combine the blueberries, sugar, lemon juice, and 2 tablespoons of water. Cook over medium heat for about 5 minutes, stirring occasionally, until the blueberries soften and begin to burst. Step 13: Thicken the Compote Whisk the cornstarch with the remaining 1 tablespoon of water until smooth. Stir it into the blueberry mixture and cook for 1–2 minutes, stirring constantly, until the compote thickens. Remove from the heat and let it cool completely. Step 14: Assemble and Serve Once the Lemon Blueberry Cheesecake is fully chilled, spoon the cooled blueberry compote evenly over the top. Slice with a sharp knife, wiping the blade clean between cuts for neat slices, and serve chilled. Expert Tips for a Crack-Free Blueberry Cheesecake Always Use a Water Bath A water bath is the key to a smooth, creamy Lemon Blueberry Cheesecake with a crack-free top. It creates gentle, even heat that helps the cheesecake bake perfectly. Bring Ingredients to Room Temperature Let the cream cheese and eggs sit at room temperature for about an hour before mixing. This helps the batter become silky smooth and prevents lumps. Wrap the Pan Well Wrap the springform pan with two layers of heavy-duty aluminum foil before placing it in the water bath. This keeps water from leaking into the crust and prevents a soggy bottom. Adjust the Lemon Flavor Start with 4 tablespoons of fresh lemon juice, then taste the batter before adding more. Since lemons vary in tartness, this helps you get the perfect balance of sweet and tangy. Don’t Overmix the Batter Mix the eggs on low speed and only until they’re incorporated. Overmixing adds air to the batter, which can cause the cheesecake to crack as it bakes. Cool the Cheesecake Gradually After baking, let the cheesecake cool slowly in the turned-off oven with the door slightly open. This prevents sudden temperature changes that can lead to cracks. Make the Blueberry Compote Ahead The blueberry compote can be prepared a day in advance and stored in the refrigerator. It saves time and gives the topping a
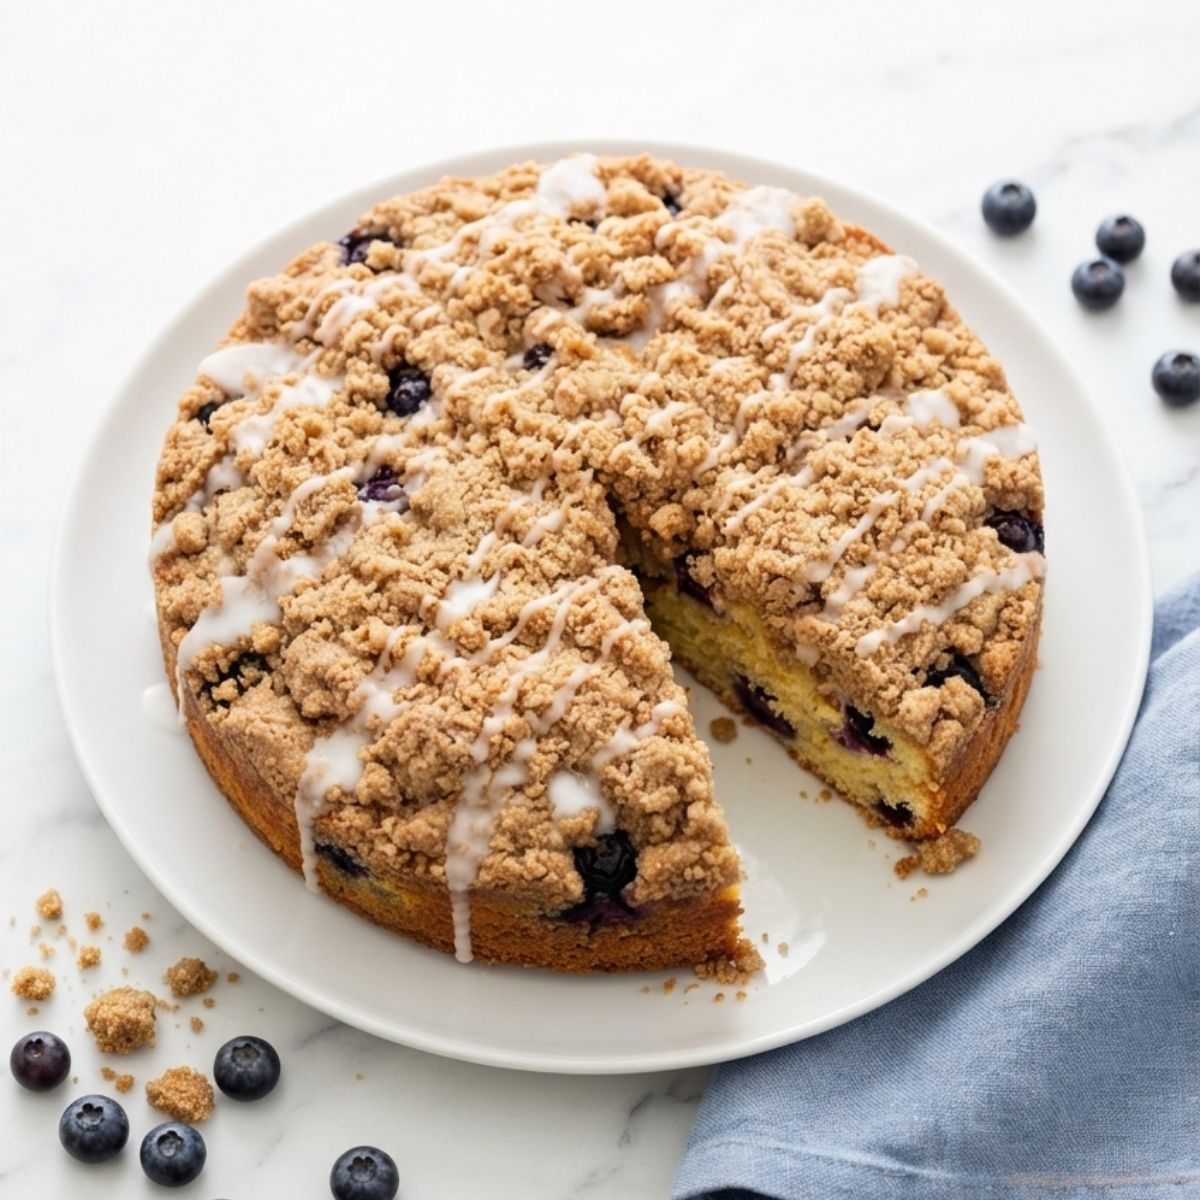
The Best Blueberry Coffee Cake with Crunchy Streusel & Vanilla Glaze
Blueberries and cinnamon are a classic combination, and this coffee cake brings them together in the best way. A soft, buttery cake is filled with juicy blueberries, topped with a crunchy cinnamon streusel, and finished with a simple vanilla glaze. It’s easy enough for a weekday breakfast but just as lovely for brunch, holidays, or sharing with family and friends. Serve it warm with a cup of coffee or tea, and you’ll have a cozy homemade treat everyone will love. Why You’ll Love This Blueberry Coffee Cake Ingredients for the Best Blueberry Coffee Cake with Streusel & Vanilla Glaze For the Cinnamon Streusel Topping For the Blueberry Coffee Cake For the Vanilla Glaze How to Make Blueberry Coffee Cake (Step-by-Step) Follow these simple steps to make a soft, buttery blueberry coffee cake with a crunchy cinnamon streusel and sweet vanilla glaze. Take your time with each step for the best bakery-style results. 1. Prepare the Pan and Preheat the Oven Preheat your oven to 350°F (175°C). Lightly grease a 9-inch square or round baking pan, or line it with parchment paper, leaving a little overhang to make lifting the cake out easier after baking. 2. Make the Cinnamon Streusel In a medium bowl, whisk together the flour, granulated sugar, brown sugar, and cinnamon. Pour in the melted butter and stir with a fork until the mixture forms buttery crumbles. Avoid overmixing the mixture should have small and large clumps for the best crunchy topping. Set aside. 3. Mix the Dry Ingredients In another bowl, whisk together the flour, baking powder, and salt until everything is evenly combined. This helps distribute the baking powder throughout the batter for an even rise. 4. Cream the Butter and Sugar Using a hand or stand mixer, beat the softened butter and granulated sugar together for 2–3 minutes, until the mixture becomes pale, light, and fluffy. This step creates air in the batter, giving the cake a soft and tender texture. 5. Add the Eggs and Vanilla Beat in the eggs one at a time, mixing well after each addition. Scrape down the sides of the bowl if needed, then mix in the vanilla extract until fully incorporated. 6. Add the Dry Ingredients and Sour Cream Mixture In a small bowl, stir together the sour cream and milk until smooth. Add the dry ingredients and sour cream mixture to the batter in three additions, alternating between them and beginning and ending with the dry ingredients. Mix only until no dry streaks remain, as overmixing can make the cake dense. 7. Fold in the Blueberries Toss the blueberries with the 2 teaspoons of flour until lightly coated. Gently fold them into the batter using a spatula, being careful not to crush the berries. Coating the blueberries helps keep them evenly distributed throughout the cake. 8. Assemble the Cake Spread the batter evenly into the prepared baking pan, smoothing the top with a spatula. Sprinkle the streusel evenly over the entire surface, making sure every slice gets plenty of buttery crumb topping. 9. Bake Until Golden Bake for 45–50 minutes, or until the top is golden brown and a toothpick inserted into the center comes out clean or with just a few moist crumbs attached. If the streusel begins browning too quickly, loosely cover the cake with aluminum foil during the last 10–15 minutes of baking. 10. Let the Cake Cool Remove the cake from the oven and let it cool in the pan for at least 20 minutes. The cake should still be slightly warm but not hot before adding the glaze, otherwise the glaze will soak into the cake instead of sitting on top. 11. Make the Vanilla Glaze Whisk together the powdered sugar and 1 tablespoon of milk until smooth. Add additional milk, one teaspoon at a time, until the glaze reaches a thick but pourable consistency. For extra flavor, stir in a splash of vanilla extract if desired. 12. Glaze, Slice, and Serve Drizzle the vanilla glaze evenly over the cooled cake using a spoon or whisk. Let the glaze set for a few minutes before slicing. Cut into 12 generous pieces and enjoy with a hot cup of coffee, tea, or a cold glass of milk. This blueberry coffee cake is delicious served slightly warm, but it’s just as good the next day once the flavors have had time to develop. Expert Tips for the Perfect Blueberry Coffee Cake A few simple baking tricks can make all the difference when making blueberry coffee cake. Follow these expert tips to create a soft, buttery crumb, evenly distributed blueberries, a crunchy cinnamon streusel, and a perfectly set vanilla glaze every time you bake. Coat the Blueberries Before Mixing Toss the blueberries with 2 teaspoons of flour before folding them into the batter. This light coating helps keep the berries suspended throughout the cake instead of sinking to the bottom during baking. Measure the Flour the Right Way For the softest, fluffiest cake, spoon the flour into your measuring cup and level it off with a knife. Scooping directly from the flour bag packs in too much flour, which can make the cake dense and dry. Use Melted Butter for the Streusel Always use melted butter when making the streusel topping. It creates buttery, chunky crumbs that bake into a crisp, golden topping. Softened butter tends to produce a dry, sandy mixture instead of those classic bakery-style crumbles. Bring Cold Ingredients to Room Temperature Butter, eggs, sour cream, and milk should all be at room temperature before you begin. Room-temperature ingredients blend together more smoothly, creating a lighter batter and a more tender cake. Mix the Batter Just Until Combined Once you add the flour mixture, mix only until no dry streaks remain. Overmixing develops the gluten in the flour, which can result in a tough or dense cake instead of a soft, delicate crumb. Use Frozen Blueberries the Right Way Frozen blueberries are a great substitute for fresh ones, but don’t thaw them