
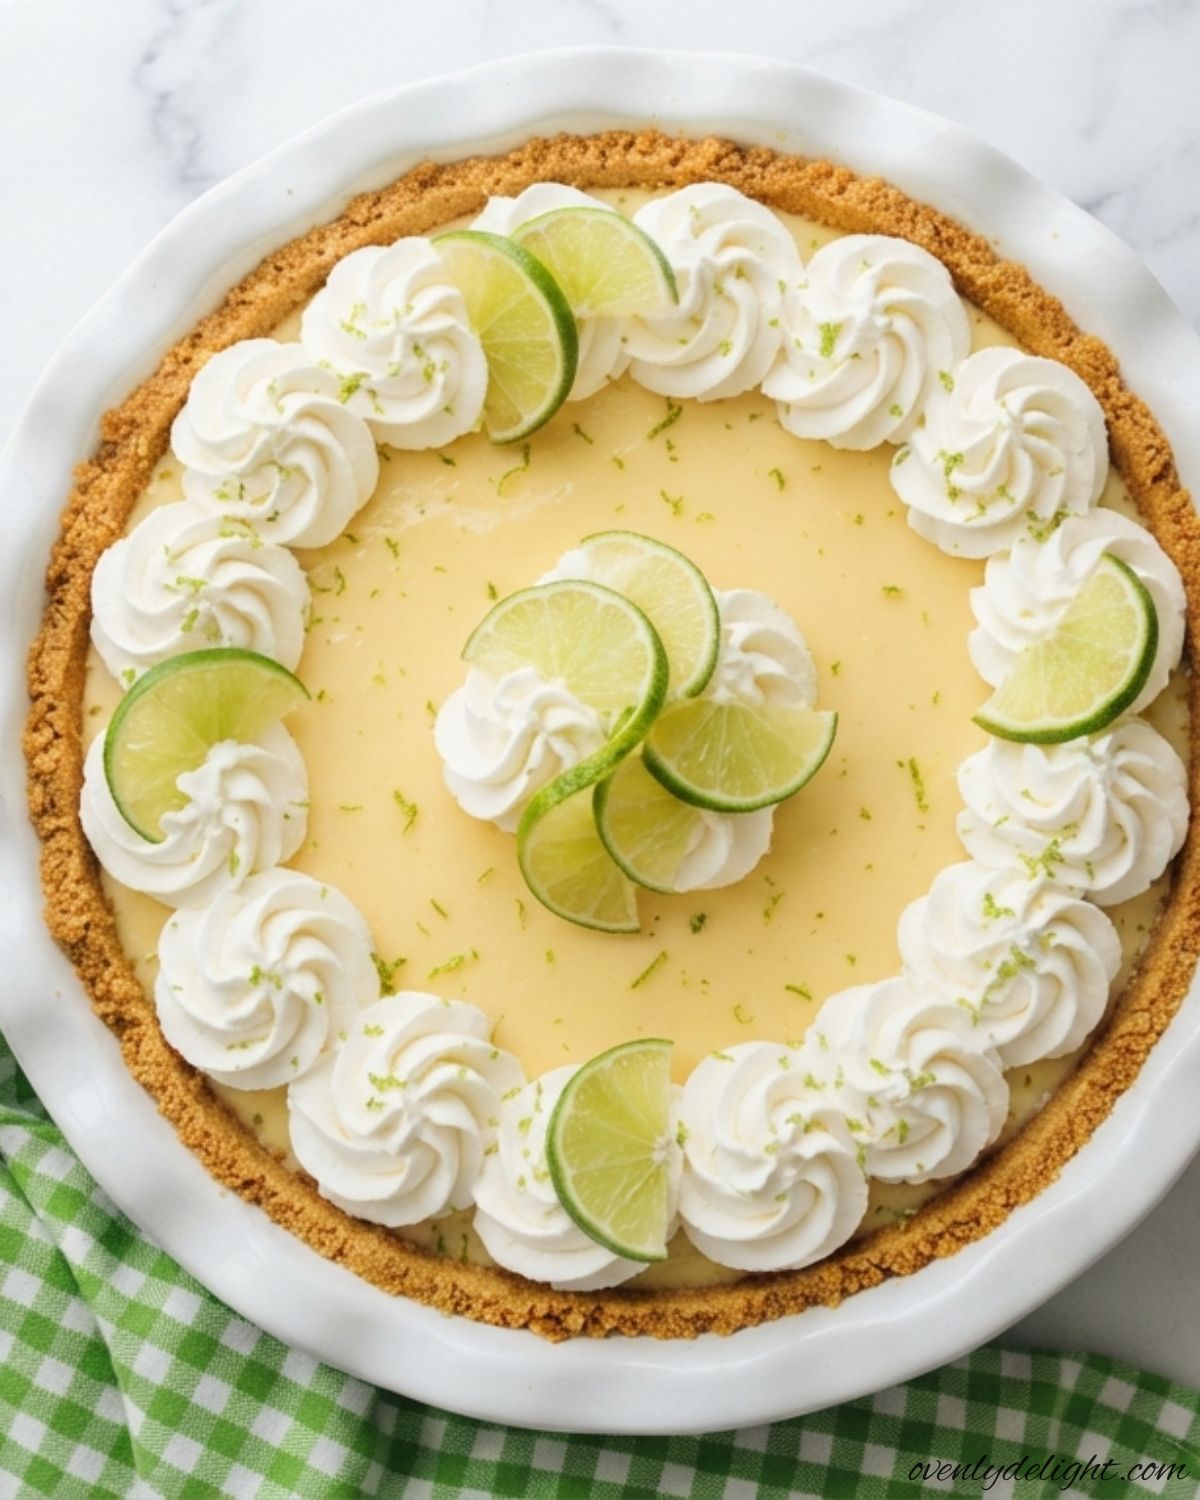
If you’re looking for a simple dessert that’s creamy, refreshing, and perfect for warm days, this No Bake Key Lime Pie is a great choice. With a buttery graham cracker crust and a smooth, tangy lime filling, it’s packed with fresh flavor without ever turning on the oven. Whether you’re making it for a family gathering, summer party, or a quick weekend treat, this easy recipe comes together with minimal effort and delivers delicious results every time. Why You’ll Love This No Bake Key Lime Pie 1. No Oven Needed This recipe is completely no-bake, making it perfect for hot summer days when you don’t want to heat up the kitchen. Just mix, chill, and enjoy. 2. Creamy and Refreshing The smooth, creamy filling is balanced with bright, tangy key lime flavor, creating a light and refreshing dessert that’s never too heavy. 3. Easy to Make With just a handful of simple ingredients and minimal prep, this pie is beginner-friendly and comes together without any complicated steps. 4. Perfect for Any Occasion Whether you’re hosting a summer barbecue, celebrating a holiday, or simply craving something sweet, this pie is always a crowd-pleaser. 5. Make-Ahead Friendly Since the pie needs time to chill, it’s an excellent dessert to prepare a day in advance. That means less stress when you’re entertaining guests. 6. Beautiful Yet Effortless A few lime slices, whipped cream, or a sprinkle of lime zest are all you need to turn this simple pie into a dessert that looks as impressive as it tastes. Ingredients for No Bake Key Lime Pie For the Graham Cracker Crust For the Key Lime Filling How to Make Easy No Bake Key Lime Pie (Step by Step) Step 1: Prepare the Graham Cracker Crust Mix the graham cracker crumbs, sugar, and melted butter until the mixture resembles wet sand. Press it firmly into the bottom and sides of a 9-inch pie dish using the bottom of a measuring cup. Chill the crust in the refrigerator while you prepare the filling. Step 2: Bloom the Gelatin Sprinkle the gelatin over 2 tablespoons of cold water and let it sit for about 5 minutes. Heat it gently in short microwave intervals until completely dissolved and smooth. Avoid overheating to keep the texture consistent. Step 3: Beat the Cream Cheese Place the softened cream cheese in a large bowl and beat until completely smooth. This creates a creamy filling without lumps and makes mixing the remaining ingredients much easier. Step 4: Mix the Filling Add the sweetened condensed milk, key lime juice, and lime zest to the cream cheese, then mix until smooth. Stir in the dissolved gelatin and mix just until everything is evenly combined. Step 5: Fold in the Whipped Cream Whip the cold heavy cream until soft peaks form. Gently fold it into the lime mixture with a spatula until no streaks remain. This gives the filling a light and fluffy texture. Step 6: Chill the Pie Pour the filling into the prepared crust and smooth the top. Cover loosely and refrigerate for at least 6 hours, or overnight for the cleanest slices and the best texture. Pro Tips for the Best No Bake Key Lime Pie Chill Your Heavy Cream for Better Whipping Always start with well-chilled heavy cream for the best texture. I also like to chill the mixing bowl and beaters for about 10 minutes before whipping. Cold cream reaches stiff peaks faster and stays light and fluffy, giving the pie a stable, airy filling. Use Key Lime Juice for Authentic Flavor For the classic sweet-tart taste, use Key lime juice whenever possible. It has a brighter, more floral flavor than regular lime juice, making the pie taste much more authentic and refreshing. Bloom the Gelatin Properly Don’t skip the blooming step if you’re using gelatin. Let it absorb the water completely before gently warming it. This helps the filling set evenly and prevents it from becoming watery or separating after chilling. Pack the Crust Firmly A sturdy crust starts with firmly packed crumbs. Use the bottom of a flat measuring cup or glass to press the crust tightly into the pan. This helps the crust hold together and gives you clean slices when serving. Allow Enough Chill Time Patience makes a big difference with this dessert. Chill the pie for at least 6 hours, but overnight is even better. The extra time allows the filling to fully set, making each slice smooth, firm, and easy to serve. Use Softened Cream Cheese Always let the cream cheese come to room temperature before mixing. Softened cream cheese blends easily with the other ingredients, creating a silky-smooth filling without any lumps. Prevent Condensation on the Pie After assembling the pie, refrigerate it uncovered for about an hour before covering it with plastic wrap. This simple step helps prevent condensation from collecting on the surface, keeping the pie fresh and attractive until you’re ready to serve. Best Ingredient Substitutions for No Bake Key Lime Pie Use Regular Lime Juice Instead of Key Lime Juice If you can’t find Key lime juice, regular lime juice is a great substitute. The flavor will be slightly less floral and a bit milder, but the pie will still have a delicious citrus taste and set beautifully. Swap Graham Crackers with Digestive Biscuits For the crust, crushed digestive biscuits work wonderfully if graham crackers aren’t available. If you need a gluten-free option, simply use your favorite gluten-free graham crackers or gluten-free digestive biscuits. Replace Heavy Cream with Coconut Cream To make this pie dairy-free, substitute the heavy whipping cream with whipped coconut cream or a dairy-free whipped topping. Chill the coconut cream overnight before whipping for the best light and fluffy texture. Use Reduced-Fat Cream Cheese if Needed Full-fat cream cheese gives the richest flavor and creamiest texture, but reduced-fat block cream cheese can be used if necessary. The filling may be slightly softer, but it will still be smooth, creamy, and delicious. Best Ways to Store
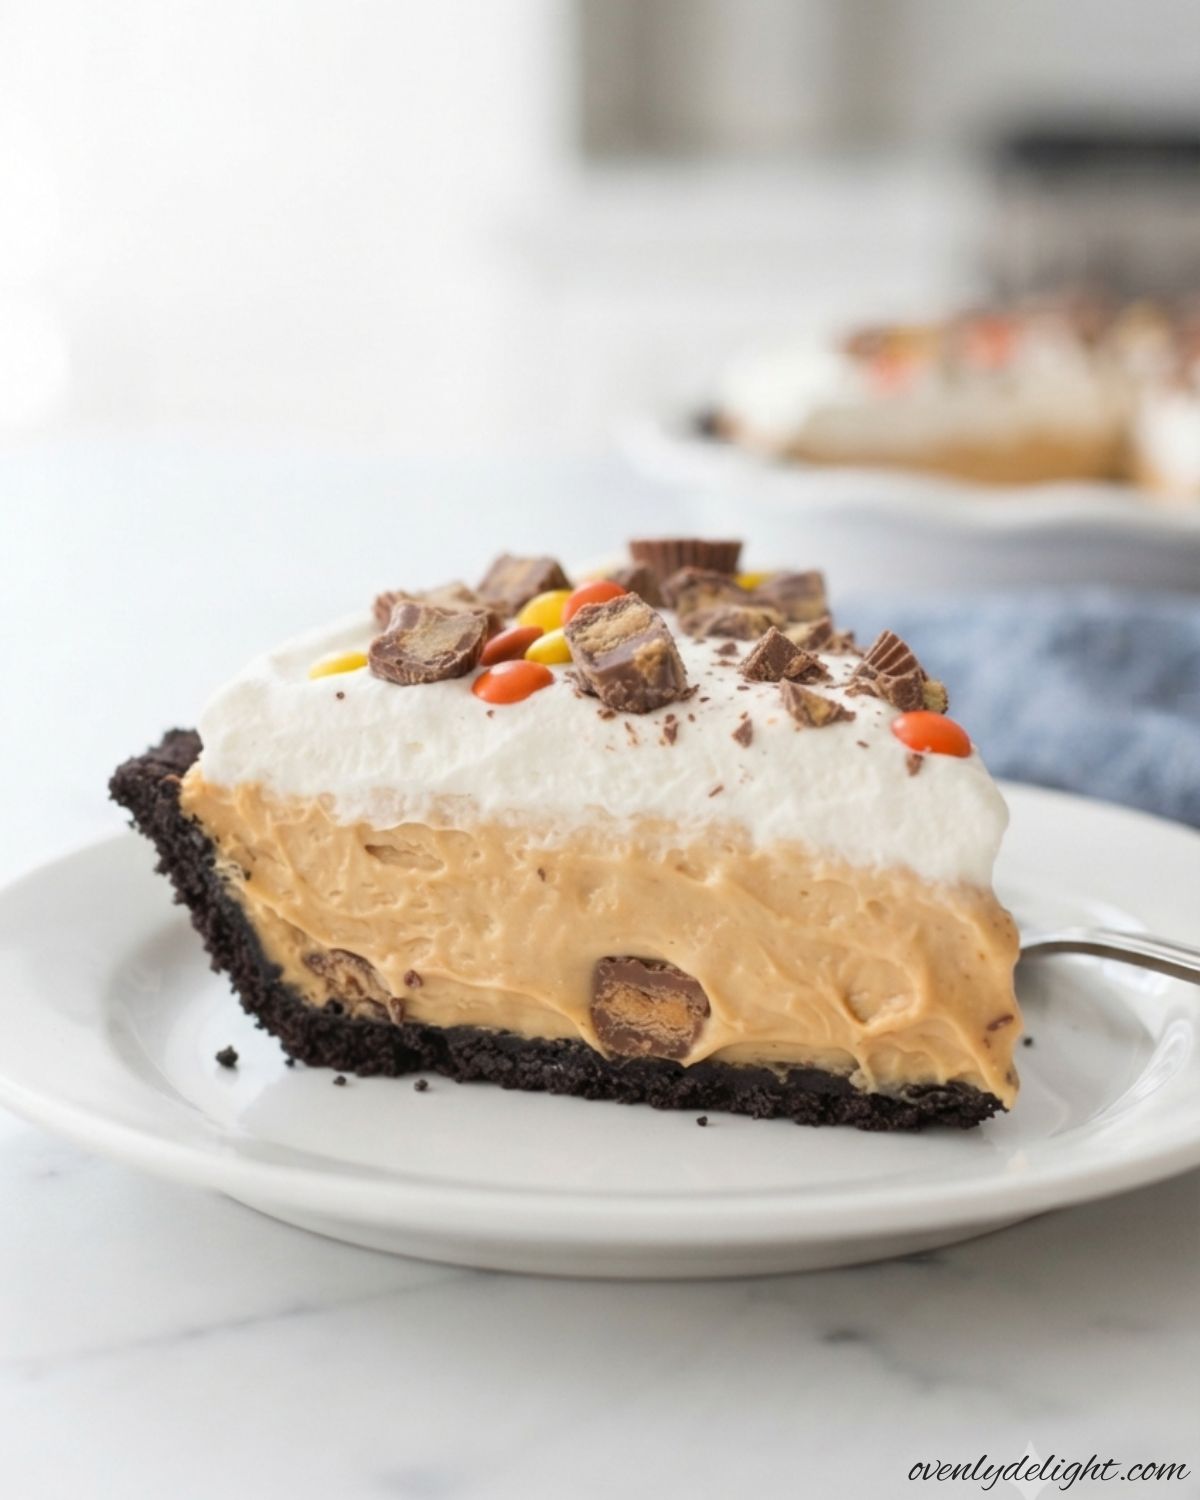
No-Bake Peanut Butter Pie (Easy Oreo Crust Recipe)
I always reach for this No-Bake Peanut Butter Pie when I want a dessert that’s easy to make but still feels extra special. It comes together with simple ingredients, requires no baking, and has the perfect combination of a buttery cookie crust and a smooth, creamy peanut butter filling. Every slice is rich, light, and full of peanut butter flavor, making it a favorite for family gatherings, holidays, or whenever a sweet craving strikes. If you love homemade desserts, this peanut butter dessert is sure to become one of your favorites. It’s quick to prepare, easy to make ahead, and guaranteed to impress with every creamy bite. Why You’ll Love This No-Bake Peanut Butter Pie 1. No-Bake Dessert That’s Perfect for Any Season One of the best things about this no-bake dessert is that you don’t need to turn on the oven. It’s an excellent choice for warm summer days, busy holidays, or anytime you want a delicious homemade dessert without spending hours in the kitchen. 2. Rich, Creamy, and Full of Peanut Butter Flavor The filling is smooth, fluffy, and packed with rich peanut butter goodness in every bite. Paired with a buttery cookie crust, it creates the perfect balance of creamy texture and satisfying crunch that peanut butter lovers can’t resist. 3. Made with Simple Everyday Ingredients This easy peanut butter pie recipe uses basic pantry staples that are easy to find at any grocery store. There’s no need for complicated ingredients, making it a convenient dessert you can prepare whenever a sweet craving strikes. 4. Perfect Make-Ahead Dessert for Gatherings Since the pie needs time to chill, it’s an ideal make-ahead dessert for holidays, birthdays, potlucks, and family dinners. Simply prepare it in advance, refrigerate until set, and enjoy a stress-free dessert that’s ready when you need it. 5. Beginner-Friendly and Easy to Make Even if you’ve never made a homemade pie before, this creamy peanut butter pie is simple to prepare. With easy-to-follow steps and no baking involved, you’ll have a beautiful dessert that looks impressive with very little effort. 6. Easy to Customize with Your Favorite Toppings This pie is delicious on its own, but you can easily make it your own by adding whipped cream, chocolate shavings, chopped peanuts, peanut butter cups, or a drizzle of chocolate or peanut butter. These simple additions make every slice look bakery-worthy and add even more flavor to this irresistible dessert. Ingredients for the Best No-Bake Peanut Butter Pie Oreo Cookie Crust Creamy Peanut Butter Filling Toppings How to Make creamy peanut butter treat at Home 1. Prepare the Chocolate Cookie Crust Place 25 whole Oreo cookies in a food processor and pulse until they become fine crumbs. Add 5 tablespoons melted unsalted butter and pulse again until the mixture resembles damp sand. This helps create a crust that holds together beautifully after chilling. 2. Press the Crust into the Pie Dish Transfer the crumb mixture to a 9-inch pie dish. Firmly press it across the bottom and up the sides using the bottom of a measuring cup or glass. Place the crust in the freezer while you prepare the filling so it becomes firm and easier to slice later. 3. Whip the Heavy Cream Pour ¾ cup cold heavy whipping cream into a chilled mixing bowl. Using a hand or stand mixer, beat until stiff peaks form, about 3–4 minutes. Set the whipped cream aside, as you’ll gently fold it into the filling later for a light, fluffy texture. 4. Mix the Cream Cheese and Peanut Butter In a separate large bowl, beat 8 ounces softened cream cheese with 1 cup creamy peanut butter until completely smooth and creamy, about 2 minutes. Scrape down the sides of the bowl as needed to ensure everything is evenly blended. 5. Add the Sweeteners Mix in ¾ cup powdered sugar and 1 teaspoon pure vanilla extract until fully incorporated. The mixture should be thick, creamy, and smooth without any lumps. 6. Fold Everything Together Add the whipped cream in two batches, gently folding it into the peanut butter mixture with a rubber spatula. Fold just until combined to keep the filling light and airy. Avoid overmixing, as it can reduce the fluffy texture. 7. Assemble and Chill Spread the filling evenly into the chilled cookie crust, smoothing the top with an offset spatula or the back of a spoon. Cover tightly and do not freeze to speed up the setting process because it can affect the creamy texture. 8. Garnish and Serve Before serving, whip the remaining ½ cup heavy cream until soft peaks form and spread or pipe it over the chilled dessert. Finish with chopped peanut butter cups, peanut butter candies, or a drizzle of melted chocolate. Slice with a sharp knife, wiping it clean between each cut for neat, bakery-style servings. Pro Tips for a Creamy No-Bake Peanut Butter Pie 1. Use Regular Creamy Peanut Butter Choose a shelf-stable creamy peanut butter instead of natural varieties. Regular peanut butter creates a smooth, stable filling, while natural peanut butter can separate and make the mixture oily or prevent it from setting properly. 2. Let the Cream Cheese Soften First Allow the cream cheese to sit at room temperature for about 30 minutes before mixing. Softened cream cheese blends effortlessly with the other ingredients, giving you a silky filling without small lumps. 3. Chill the Cookie Crust Before Filling After pressing the crust into the pie dish, place it in the freezer for 10–15 minutes. This helps it firm up, making it easier to slice and preventing the crust from crumbling when serving. 4. Fold the Whipped Cream Gently Use a rubber spatula to gently fold the whipped cream into the filling. Avoid vigorous stirring, as it removes the air from the whipped cream and results in a heavier texture instead of a light, fluffy consistency. 5. Give It Enough Time to Chill For the best results, refrigerate the pie for at least 6 hours, or overnight if
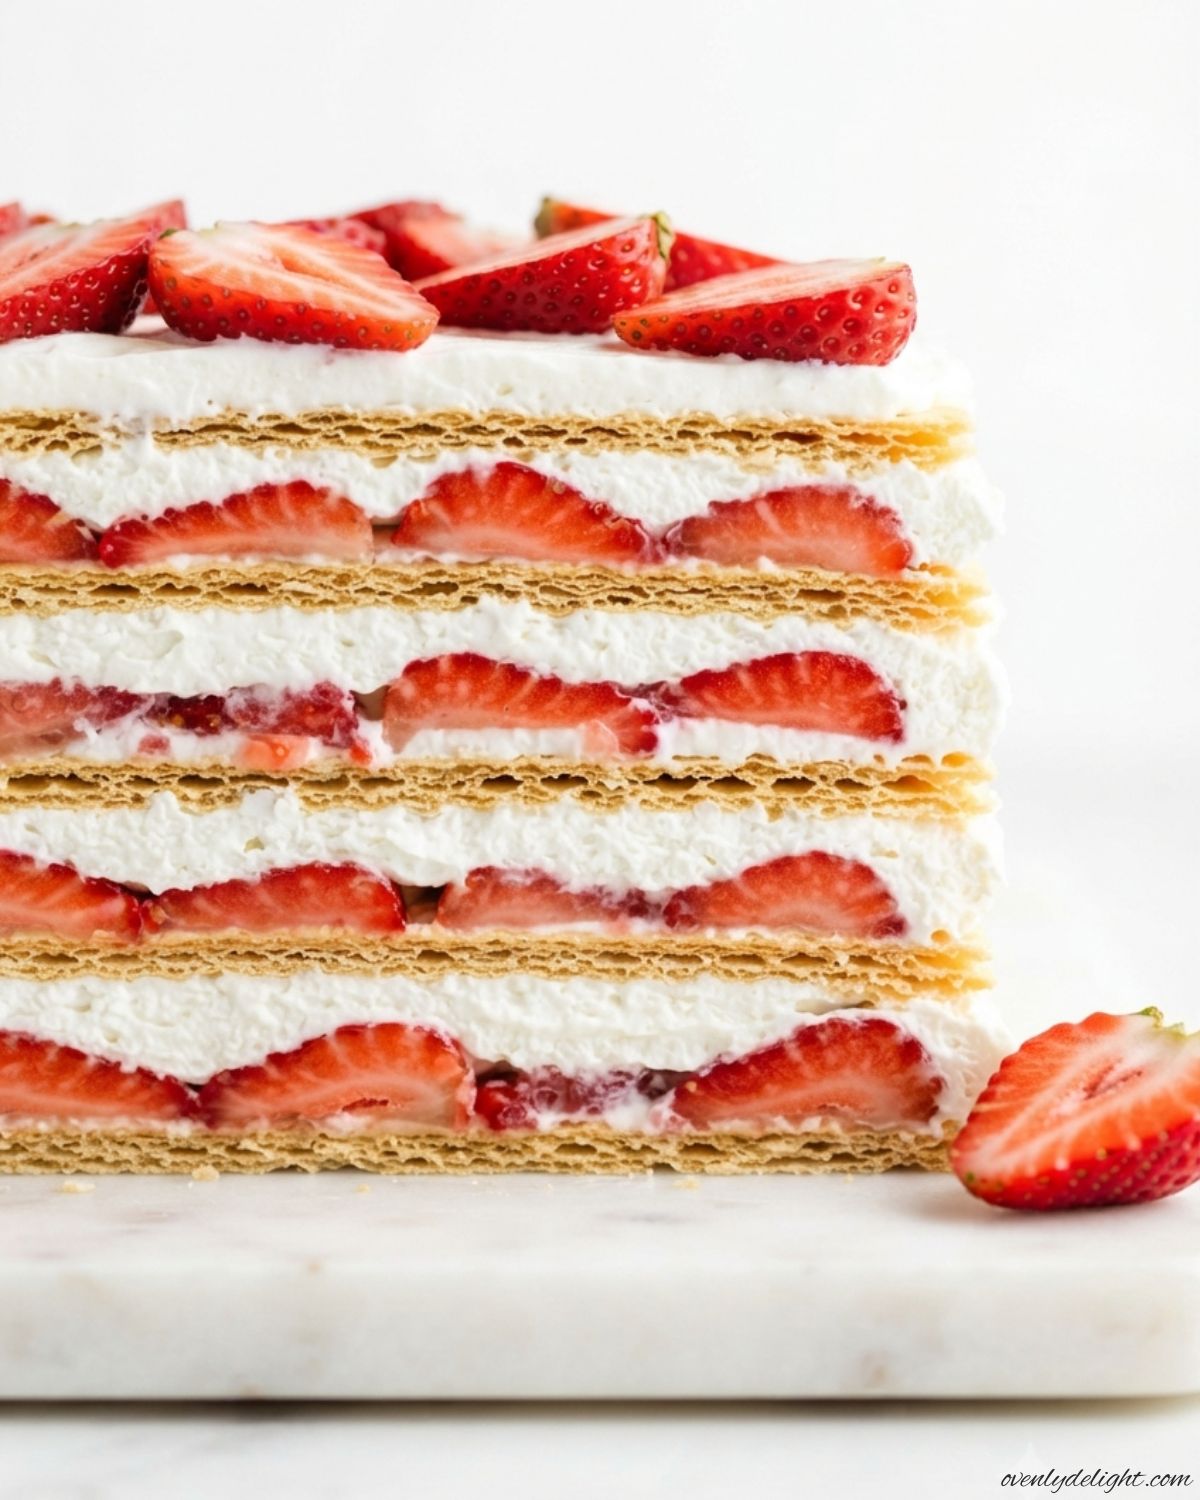
Strawberry Icebox Cake Recipe (Easy No-Bake Dessert)
I love making this Strawberry Icebox Cake whenever I want a simple yet delicious dessert that everyone enjoys. It has become one of my favorite no-bake treats for summer gatherings, family dinners, and special occasions. I still remember making it on a warm day when I wanted something refreshing without turning on the oven, and the creamy layers of whipped filling, fresh strawberries, and cookies were an instant favorite. This easy strawberry dessert recipe is light, creamy, and packed with fruity flavor. With simple ingredients and a chilled texture, it’s the perfect homemade treat for any occasion. Why You’ll Love This Strawberry Icebox Cake No baking required:This easy no-bake dessert comes together without turning on the oven, making it perfect for warm summer days, busy schedules, or when you want a homemade treat with minimal effort. Fresh and fruity flavor:Juicy strawberries add a naturally sweet and refreshing taste to every layer. The homemade strawberry filling brings a bright fruit flavor that pairs beautifully with the creamy layers. Simple ingredients:Made with easy-to-find ingredients like strawberries, cream cheese, whipping cream, and graham crackers, this chilled dessert is beginner-friendly and perfect for family gatherings or special occasions. Creamy and delicious texture:The combination of soft graham cracker layers and smooth whipped cream filling creates a light, creamy texture that melts in your mouth with every bite. Perfect for any occasion:Whether you’re serving it at a summer party, holiday celebration, birthday gathering, or family dinner, this strawberry dessert is a beautiful crowd-pleaser that everyone will enjoy. Make-ahead friendly:This icebox cake can be prepared in advance, allowing the flavors to blend together while the layers soften into a delicious cake-like texture. Ingredients for a Creamy No-Bake Strawberry Cake Strawberry Compote Whipped Cream Layer Topping Easy Strawberry Icebox Cake Recipe (Step by Step) 1. Prepare the Strawberry Compote Add sliced strawberries, sugar, cornstarch, and lemon juice to a saucepan over medium heat. Cook for 6–8 minutes, stirring frequently, until the strawberries break down and the mixture becomes thick and glossy. Letting the compote thicken properly helps create a flavorful strawberry layer that stays in place when sliced. 2. Cool the Strawberry Filling Transfer the strawberry compote to a shallow bowl and spread it out to cool faster. Allow it to cool completely before assembling the cake, as warm filling can soften the whipped cream layer and affect the final texture. 3. Make the Creamy Filling Beat the softened cream cheese and powdered sugar together until smooth and creamy. In a separate bowl, whip the cold heavy cream until light and fluffy, then gently fold it into the cream cheese mixture. This creates a rich, airy filling that gives the dessert its signature creamy texture. 4. Layer the Icebox Cake Place a layer of graham crackers in an 8×4-inch loaf pan or 8×8-inch baking dish , breaking pieces if needed to cover the surface. Spread a layer of whipped cream filling followed by strawberry compote. Continue layering until all ingredients are used, finishing with a smooth cream layer on top. 5. Chill Until Set Cover the cake tightly and refrigerate for at least 4 hours, or overnight for the best results. Chilling allows the graham crackers to absorb the creamy filling and transform into soft, cake-like layers that make this classic icebox dessert special. 6. Add Topping and Serve Before serving, decorate the top with extra whipped cream and fresh strawberry slices. For clean slices, use a sharp knife and wipe it between cuts. Serve this chilled strawberry dessert cold for the best creamy texture and fresh flavor. Tips for the Perfect Strawberry Icebox Cake Cool the strawberry filling completely:Always let the strawberry compote cool before adding it to the cake layers. Warm filling can melt the whipped cream mixture, making the layers soft and harder to slice. A fully cooled compote helps the dessert hold its beautiful layers. Choose the right pan:A loaf pan creates tall, bakery-style slices with more defined layers, while an 8×8-inch dish is a great option when serving a larger group. Choose the size depending on the look and number of servings you want. Soften the cream cheese before mixing:Bring the cream cheese to room temperature before making the filling. Cold cream cheese can leave small lumps, while softened cream cheese blends smoothly with the powdered sugar for a rich and creamy texture. Line the pan for easy serving:Adding plastic wrap with extra overhang makes it easier to lift the chilled cake from the pan. This helps you create cleaner slices and a prettier presentation when serving. Balance the strawberry flavor:Taste your strawberry compote before layering. If your berries are slightly tart or not fully ripe, add a little extra sugar to enhance the natural sweetness and create a flavorful fruit layer. Give it enough chilling time:For the best Strawberry Icebox Cake texture, chill it for at least 4 hours, but overnight chilling gives the softest, most cake-like layers. The graham crackers need time to absorb the creamy filling and become tender. Store toppings separately:If you are not serving the entire cake at once, keep extra whipped cream and fresh strawberry toppings separate. This helps each slice stay fresh and keeps the topping looking beautiful. Strawberry Icebox Cake Ingredient Substitutions & Tips Graham crackers:For a gluten-free version, replace regular graham crackers with gluten-free graham crackers. They create a similar cake-like texture after chilling, but they may soften a little faster, so check the layers earlier for the best consistency. Cream cheese:Swap full-fat cream cheese with dairy-free cream cheese for a dairy-free Strawberry Icebox Cake. The filling may be slightly softer, but it will still provide a smooth and creamy texture that works well with the strawberry layers. Whipping cream:Use a dairy-free heavy whipping cream alternative if you want a dairy-free option. Choose one that whips well so your filling stays light, fluffy, and stable. Fresh strawberries:Frozen strawberries are a great alternative when fresh berries are unavailable. Thaw and drain them well before cooking to remove extra moisture and prevent a watery strawberry
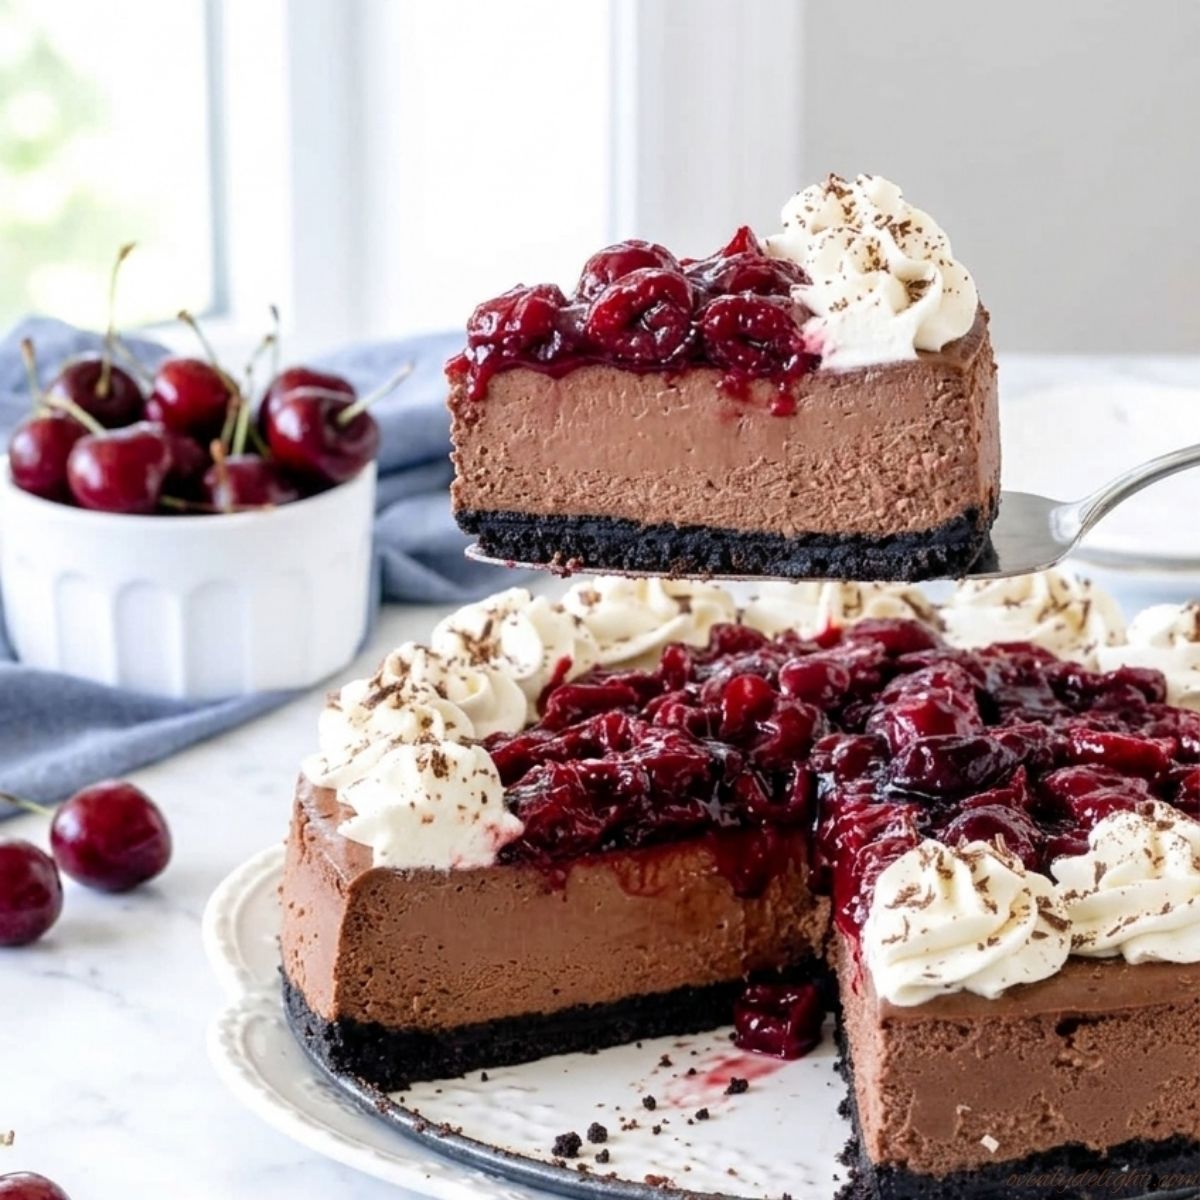
Black Forest Cheesecake Recipe – Rich Chocolate & Cherry Dessert
I’ve always loved the classic combination of rich chocolate and sweet cherries, so it was only a matter of time before I turned those flavors into a cheesecake. Instead of the traditional cake, this version has a buttery Oreo crust, a smooth chocolate filling, and a homemade cherry topping that makes every slice feel a little extra special. Although it looks impressive, the recipe itself is surprisingly straightforward. The hardest part is waiting for it to chill long enough before slicing in. Once it’s fully set, you’re rewarded with a rich, creamy cheesecake that’s perfect for birthdays, holidays, dinner parties, or anytime you’re craving a chocolate dessert with a fruity twist. Why You’ll Love This Black Forest Cheesecake Ingredients for Black Forest Cheesecake For the Oreo Crust For the Chocolate Cheesecake Filling For the Cherry Topping For the Whipped Cream How to Make Black Forest Cheesecake (Step by Step) Step 1: Prepare the Pan Preheat your oven to 325°F (160°C). Wrap the outside of a 9-inch springform pan with two layers of heavy-duty aluminum foil, making sure the foil comes well up the sides of the pan. This helps keep water from leaking into the crust during the water bath and ensures the cheesecake bakes evenly. Step 2: Make the Oreo Crust Place the Oreo cookies (filling included) in a food processor and pulse until they become fine, even crumbs. Pour in the melted butter and pulse again, or stir by hand, until every crumb is evenly coated and resembles wet sand. Step 3: Bake the Crust Transfer the crumb mixture to the prepared springform pan and press it firmly into an even layer across the bottom using the back of a measuring cup or glass. Bake for 10 minutes, then remove it from the oven and let it cool while you prepare the filling. This short bake helps create a sturdy crust that stays crisp. Step 4: Melt the Chocolate Place the chopped dark chocolate in a microwave-safe bowl and heat in 20-second intervals, stirring after each until completely smooth. Alternatively, melt it over a double boiler. Set the chocolate aside to cool slightly it should still be pourable but not hot enough to cook the eggs later. Step 5: Mix the Cream Cheese and Sugar In a large mixing bowl, beat the softened cream cheese and granulated sugar on medium speed until completely smooth and creamy, scraping down the sides and bottom of the bowl several times. Taking the time to remove all lumps now will give your cheesecake a silky texture. Step 6: Add the Chocolate Mixture Whisk the cocoa powder with the hot water until it forms a smooth paste with no dry spots. Add the cocoa paste, melted chocolate, and sour cream to the cream cheese mixture, then beat on low speed until everything is fully combined and evenly chocolatey. Scrape the bowl once more to make sure nothing is left unmixed. Step 7: Add the Eggs Add the eggs one at a time, mixing on low speed just until each egg is incorporated before adding the next. Avoid overmixing once the eggs are added, as too much air in the batter can cause the cheesecake to rise too much and crack while cooling. Step 8: Assemble the Cheesecake Pour the cheesecake batter over the cooled Oreo crust and smooth the top with a spatula. Place the springform pan inside a large roasting pan. Carefully pour boiling water into the roasting pan until it reaches about halfway up the sides of the cheesecake pan. The water bath creates gentle, even heat for a creamy texture. Step 9: Bake and Cool Gradually Bake for 60–70 minutes, or until the edges look set while the center still has a slight wobble when gently shaken. Turn off the oven, crack the oven door open a few inches, and leave the cheesecake inside for 1 hour. This gradual cooling helps reduce the chance of cracks. Step 10: Chill the Cheesecake Carefully remove the springform pan from the water bath and peel away the foil. Let the cheesecake cool to room temperature, then refrigerate it uncovered for at least 6 hours, or preferably overnight. Chilling allows the filling to fully set and makes slicing much easier. Step 11: Cook the Cherry Topping While the cheesecake chills, combine the fresh cherries, granulated sugar, and lemon juice in a saucepan over medium heat. Cook for 5–7 minutes, stirring occasionally, until the cherries soften and release their juices while still holding their shape. Step 12: Thicken the Cherry Sauce Stir the cornstarch and water together until smooth, then slowly pour the slurry into the simmering cherries while stirring continuously. Cook for 2–3 minutes, until the sauce becomes glossy and thick enough to coat a spoon. Remove it from the heat and let it cool completely before using. Step 13: Decorate and Serve Beat the heavy whipping cream and powdered sugar until soft peaks form. Spoon the cooled cherry topping over the chilled cheesecake, then add swirls or dollops of whipped cream around the edges. Finish with chocolate shavings for the classic Black Forest look. Slice with a sharp knife dipped in hot water and wiped clean between cuts for neat, bakery-style slices. Expert Tips for the Best Black Forest Cheesecake Use Room-Temperature Ingredients Bring the cream cheese, eggs, and sour cream to room temperature before mixing. They blend together more easily, creating a smooth batter without overmixing, which helps produce a creamy cheesecake. Mix Gently After Adding the Eggs Once the eggs are added, beat the batter on low speed and mix only until each egg is incorporated. Overmixing adds excess air, which can cause the cheesecake to puff up in the oven and crack as it cools. Protect the Pan from Water Leaks Wrap the outside of the springform pan with two layers of heavy-duty foil, or place the pan inside a slow cooker liner before setting it in the water bath. This helps keep water from seeping into the crust
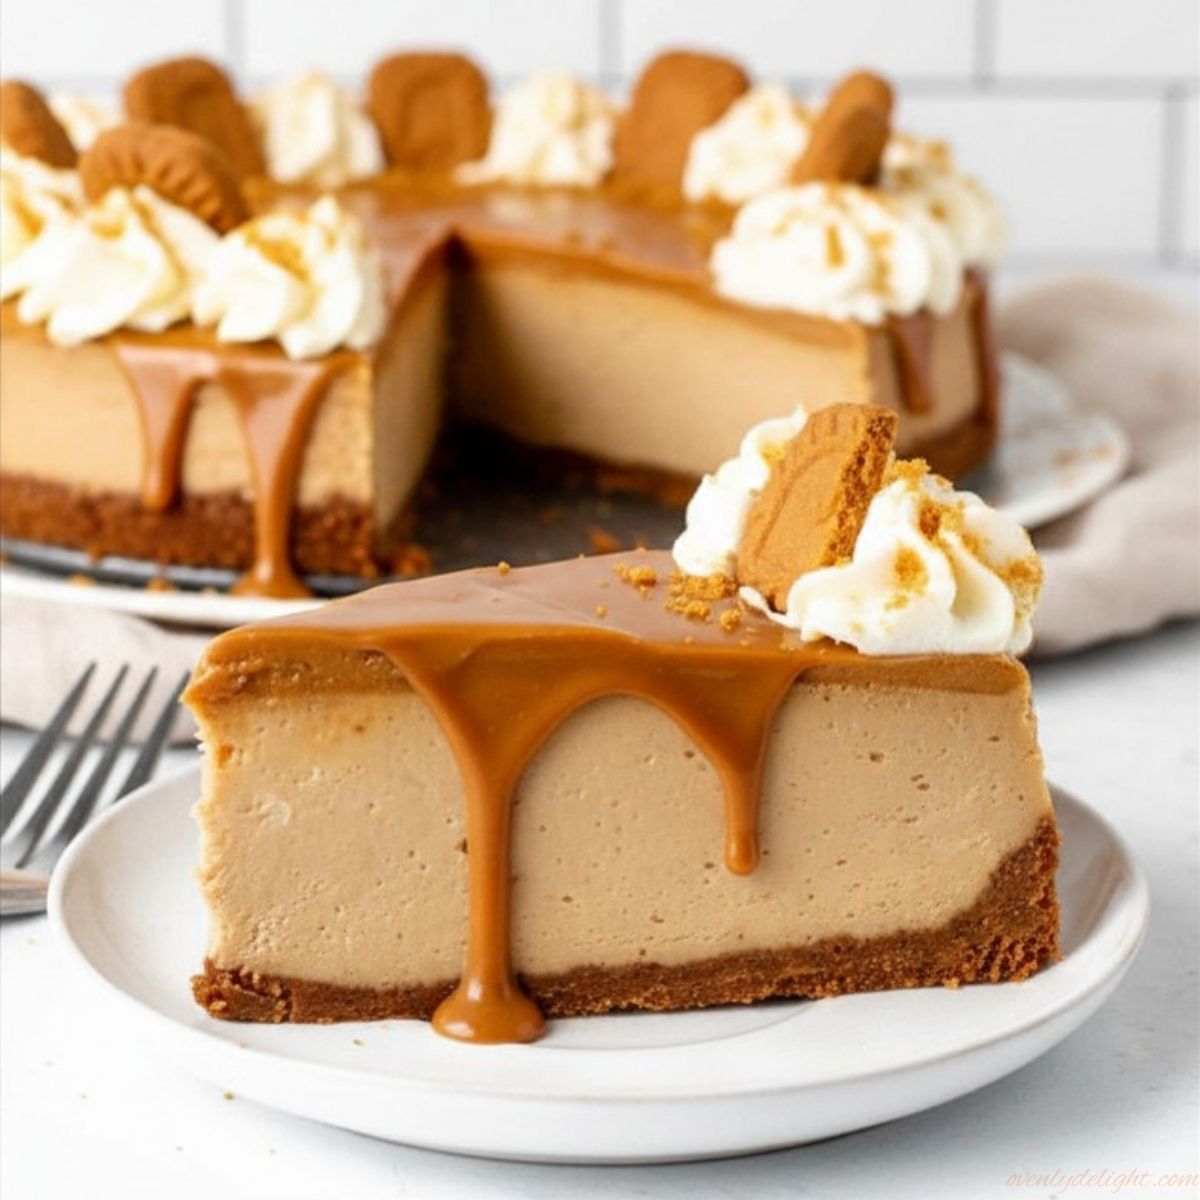
Biscoff Cheesecake Recipe – Creamy, No-Fail Lotus Biscoff Dessert
If you love Lotus Biscoff cookies, this Biscoff Cheesecake is a dessert you have to try. It has a buttery Biscoff cookie crust, a rich and creamy cookie butter filling, and a silky Biscoff topping that tastes just like it came from a bakery. It actually took me three tries to get this cheesecake just right. I kept opening the oven door to check on it because I was worried about overbaking, but that turned out to be my biggest mistake. Once I learned to leave it alone and let it bake properly, everything changed. The cheesecake came out smooth, held its shape perfectly, and had that rich, creamy bakery-style texture I had been trying to achieve. Now it’s one of my favorite desserts to make whenever I want something that looks as good as it tastes. Why You’ll Love This Biscoff Cheesecake Ingredients for Homemade Biscoff Cheesecake For the Biscoff Cookie Crust For the Biscoff Cheesecake Filling For the Biscoff Topping How to Make Biscoff Cheesecake (Step-by-Step) Step 1: Prepare the Pan Preheat your oven to 325°F (165°C) and place the oven rack in the center. Grease a 9-inch springform pan, then wrap the outside with two layers of heavy-duty foil. This extra step keeps water from leaking into the pan during the water bath and prevents a soggy crust. Step 2: Make the Biscoff Cookie Crust Crush the Lotus Biscoff cookies into fine crumbs using a food processor or a rolling pin. Mix the crumbs with the melted butter until they resemble wet sand, then press the mixture firmly into the bottom and slightly up the sides of the pan. Bake for 10 minutes, then let the crust cool while you prepare the filling. Step 3: Beat the Cream Cheese Add the room-temperature cream cheese to a large bowl and beat until it’s completely smooth. Take your time here because any lumps you see now will still be there after baking. Step 4: Mix the Filling Mix in the Biscoff spread until smooth, then add both sugars, cornstarch, and cinnamon. Stir in the sour cream and vanilla, then add the eggs and egg yolks one at a time on low speed. Mix only until everything is combined to keep the filling creamy. Step 5: Fill the Pan Pour the cheesecake filling over the cooled crust and spread it into an even layer with a spatula. Gently tap the pan on the counter a few times to release any air bubbles before baking. Step 6: Prepare the Water Bath Place the springform pan inside a large roasting pan. Carefully pour boiling water into the roasting pan until it reaches halfway up the sides of the cheesecake pan. The water bath helps the cheesecake bake gently for a smooth, creamy texture. Step 7: Bake the Cheesecake Bake for 50 minutes until the edges are set but the center still has a slight wobble. Turn off the oven, crack the door open, and let the cheesecake sit inside for 1 hour. This slow cooling helps prevent cracks. Step 8: Cool and Chill Take the cheesecake out of the oven and let it cool completely at room temperature. Run a thin knife around the edges, then refrigerate for at least 6 hours, or overnight if possible. The longer it chills, the better the texture becomes. Step 9: Make the Biscoff Topping Warm the Biscoff spread until it’s smooth and pourable, then whisk in the whipping cream until glossy. The topping should be silky enough to spread easily over the cheesecake. Step 10: Decorate and Serve Pour the topping over the chilled cheesecake and gently spread it to the edges. Chill for another 30 minutes, then decorate with Lotus Biscoff cookies or cookie crumbs before slicing. For the cleanest slices, wipe your knife clean between each cut. Expert Tips for the Best Biscoff Cheesecake Bring Ingredients to Room Temperature Set the cream cheese, eggs, and sour cream on the counter for 1–2 hours before starting. Cold ingredients don’t blend smoothly and can leave lumps in the filling. Double-Wrap the Pan Use two layers of heavy-duty foil around the springform pan before the water bath. This helps prevent water from leaking in and making the crust soggy. Use Full-Fat Ingredients Full-fat cream cheese and sour cream give the cheesecake its rich, thick, bakery-style texture. Low-fat versions can make the filling less creamy. Trust the Wobble Test The cheesecake is done when the edges are set but the center still jiggles slightly. It will continue to firm up as it cools. Chill Overnight For the cleanest slices and best flavor, refrigerate the cheesecake overnight. The texture becomes firmer, smoother, and easier to cut. Add the Topping Before Serving Pour the Biscoff topping onto the fully chilled cheesecake a few hours before serving. This keeps the top smooth, shiny, and firmly set. Measure Ingredients Accurately Cheesecakes are all about precision, so try to measure your ingredients as accurately as possible. If your recipe uses different units, a baking measurement converter can be helpful for converting cups, grams, ounces, or tablespoons before you start mixing. Ingredient Substitutions Sour Cream → Greek Yogurt If you’re out of sour cream, don’t worry. I’ve used full-fat plain Greek yogurt as a 1:1 substitute, and the cheesecake still turns out smooth and creamy with just a slightly milder tang. Biscoff Spread → Cookie Butter Any good-quality cookie butter works here. I’ve tested other brands when I couldn’t find Biscoff spread, and the flavor stays very close. Lotus Biscoff Cookies → Graham Crackers If Biscoff cookies aren’t available, use 2 cups crushed graham crackers mixed with ½ teaspoon ground cinnamon. The flavor won’t be exactly the same, but the crust is still buttery and delicious. Cream Cheese & Dairy → Dairy-Free Alternatives For a dairy-free version, use dairy-free cream cheese, coconut-based sour cream, and vegan butter. Since Lotus Biscoff cookies and spread are already dairy-free, these simple swaps work really well. Brown Sugar → Granulated Sugar No brown sugar? I’ve made
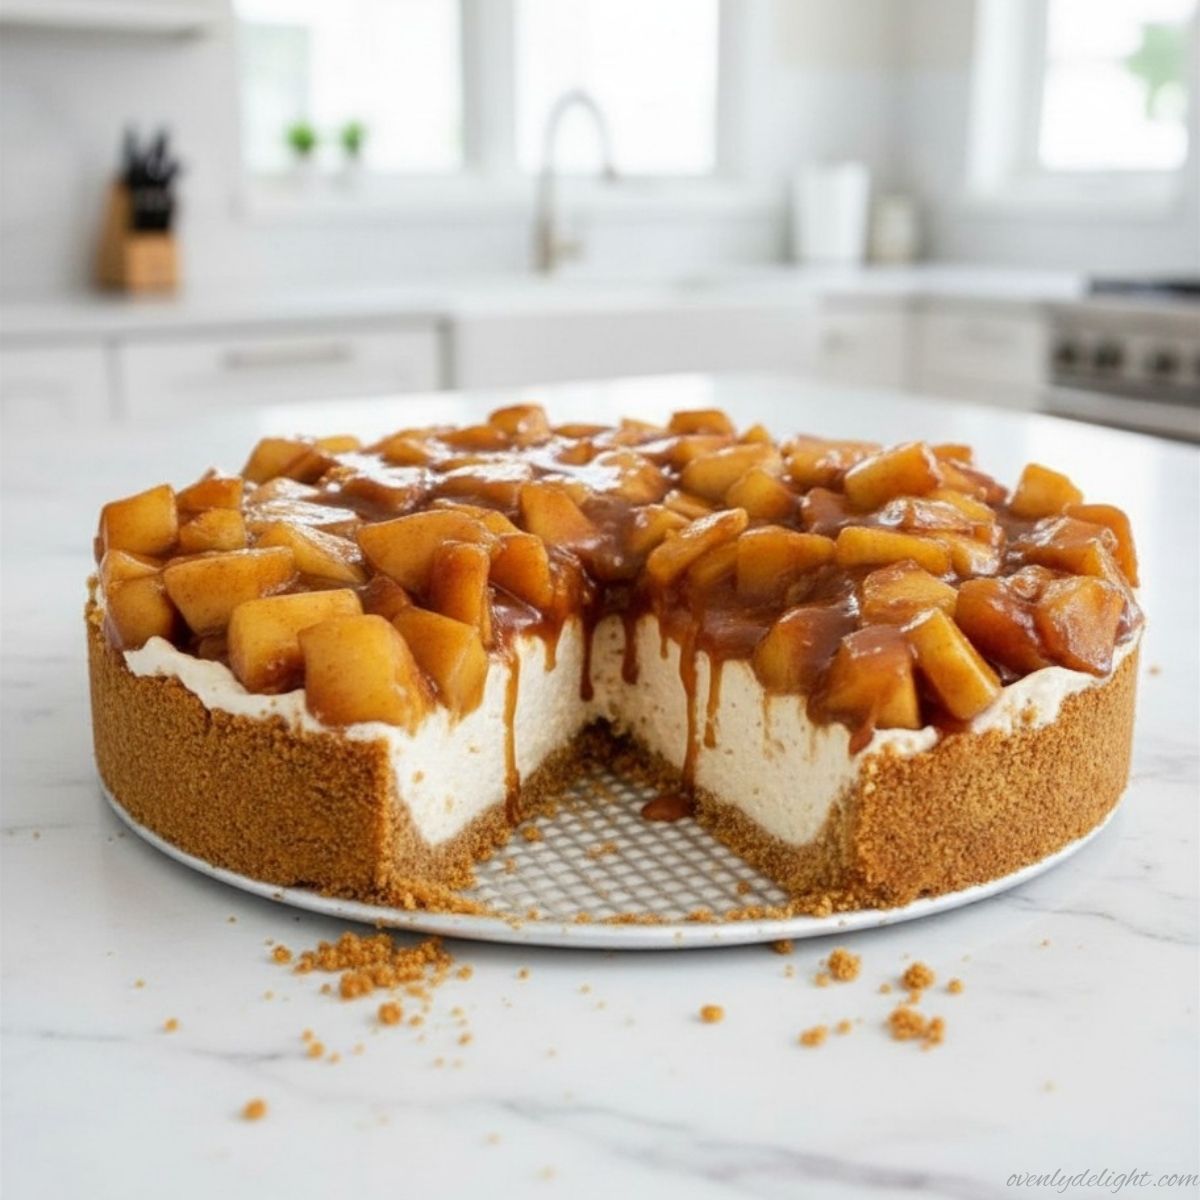
No Bake Apple Cheesecake
I first made this No Bake Apple Cheesecake on a warm afternoon when I wanted something cozy and comforting without turning on the oven. I had a few apples sitting on the counter and a craving for cheesecake, so I decided to combine the two. The result was even better than I expected creamy, smooth cheesecake layered with sweet cinnamon apples and a buttery crust. Since then, this dessert has become one of my favorite make-ahead treats for family gatherings and holidays. It brings together all the flavors of classic apple pie and cheesecake in one easy, no-bake recipe that’s simple enough for beginners but impressive enough for special occasions. Why You’ll Love This Recipe If you love easy desserts that look impressive, this No Bake Apple Cheesecake is for you. I actually came up with this recipe on a busy day when I wanted to make something special but didn’t have the energy to turn on the oven. I remember thinking I might mess it up because no-bake desserts can be tricky, but I had a few apples sitting in the fridge and decided to just try it anyway. It took me only 20 minutes to put everything together, and then I just hoped for the best while it chilled. What surprised me most was how perfectly it set. The creamy filling turned out smooth and sliceable, and the cinnamon apples added that cozy apple pie flavor I was craving. Since that day, this No Bake Apple Cheesecake has become my go-to dessert for last-minute gatherings and lazy weekends. It feels fancy, but it’s honestly one of the easiest recipes I’ve ever made. Ingredients for Easy No Bake Apple Cheesecake For the Crust For the Cheesecake Filling How to Make No Bake Apple Cheesecake (Step by Step) 1. Make the Perfect Graham Cracker Crust (Base Layer) Start by mixing graham cracker crumbs, sugar, and melted butter in a bowl until the texture looks like wet sand. It should hold together when you press it between your fingers. Now pour this mixture into a 9-inch springform pan and press it down firmly. Take your time here use the bottom of a glass or measuring cup to really pack it tight, especially around the edges. A well-pressed crust is the secret to clean, sturdy slices later that don’t fall apart. 2. Chill the Crust for a Firm Base Once your crust is ready, place it in the freezer for about 15 minutes. This step might feel small, but it makes a big difference. The butter firms up and locks everything in place, so when you add the creamy filling later, the crust stays solid instead of crumbling. Think of it as setting the foundation of your cheesecake. 3. Beat Cream Cheese Until Smooth and Creamy In a large mixing bowl, add softened cream cheese and beat it for about 2 minutes until it becomes completely smooth. Don’t rush this step lumps here will show up in your final cheesecake. Make sure to scrape down the sides of the bowl so everything mixes evenly. The goal is a silky, creamy base that feels light and smooth with no graininess at all. 4. Add Sugar, Vanilla & Warm Cinnamon Flavor Now add powdered sugar, vanilla extract, and a little cinnamon into the cream cheese mixture. Mix until everything becomes soft, creamy, and slightly fluffy. At this stage, your kitchen will already start smelling amazing sweet, warm, and comforting, like dessert is on its way. 5. Whip the Cream to Stiff Peaks In a separate bowl, whip cold heavy cream until stiff peaks form. This means when you lift the whisk, the cream should hold its shape and not fall. Be careful not to under-whip it this step is what gives your cheesecake that light, airy texture instead of making it dense or heavy. 6. Gently Fold for a Light Cheesecake Texture Now add the whipped cream into the cream cheese mixture in three parts. Use a spatula and gently fold it in. Don’t stir fast or aggressively just slow folding motions. This keeps all the air inside and gives you that fluffy, melt-in-your-mouth cheesecake texture. 7. Fill the Pan and Chill Until Set Spread the cheesecake filling evenly over your chilled crust. Smooth the top with a spatula so it looks nice and even. Cover it and refrigerate for at least 4 hours, but overnight is even better. This waiting time is what transforms it from a soft mixture into a perfectly set, sliceable cheesecake. 8. Cook the Cinnamon Apple Topping Peel and dice your apples, then cook them in a pan with butter, brown sugar, cinnamon, and a pinch of nutmeg over medium heat for about 8–10 minutes. Once the apples soften, add a cornstarch slurry and cook for another 1–2 minutes until the mixture turns thick and glossy. Let it cool completely before using this is important so it doesn’t melt your cheesecake. 9. Top, Slice & Serve Like a Pro Once your cheesecake is fully set and the apple topping is completely cool, spoon it generously over the top. For clean, bakery-style slices, dip your knife in hot water, wipe it clean, and then cut. Repeat between each slice for perfect edges every time. Expert Tips for Perfect No Bake Apple Cheesecake 1. Always use room temperature cream cheese Cold cream cheese is the number one reason for lumps. Let it soften properly so your filling becomes silky smooth with no grainy texture. 2. Don’t overwhip the cream Whip until stiff peaks only. If you go beyond that, the cream can turn grainy and the cheesecake won’t hold its light, airy texture. 3. Pack the crust tightly A loose crust will crumble when slicing. Press it firmly using a spoon or glass so it stays solid and clean when served. 4. Cool everything before assembling Make sure the apple topping is completely cool before adding it on top. Warm apples can melt the cheesecake layer and ruin the structure.
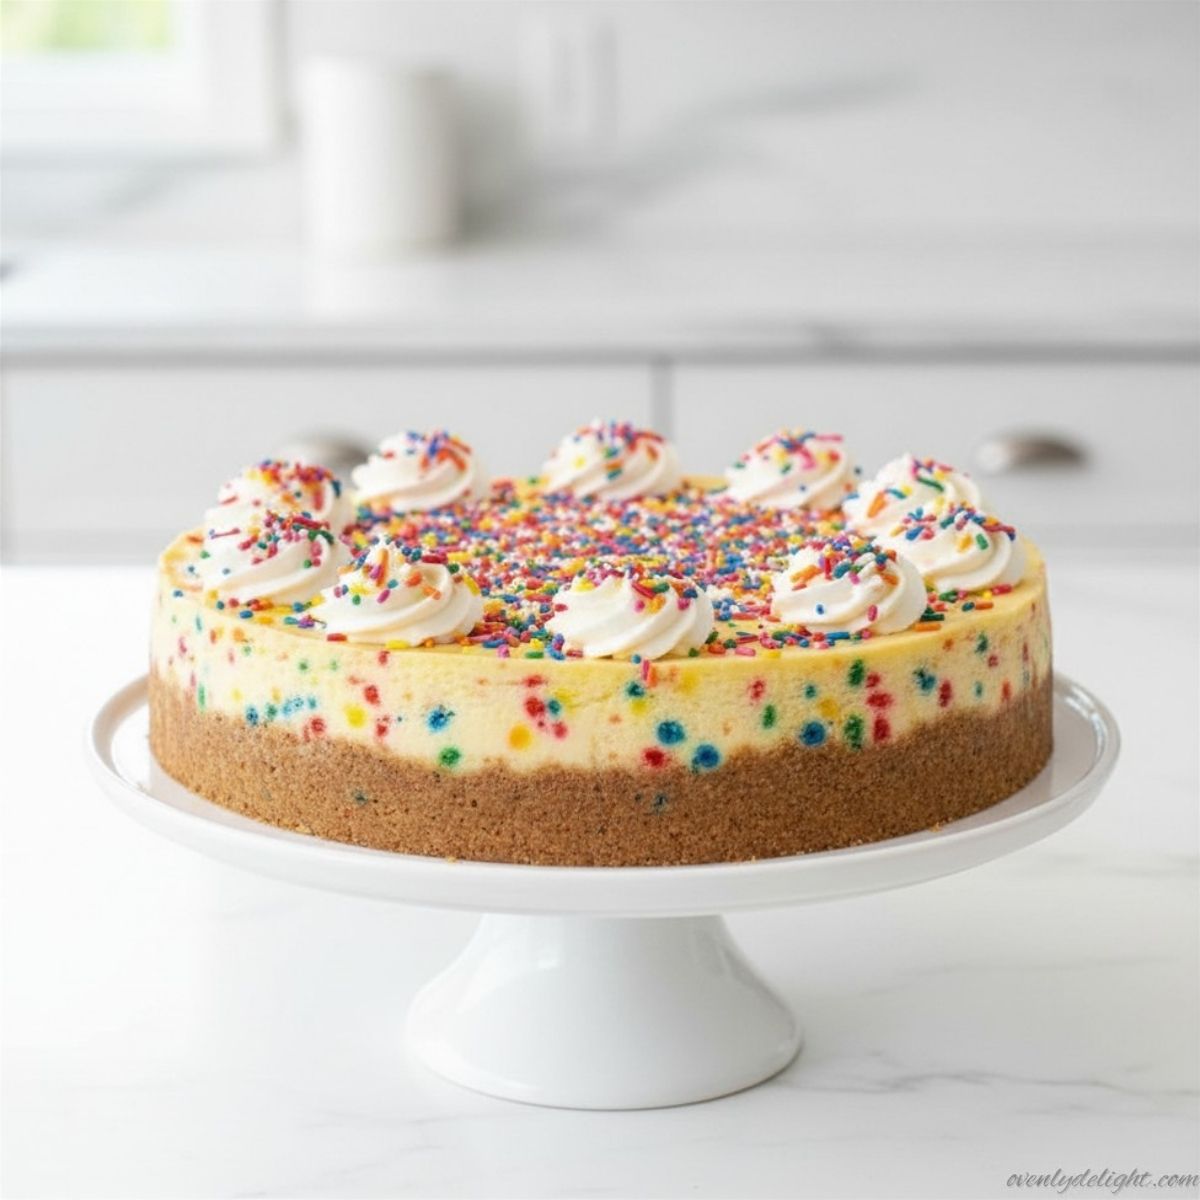
No Bake Funfetti Cheesecake (Easy & Foolproof)
This No Bake Funfetti Cheesecake started as a “just for fun” dessert on a late night when I was craving something sweet but didn’t want to turn on the oven. I had cream cheese and a jar of rainbow sprinkles in the pantry, with no real plan except to experiment and see what would happen. What came out was a creamy, light cheesecake with that nostalgic birthday cake flavor in every bite. It quickly became one of those go-to recipes I make whenever I want something simple, fun, and guaranteed to make people smile the moment they see the sprinkles. Why We Love This Recipe This recipe is a total win when you want something impressive without the stress of baking. There’s no oven, no water bath, and no worrying about cracks on top just a smooth, creamy filling that comes together in one bowl with a hand mixer. I still remember the first time I made it on a random evening when I was just experimenting with whatever I had in the kitchen. I didn’t expect much, but when I tasted it after chilling, I was honestly surprised at how light, creamy, and “birthday cake-like” it turned out. Since then, it’s become one of those desserts I keep coming back to whenever I want something easy, fun, and guaranteed to lift the mood. Ingredients for No Bake Funfetti Cheesecake Recipe Crust Filling For Topping How to Make No Bake Cheesecake Recipe (Step by Step) 1. Make the Graham Cracker Crust Start by mixing graham cracker crumbs, sugar, and melted butter in a medium bowl until it looks like wet sand. Then press it firmly into the bottom of a 9-inch springform pan. I like using the bottom of a glass or measuring cup to really pack it down evenly so the crust holds its shape when sliced later. 2. Chill the Crust Pop the pan into the freezer for about 10 minutes while you prepare the filling. This little step makes a big difference it helps the crust set properly so it doesn’t fall apart later. I’ve skipped this before, and trust me… the first slice was a mess. 3. Beat the Cream Cheese In a large bowl, beat the softened cream cheese until it becomes completely smooth and creamy (about 2 minutes). Don’t rush this step scrape down the sides so there are no hidden lumps, because they won’t magically disappear later. 4. Add Sugar and Vanilla Now mix in the powdered sugar and vanilla extract on low speed first, then increase to medium. Keep beating until the mixture looks light, smooth, and a little fluffy. This is where the flavor really starts to come together. 5. Whip the Cream In a separate bowl, whip the cold heavy cream until stiff peaks form. Make sure the cream is cold it whips faster and gives the cheesecake that perfect airy, set texture once chilled. 6. Fold Everything Together Gently fold the whipped cream into the cream cheese mixture in three parts. Take your time here and use a folding motion, not stirring. This keeps the filling light, fluffy, and mousse-like instead of dense. 7. Add the Sprinkles Fold in the rainbow sprinkles at the very end. If you add them too early, they can bleed and turn the filling dull (I learned that the messy way once, so don’t skip this tip). 8. Assemble and Smooth Pour the filling over your chilled crust and smooth the top with a spatula or the back of a spoon. Try to make it as even as possible so it looks clean and professional when sliced. 9. Chill Until Set Refrigerate for at least 4 hours, but overnight is even better if you want clean, firm slices. Cover it loosely so the top doesn’t dry out but still stays fresh. 10. Release and Decorate Run a thin knife around the edges before releasing the springform pan. Then top with whipped cream and a final sprinkle of rainbow sprinkles right before serving for that fun, bakery-style finish. Expert Tips for Perfect Funfetti Cheesecake Ingredient Substitutions How to Store No Bake Funfetti Cheesecake In the Refrigerator Keep the cheesecake covered and stored in the fridge to maintain its freshness and creamy texture. I usually leave it in the springform pan and loosely cover it with plastic wrap or foil so it doesn’t dry out or absorb fridge odors. It stays fresh for up to 5 days, but the texture is best within the first 2–3 days when the crust is still slightly crisp. In the Freezer For longer storage, freezing works really well. Slice the cheesecake first, then wrap each slice tightly in plastic wrap and a layer of foil. Place them in an airtight container and freeze for up to 2 months. This makes it easy to grab single servings whenever you want a quick dessert. How to Thaw When you’re ready to enjoy it, simply move the slices from the freezer to the refrigerator and let them thaw overnight. This slow thaw keeps the texture smooth and creamy instead of watery or grainy. Try More No-Bake Dessert Frequently Asked Questions Final Thoughts on This No Bake Funfetti Cheesecake This No Bake Funfetti Cheesecake is one of those desserts that proves simple really can be special. It doesn’t need an oven or any complicated steps just a little mixing, folding, and patience while it chills. Every time I make it, I’m reminded how something so easy can still feel fun, colorful, and a little nostalgic. What I love most is how reliable it is. Whether it’s for a birthday, a casual get-together, or just a sweet craving at home, it always turns out creamy, light, and full of that classic funfetti charm. It’s the kind of recipe you keep coming back to because it never disappoints.