
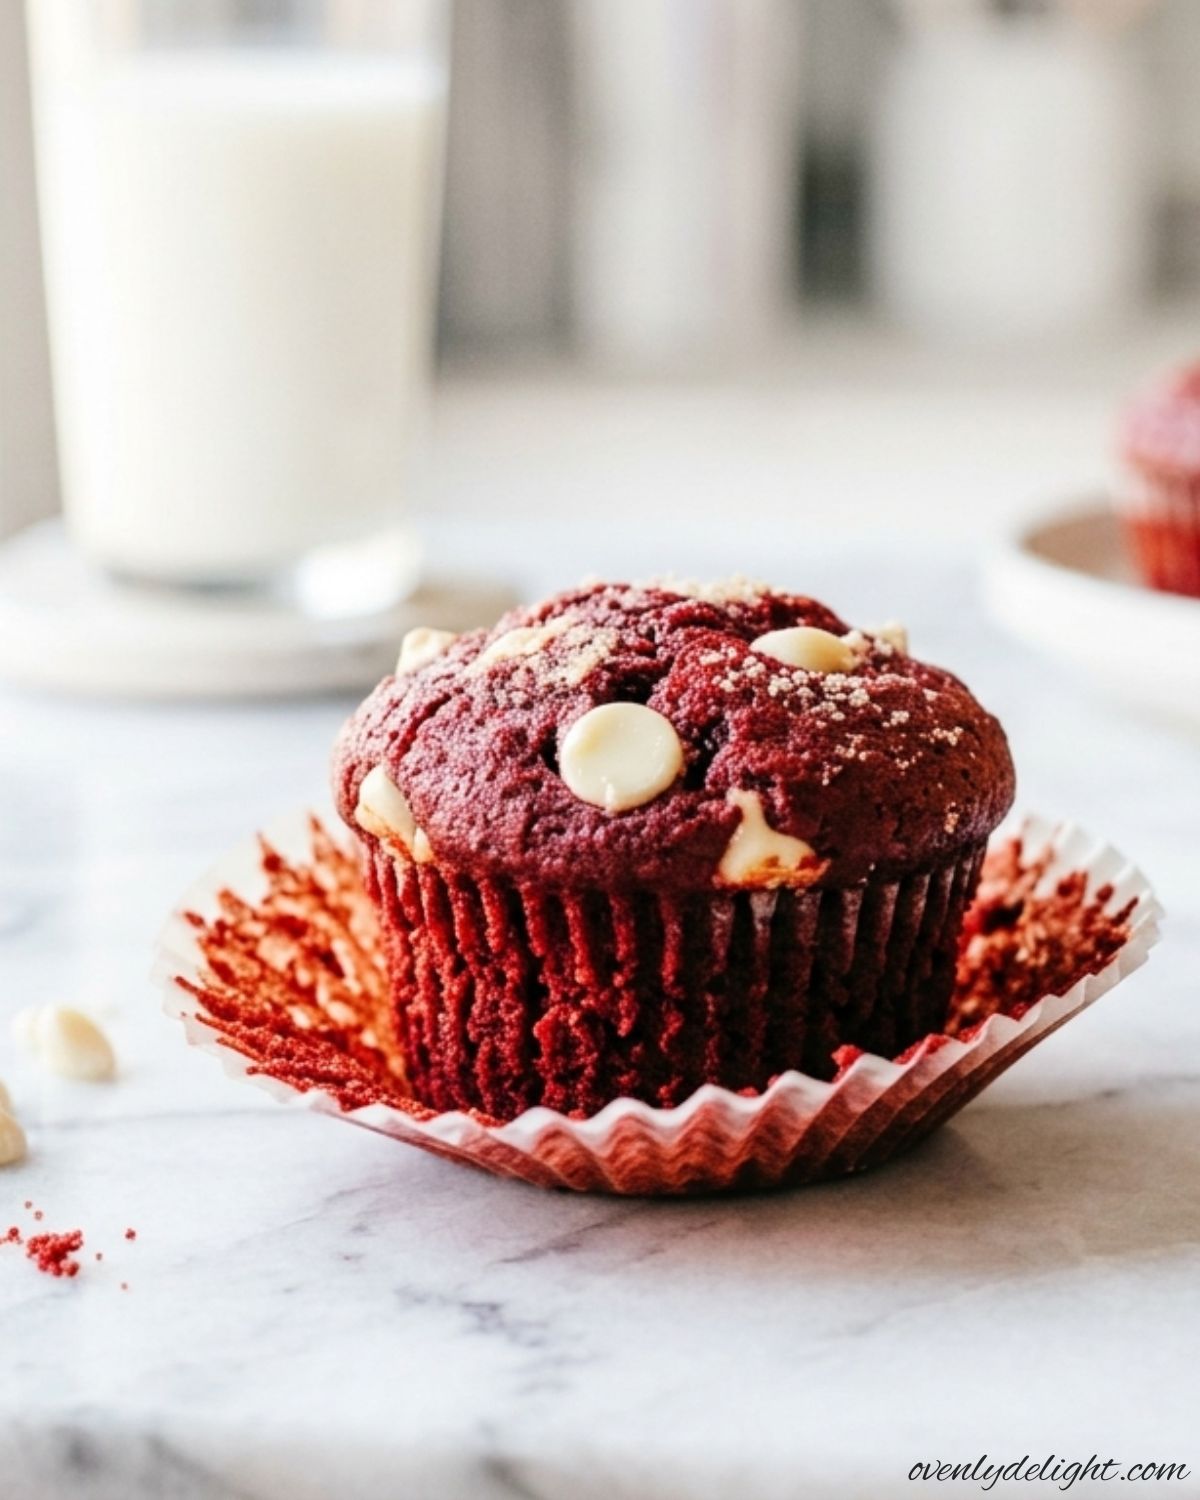
I love baking these Red Velvet Chocolate Chip Muffins whenever I want something soft, rich, and easy to make. They have a light cocoa flavor, a tender crumb, and plenty of chocolate chips in every bite, making them perfect for breakfast, brunch, or an afternoon treat. After testing this recipe several times, I found the right balance of moisture and flavor to create bakery-style muffins that turn out delicious and reliable every time. Why You’ll Love These Bakery-Style Red Velvet Chocolate Chip Muffins Soft and Moist Texture Every bite is tender, fluffy, and perfectly moist thanks to the balanced combination of ingredients. These homemade muffins have a light crumb that stays fresh, making them ideal for enjoying the same day or saving for later. Loaded with Chocolate Chips Each muffin is packed with melty chocolate chips that add rich sweetness and extra flavor. They create delicious pockets of chocolate throughout the muffins without overpowering the classic red velvet taste. Easy to Make from Scratch This recipe uses simple pantry staples and comes together with minimal effort. Whether you’re an experienced baker or trying homemade muffins for the first time, the easy steps make the process stress-free and reliable. Perfect for Any Occasion These chocolate chip muffins are a great choice for breakfast, brunch, lunchboxes, holiday gatherings, bake sales, or an afternoon coffee break. They look beautiful and are easy to share with family and friends. Bakery-Style Results at Home The muffins bake with tall, fluffy tops and a soft interior that rivals your favorite bakery. After testing this recipe multiple times, I found the right method for creating consistent, delicious results in a home kitchen. Great for Make-Ahead and Freezing Bake a batch in advance and enjoy them throughout the week. They store well at room temperature, stay moist in the refrigerator, and freeze beautifully, making them perfect for meal prep or whenever you need a quick homemade treat. Ingredients for Red Velvet Chocolate Chip Muffins How to Make Bakery-Style Red Velvet Chocolate Chip Muffins 1. Prepare the Oven and Muffin Pan Preheat your oven to 375°F (190°C) and place the oven rack in the center position. Line a standard 12-cup muffin pan with paper liners so the muffins release easily after baking. 2. Mix the Dry Ingredients In a large mixing bowl, whisk together the all-purpose flour, natural cocoa powder, baking powder, baking soda, and salt until well combined. If your cocoa powder has any lumps, sift it first to ensure a smooth batter and even chocolate flavor. 3. Combine the Wet Ingredients In a separate bowl, whisk together the melted butter and vegetable oil until blended. Add the eggs one at a time, then mix in the vanilla extract, distilled white vinegar, and red food coloring until the color is completely smooth with no streaks remaining. 4. Make the Muffin Batter Gradually add the dry ingredients to the wet mixture, alternating with the buttermilk in three additions. Stir gently after each addition and stop mixing as soon as the flour disappears. Overmixing can make the muffins dense instead of light and fluffy. 5. Fold in the Chocolate Chips and Fill the Pan Using a spatula, gently fold in the white chocolate chips, reserving a small handful for the tops. Divide the batter evenly among the prepared muffin cups, filling each about ¾ full. Sprinkle the reserved chocolate chips over each muffin for a beautiful bakery-style finish. 6. Bake and Cool Bake for 16–18 minutes, or until a toothpick inserted into the center comes out clean or with a few moist crumbs. Let the muffins cool in the pan for 5 minutes, then transfer them to a wire rack to cool completely before serving. Expert Tips for Bakery-Style Red Velvet Muffins Use Room-Temperature Ingredients For the smoothest batter, let the eggs and buttermilk come to room temperature before mixing. Also, allow the melted butter to cool slightly so it blends evenly without separating. Choose Natural Cocoa Powder Natural cocoa powder works best in this recipe because it reacts with the vinegar and baking soda, helping the muffins rise properly while creating the classic red velvet flavor and color. Use Gel Food Coloring Gel food coloring produces a deeper, more vibrant red without adding extra liquid to the batter. It also gives more consistent results than standard liquid food coloring. Don’t Overmix the Batter Mix the wet and dry ingredients just until combined. Overmixing develops the gluten in the flour, which can make the muffins dense instead of soft and fluffy. Fill the Muffin Cups Evenly Use a cookie scoop or measuring cup to divide the batter evenly between the muffin liners. Filling each cup about three-quarters full helps create tall, bakery-style muffin tops. Check for Doneness Carefully Start checking the muffins after 16 minutes. A toothpick inserted into the center should come out clean or with a few moist crumbs. Avoid overbaking, as it can dry out the muffins and reduce their soft texture. Ingredient Substitutions for Homemade Red Velvet Muffins Buttermilk Substitute If you don’t have buttermilk, mix ¾ cup (180ml) regular milk with ¾ tablespoon lemon juice or white vinegar. Let it sit for 5 minutes before using. This creates a similar tangy flavor and helps keep the muffins tender. White Chocolate Chip Alternatives Swap the white chocolate chips with semisweet chocolate chips, milk chocolate chips, dark chocolate chips, or chopped pecans for a different flavor and texture. Each option pairs well with the rich cocoa notes. Dairy-Free Option Replace the buttermilk with ¾ cup (180ml) unsweetened almond milk, soy milk, or oat milk mixed with ¾ tablespoon vinegar. Use a dairy-free butter alternative to maintain a soft, moist crumb. Gluten-Free Option Use a 1:1 gluten-free all-purpose flour blend in place of regular flour. A blend that contains xanthan gum generally provides the best texture for homemade muffins. Egg-Free Option Replace each egg with 1 tablespoon ground flaxseed mixed with 3 tablespoons water. Let the mixture rest for 5 minutes before adding it to the batter.
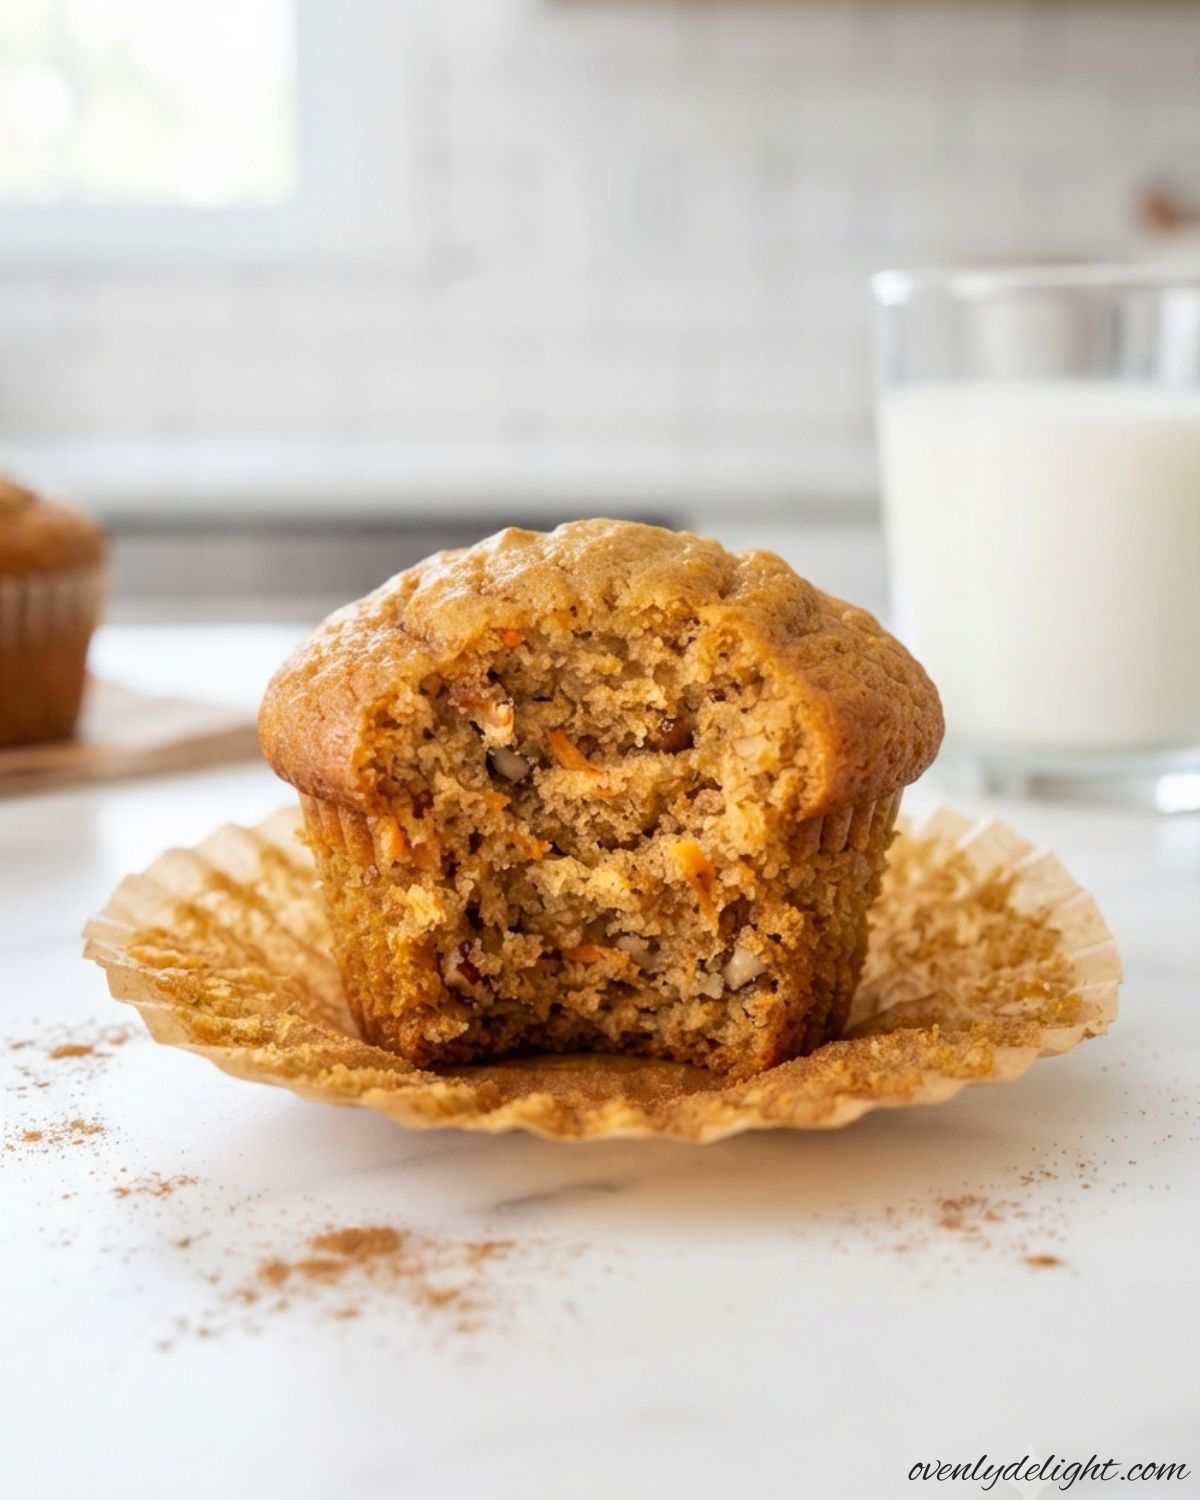
Carrot Cake Muffins Recipe (Moist & Easy From Scratch)
I love making these Carrot Cake Muffins whenever I want an easy homemade treat that works for breakfast, a snack, or dessert. They’re soft, moist, and filled with freshly grated carrots and warm spices, giving them all the cozy flavors of classic carrot cake in a simple muffin form. This recipe uses everyday ingredients, comes together quickly, and bakes into delicious bakery-style muffins every time. Why This Carrot Muffin Recipe Works Ingredients You’ll Need for Carrot Muffins How to Make Moist Carrot Cake Muffins Step 1: Prepare the Oven and Muffin Pan Preheat your oven to 350°F (175°C) and place the oven rack in the center position for even baking. Line a standard 12-cup muffin pan with paper liners or lightly grease each cup with nonstick spray. Preparing the pan before mixing the batter ensures the baking powder and baking soda start working as soon as the muffins go into the oven. Step 2: Mix the Dry Ingredients In a large mixing bowl, whisk together the all-purpose flour, ground cinnamon, ground nutmeg, baking powder, baking soda, and salt until everything is evenly combined. This helps distribute the leavening agents and spices throughout the batter so every muffin bakes evenly and has the same delicious flavor. Step 3: Combine the Wet Ingredients In a separate bowl, whisk together the vegetable oil, brown sugar, and granulated sugar until smooth. Add the eggs one at a time, then mix in the vanilla extract and milk until fully combined. The mixture should be smooth and well blended before adding the dry ingredients. Step 4: Make the Muffin Batter Pour the dry ingredients into the bowl of wet ingredients and gently fold everything together using a rubber spatula. Mix only until the flour disappears. A few small lumps are perfectly fine and will bake out in the oven. Overmixing develops too much gluten, which can make the muffins dense instead of soft and tender. Step 5: Add the Carrots and Fill the Muffin Pan Fold the freshly grated carrots and chopped walnuts, if using, into the batter with just a few gentle strokes. Divide the batter evenly among the prepared muffin cups, filling each about three-quarters full. Using an ice cream scoop makes it easy to portion the batter evenly so all the muffins bake at the same rate. Step 6: Bake, Cool, and Serve Bake the muffins for 22–25 minutes, or until the tops are lightly golden and a toothpick inserted into the center comes out clean or with a few moist crumbs. Let the muffins cool in the pan for about 5 minutes before transferring them to a wire rack to cool completely. Enjoy them warm, or store them in an airtight container to keep them soft and moist for several days. Expert Tips for Easy Homemade Carrot Cake Muffins Use Freshly Grated Carrots Freshly grated carrots contain more natural moisture than pre-shredded carrots, helping keep the muffins soft and tender. They also blend more evenly into the batter, giving every bite the perfect texture and natural sweetness. Measure the Flour Correctly Spoon the flour into your measuring cup and level it off with a knife instead of scooping directly from the bag. This prevents adding too much flour, which can make the muffins dry, heavy, and less fluffy. Use Room-Temperature Ingredients Allow the eggs and milk to sit at room temperature for about 20–30 minutes before mixing. They combine more easily with the other ingredients, creating a smoother batter that bakes evenly. Avoid Overmixing the Batter Gently fold the wet and dry ingredients together until no dry flour remains. A few small lumps are perfectly normal. Overmixing develops the gluten in the flour, resulting in muffins that are dense and chewy instead of light and tender. Fill the Muffin Cups Evenly Fill each muffin cup about three-quarters full to give the batter enough room to rise while creating tall, bakery-style muffin tops. Using an ice cream scoop helps portion the batter evenly so every muffin bakes at the same rate. Don’t Overbake the Muffins Start checking the muffins a few minutes before the baking time ends. Insert a toothpick into the center of a muffin. If it comes out clean or with a few moist crumbs attached, they’re ready. Overbaking is one of the quickest ways to dry out homemade muffins. Cool Before Storing Let the muffins cool in the pan for about 5 minutes before transferring them to a wire rack. Once completely cool, store them in an airtight container to keep them fresh, soft, and moist for several days. Easy Ingredient Swaps and Variations Oil Substitute If you don’t have vegetable oil, use the same amount of melted coconut oil or canola oil. Both keep the muffins moist and tender, and the overall texture remains very similar to the original recipe. Gluten-Free Flour Option Replace the all-purpose flour with a 1:1 gluten-free baking blend, such as Bob’s Red Mill Gluten-Free 1:1 Baking Flour. The muffins may be slightly denser, but they will still have a soft crumb and plenty of carrot cake flavor. Dairy-Free Milk Substitute For a dairy-free version, use oat milk, almond milk, or another unsweetened plant-based milk in the same amount as regular milk. These options provide enough moisture without changing the flavor significantly. Egg-Free Substitute Replace the two eggs with two flax eggs by mixing 2 tablespoons ground flaxseed with 6 tablespoons water. Let the mixture rest for about 5 minutes before adding it to the batter. The muffins will be slightly more tender and may not rise quite as high, but they will still be delicious. Nut-Free or Different Mix-In Option If you don’t have walnuts, chopped pecans make an excellent substitute and provide a similar crunch. For a nut-free version, simply leave the nuts out or replace them with about ⅓ cup raisins for a naturally sweet and chewy addition. How to Store and Freeze Carrot Muffins Store at Room Temperature Once the muffins have cooled completely, place them in an airtight container
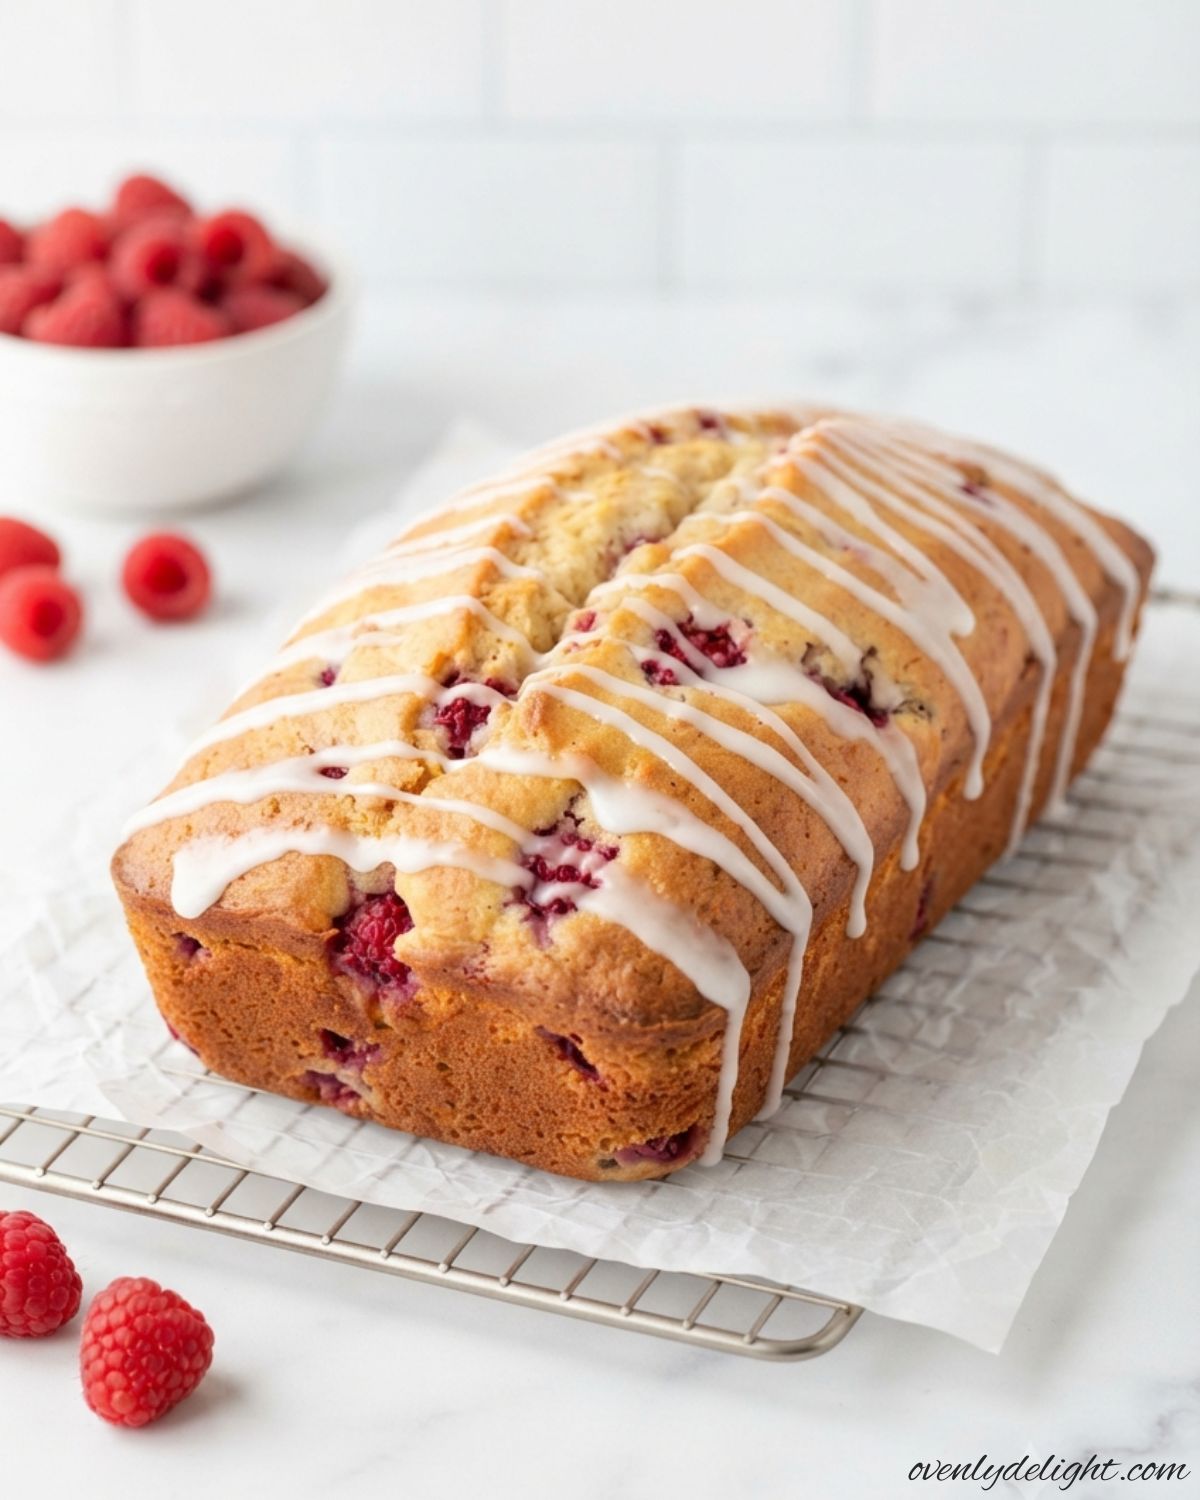
Raspberry Bread (Moist, Bakery-Style, No-Fail)
Whenever I have fresh raspberries on hand, this Raspberry Bread is one of the first recipes I bake. I love how the juicy berries melt into the soft, tender loaf, adding little bursts of sweetness in every bite. It’s one of those simple recipes I can always count on because it comes together with everyday ingredients and turns out beautifully every time. Whether I’m enjoying a slice with my morning coffee, serving it for brunch, or sharing it with family and friends, this Raspberry Bread never lasts long. If you’re looking for an easy homemade quick bread that’s moist, fruity, and full of fresh flavor, this recipe is sure to become a favorite. Why You’ll Love This Moist Raspberry Bread Ingredients for Raspberry Bread Dry Ingredients Wet Ingredients For the Raspberries Optional Vanilla Glaze How to Make Homemade Raspberry Bread (Step by Step) 1. Preheat the Oven and Prepare the Pan Preheat your oven to 350°F (175°C) and position a rack in the center. Grease a 9×5-inch loaf pan and line it with parchment paper, leaving an overhang on the sides so you can easily lift the Raspberry Bread out after baking. This also makes cleanup much easier. 2. Mix the Dry Ingredients In a medium bowl, whisk together the all-purpose flour, baking powder, and salt until evenly combined. Whisking helps distribute the baking powder throughout the flour, giving your Raspberry Bread an even rise and soft texture. 3. Whisk the Wet Ingredients In a large mixing bowl, whisk together the melted butter, vegetable oil, and granulated sugar until smooth. Add the eggs one at a time, mixing well after each addition. Stir in the vanilla extract, then whisk in the buttermilk until the mixture is smooth and creamy. 4. Combine the Batter Gradually add the dry ingredients to the wet ingredients, stirring gently until just combined. Be careful not to overmix, as this can make the Raspberry Bread dense and tough instead of light and tender. A few small lumps in the batter are perfectly fine. 5. Fold in the Raspberries Toss the raspberries with 1 tablespoon of flour, then gently fold them into the batter using a spatula. Coating the berries with flour helps keep them evenly distributed throughout the Raspberry Bread instead of sinking to the bottom. Fold gently to keep the raspberries intact. 6. Fill the Loaf Pan Pour the batter into the prepared loaf pan and smooth the top with a spatula. If you’d like a bakery-style look, gently press a few extra raspberries onto the surface before baking for a beautiful finish. 7. Bake the Raspberry Bread Bake for 55–65 minutes, or until a toothpick inserted into the center comes out clean or with a few moist crumbs attached. If the top begins to brown too quickly, loosely cover it with aluminum foil during the last 15–20 minutes. Every oven is different, so start checking for doneness around the 55-minute mark. 8. Cool the Bread Let the Raspberry Bread cool in the pan for about 15 minutes. This allows the loaf to set properly and makes it less likely to break when removed. Carefully lift it out using the parchment paper and transfer it to a wire rack to cool completely. 9. Make the Vanilla Glaze (Optional) In a small bowl, whisk together the powdered sugar, vanilla extract, and 1 tablespoon of milk until smooth. Add a little more milk, one teaspoon at a time, until the glaze is thick but easy to drizzle. 10. Glaze, Slice, and Enjoy Drizzle the vanilla glaze over the completely cooled Raspberry Bread and let it set for about 10 minutes before slicing. Enjoy a slice with your morning coffee, afternoon tea, or as a simple homemade dessert. The bread is delicious on its own, but the glaze adds an extra touch of sweetness. Expert Tips for the Best Raspberry Bread Recipe Raspberry Bread Ingredient Substitutions How to Store Raspberry Bread Recipe More Easy Bread Recipes You’ll Love Frequently Asked Questions Final Thoughts I always love having a loaf like this on the counter because it makes even an ordinary day feel a little more special. The soft texture, juicy berries, and simple ingredients come together to create something that’s both comforting and easy to share. I usually enjoy a slice with my morning coffee, but it’s just as good as an afternoon treat or a simple dessert after dinner. If you decide to bake it, I hope it brings as much joy to your kitchen as it does to mine. And if you put your own twist on it, I’d love to hear about it in the comments!
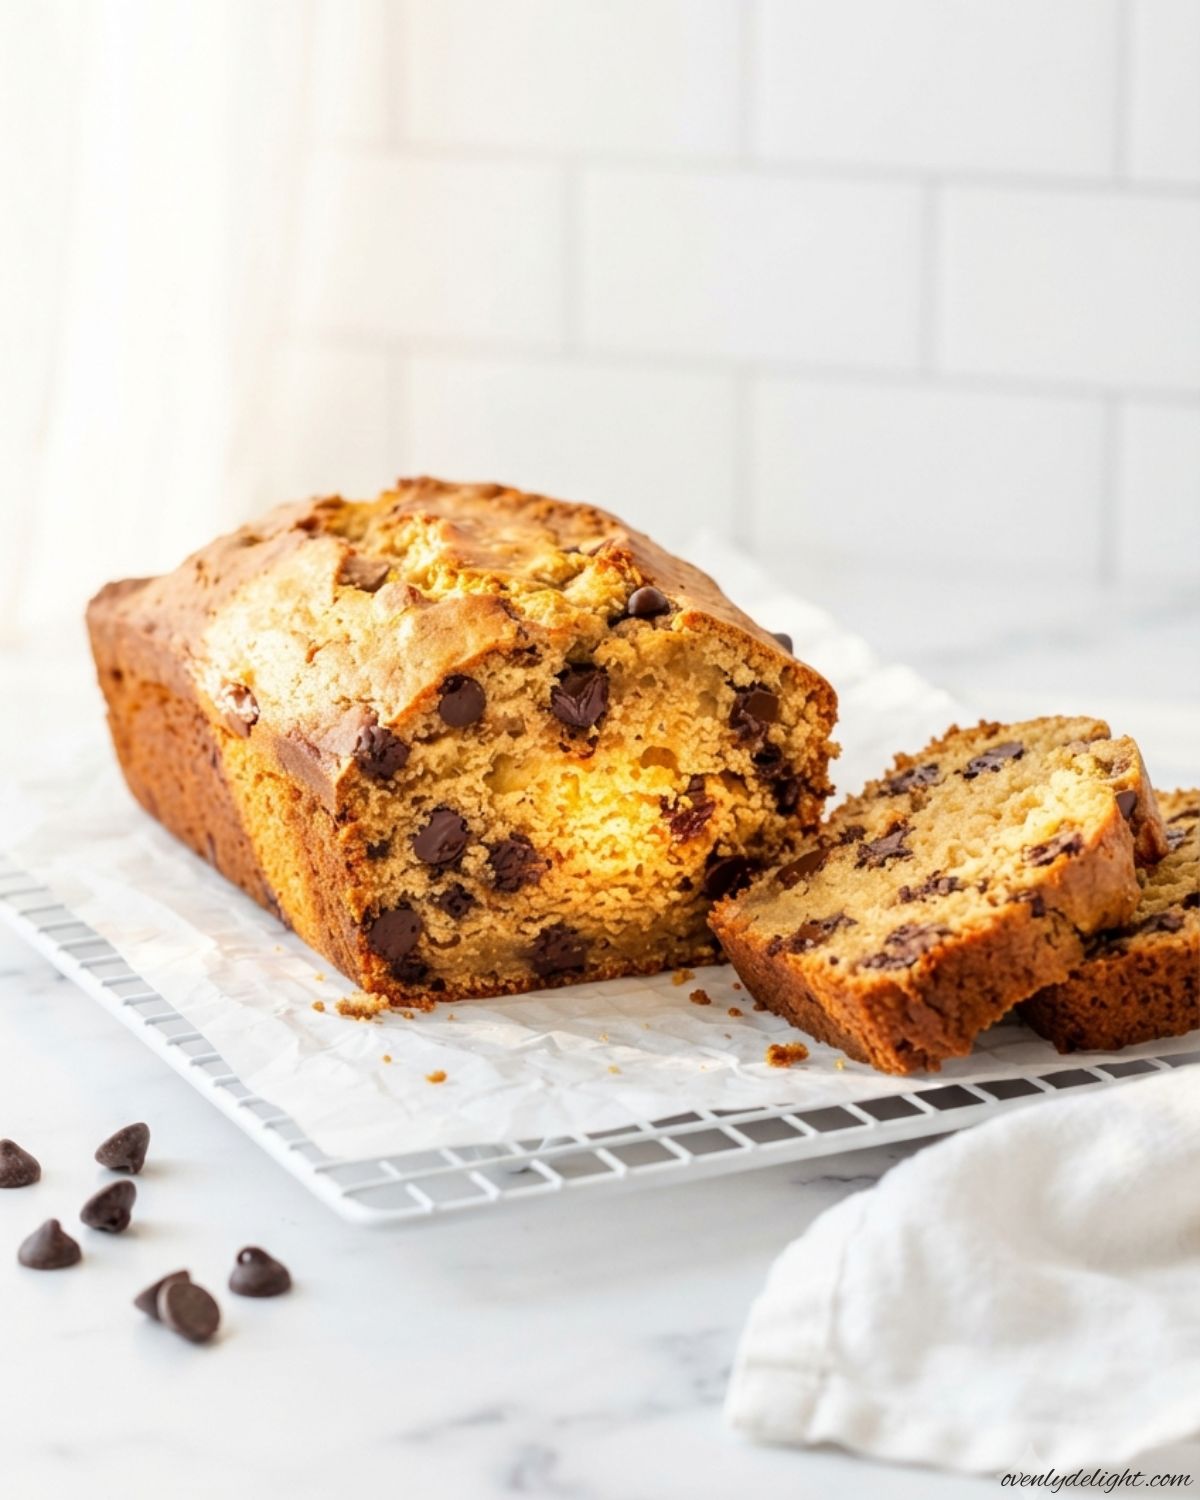
Peanut Butter Chocolate Chip Bread (Easy, Moist & No Mixer)
I love recipes that combine simple pantry ingredients into something truly special, and this Peanut Butter Chocolate Chip Bread is one of my favorites. With rich peanut butter, melty chocolate chips, and a soft, moist crumb, it’s perfect for breakfast, an afternoon snack, or dessert. Easy to make and full of homemade flavor, this Peanut Butter Chocolate Chip Bread is a recipe you’ll want to bake again and again. Why You’ll Love This Peanut Butter Chocolate Chip Bread What You’ll Need For Homemade Peanut Butter Bread How to Make Peanut Butter Chocolate Chip Bread (Step-by-Step) 1. Prepare the Oven and Pan Preheat your oven to 350°F (175°C) and position the oven rack in the center. Grease a 9×5-inch loaf pan with butter or nonstick spray, or line it with parchment paper, leaving an overhang on the sides so you can easily lift the bread out after baking. 2. Mix the Dry Ingredients In a large mixing bowl, whisk together the all-purpose flour, baking powder, and salt until everything is evenly combined. This helps distribute the baking powder throughout the batter for an even rise. 3. Combine the Wet Ingredients In another bowl, stir together the peanut butter and brown sugar until smooth and well combined. Add the egg and vanilla extract, mixing until fully incorporated. Then stir in the sour cream and milk until the mixture is smooth and creamy. Mixing the peanut butter and sugar well at the beginning helps prevent streaks of peanut butter in the finished loaf. 4. Make the Batter Pour the wet ingredients into the bowl of dry ingredients. Using a rubber spatula, gently fold everything together just until no dry flour remains. Avoid overmixing, as it can make the bread dense instead of soft and tender. 5. Add the Chocolate Chips Fold in the chocolate chips, reserving a small handful to sprinkle over the top before baking. This simple step gives the loaf a beautiful bakery-style appearance. 6. Bake and Cool Transfer the batter to the prepared loaf pan and smooth the top. Sprinkle the reserved chocolate chips over the surface. Bake for 55–65 minutes, or until a toothpick inserted into the center comes out with a few moist crumbs. If the top starts browning too quickly, loosely cover it with foil during the last 20–25 minutes of baking. Let the bread cool in the pan for 15 minutes, then transfer it to a wire rack and allow it to cool completely before slicing for the cleanest cuts. Expert Tips for the Best Peanut Butter Chocolate Chip Bread Don’t Overmix the Batter For a soft and tender Peanut Butter Chocolate Chip Bread, gently fold the wet and dry ingredients together just until no dry flour remains. Overmixing develops the gluten, which can make the loaf dense instead of light and moist. Use Room-Temperature Ingredients Let the egg, milk, sour cream, and peanut butter sit at room temperature for about 20–30 minutes before mixing. Room-temperature ingredients blend more smoothly, helping your Peanut Butter Chocolate Chip Bread bake evenly with a soft, fluffy texture. Toss the Chocolate Chips with Flour Coat the chocolate chips with a tablespoon of the flour before folding them into the batter. This simple trick helps keep the chips evenly distributed throughout the Peanut Butter Chocolate Chip Bread instead of sinking to the bottom. Check for Doneness Carefully Start checking the bread around the 55-minute mark by inserting a toothpick into the center. Your Peanut Butter Chocolate Chip Bread is ready when it comes out with a few moist crumbs but no wet batter. Cool Before Slicing Allow the bread to cool in the pan for about 15 minutes, then transfer it to a wire rack to cool completely. Waiting before slicing helps the Peanut Butter Chocolate Chip Bread set properly for clean, bakery-style slices. Store It the Right Way Once completely cooled, keep your Peanut Butter Chocolate Chip Bread in an airtight container at room temperature for up to 3 days or freeze individual slices for up to 3 months to enjoy whenever you like. Ingredient Substitutions Swap Sour Cream with Greek Yogurt Plain Greek yogurt is an excellent substitute for sour cream. It adds a slight tanginess while keeping the bread soft, moist, and rich. Use a Gluten-Free Flour Blend To make this recipe gluten-free, replace the all-purpose flour with a 1:1 gluten-free baking flour blend, such as Bob’s Red Mill. The loaf may have a slightly denser crumb, but it will still bake beautifully. Replace Dairy Milk Whole milk can easily be swapped with almond milk or oat milk. While the bread may be a little less rich, it will still have a soft texture and delicious flavor. Try Natural Peanut Butter Natural peanut butter works well, but be sure to stir it thoroughly before measuring. Since the oil naturally separates, mixing it first helps create a smooth batter and consistent texture. Make It Egg-Free For an egg-free version, replace the egg with ¼ cup unsweetened applesauce. The loaf will be slightly denser, but it will remain moist and flavorful. Make It Dairy-Free To make the recipe dairy-free, use your favorite dairy-free yogurt instead of sour cream and substitute the milk with oat milk or another plant-based alternative. The bread will still bake up soft and tender with only a slight difference in richness. How to Store Your Peanut Bread Store at Room Temperature After the bread has cooled completely, wrap it tightly in plastic wrap or place it in an airtight container. This helps lock in moisture and keeps the loaf soft and fresh for up to 3 days. Avoid leaving it uncovered, as it can dry out quickly. Refrigerate for Longer Freshness If you’d like to keep it a little longer, store the bread in an airtight container in the refrigerator for up to 7 days. Because refrigeration can firm up the crumb, let a slice sit at room temperature for a few minutes or warm it slightly before serving for the best flavor and texture.
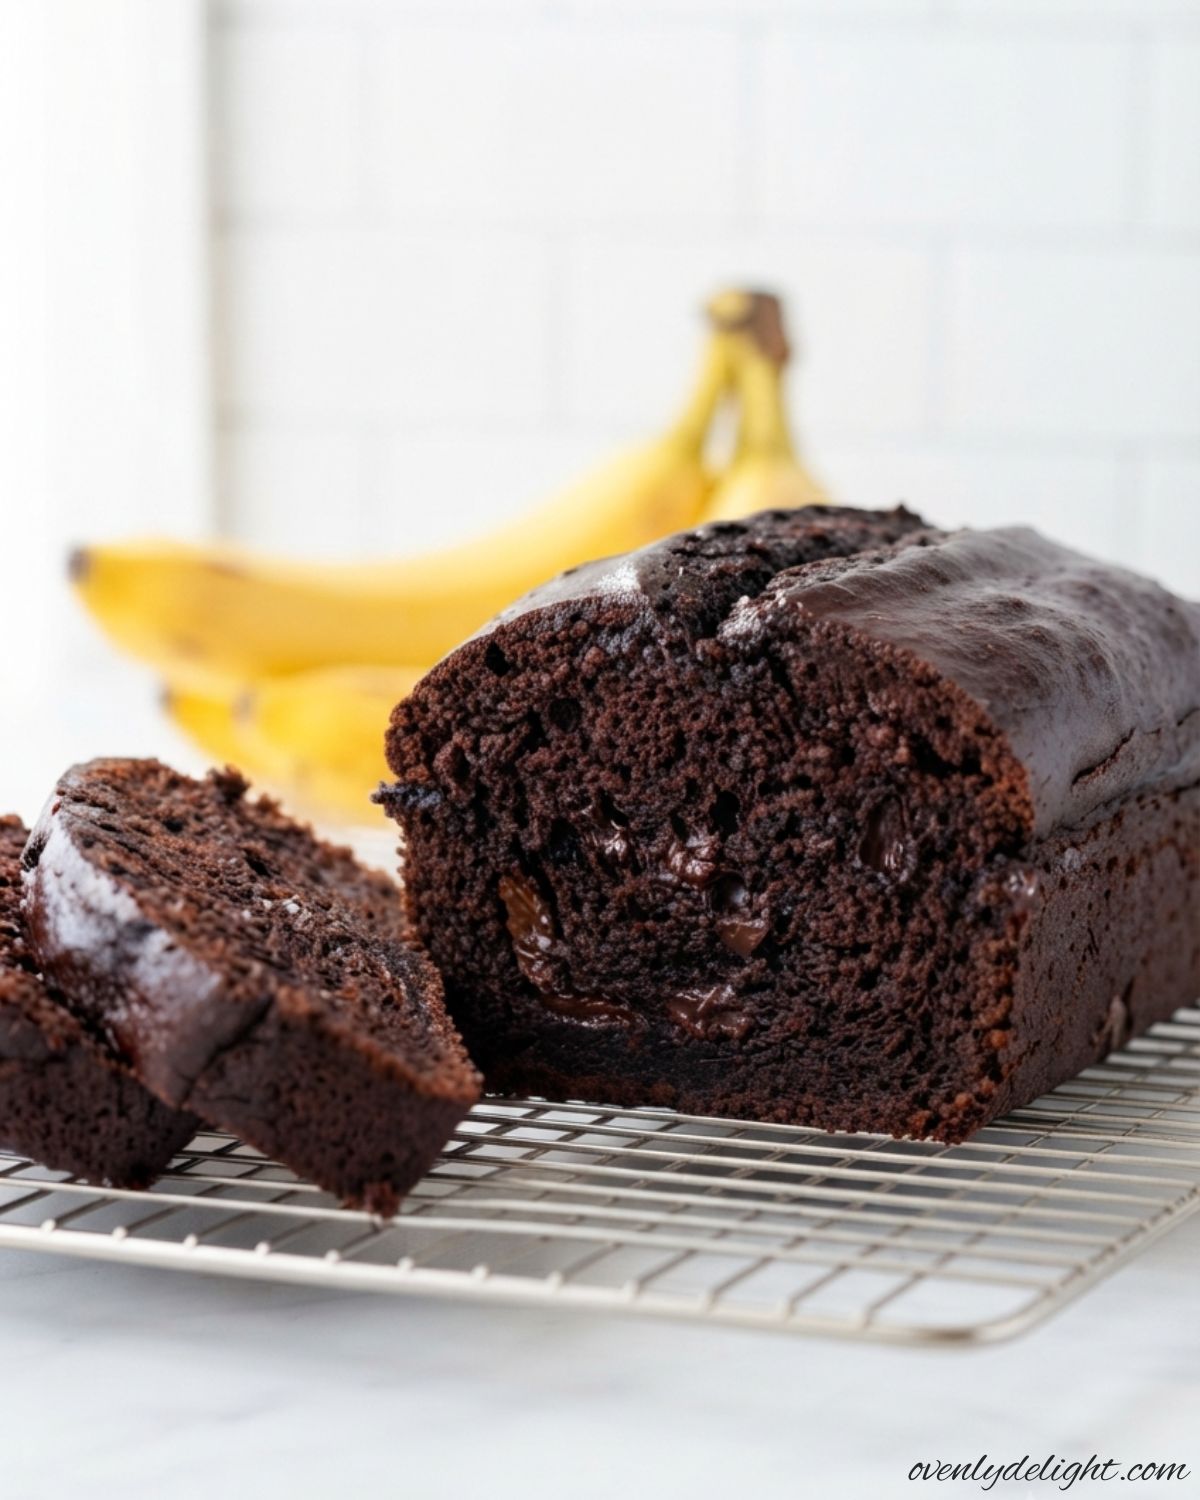
Double Chocolate Banana Bread (Moist & Fudgy Chocolate Banana Loaf)
I always look for a delicious way to use overripe bananas, and this Double Chocolate Banana Bread is my favorite. I first made it when I wanted something richer than classic banana bread, so I added cocoa powder and plenty of chocolate chips. One bite of the soft, moist loaf, and I knew it would become a regular recipe in my kitchen. Now I make this recipe whenever I have ripe bananas to use up. It’s rich, chocolatey, incredibly moist, and perfect for breakfast, an afternoon snack, or an easy dessert that everyone loves. Why You’ll Love This Double Chocolate Banana Bread Ingredients for This Recipe Dry Ingredients Wet Ingredients Mix-In How to Make Double Chocolate Banana Bread (Step-by-Step) 1. Prepare the Oven and Pan Preheat your oven to 350°F (175°C) and position a rack in the center. Grease a 9×5-inch loaf pan with butter or nonstick spray, or line it with parchment paper for easy removal after baking. 2. Mix the Dry Ingredients In a medium mixing bowl, whisk together the all-purpose flour, cocoa powder, baking powder, baking soda, and salt until everything is evenly combined. This ensures the leavening agents are distributed throughout the batter. 3. Combine the Wet Ingredients In a large bowl, whisk together the melted butter, granulated sugar, and brown sugar until smooth. Add the eggs one at a time, whisking well after each addition, then stir in the vanilla extract. 4. Add the Bananas Mix the mashed ripe bananas and sour cream into the wet ingredients until fully incorporated. The batter may look slightly lumpy, which is completely normal. 5. Make the Batter Gradually add the dry ingredients to the wet mixture and gently fold everything together with a spatula. Mix only until no dry streaks remain to keep the loaf soft and tender. 6. Fold in the Chocolate Chips Gently fold the chocolate chips into the batter, making sure they are evenly distributed. Reserve a small handful to sprinkle over the top for a bakery-style finish. 7. Bake Pour the batter into the prepared loaf pan and smooth the top with a spatula. Sprinkle the reserved chocolate chips over the surface and bake for 50–55 minutes, or until a toothpick inserted into the center comes out with a few moist crumbs. 8. Cool and Slice Let the bread cool in the pan for 15 minutes, then carefully transfer it to a wire rack to cool completely. Waiting until the loaf has cooled makes it easier to slice and helps the texture set perfectly. Expert Tips for the Best Results A few simple baking tips can make a big difference in the texture and flavor of your loaf. Follow these suggestions to achieve a moist, tender crumb and rich chocolate flavor every time. Use Very Ripe Bananas Choose bananas that are heavily speckled or mostly brown. The riper they are, the sweeter they become, adding more natural flavor and moisture to the bread. Measure the Flour Correctly For the best results, spoon the flour into your measuring cup and level it off with a knife, or use a kitchen scale if you have one. Adding too much flour can make the loaf dense instead of soft and fluffy. Bring the Eggs to Room Temperature Room-temperature eggs mix more smoothly into the batter and help create an even texture. If your eggs are cold, let them sit on the counter for about 20–30 minutes before baking. Avoid Overmixing the Batter Once the dry ingredients are added, gently fold everything together until just combined. Overmixing develops too much gluten, which can result in a tough loaf rather than a tender one. Line the Loaf Pan Lining the pan with parchment paper makes removing the bread much easier after baking. Leave a little paper hanging over the sides so you can lift the loaf out without damaging it. Measure the Bananas Use 1¼ cups of mashed ripe bananas rather than simply adding three large bananas. Too much banana can leave the center of the loaf overly moist and affect the final texture. Let the Bread Cool Completely Although it’s tempting to slice into the bread while it’s still warm, allowing it to cool completely helps the crumb set properly. This gives you cleaner slices and the best texture in every bite. Ingredient Substitutions Sour Cream If you don’t have sour cream on hand, replace it with an equal amount of plain Greek yogurt. It provides the same creamy texture and moisture while adding a slightly tangy flavor that pairs well with the chocolate and bananas. All-Purpose Flour To make this recipe gluten-free, use a 1:1 gluten-free baking flour blend in place of the all-purpose flour. Choose a blend that contains xanthan gum for the best texture. The loaf may be slightly denser, but it will still be soft and delicious. Unsalted Butter Melted coconut oil is an excellent substitute for butter if you need a dairy-free option. It keeps the bread moist and tender while adding a very subtle coconut flavor that complements the chocolate. Eggs For an egg-free version, replace the eggs with two flax eggs made by mixing 2 tablespoons of ground flaxseed with 5 tablespoons of water. Let the mixture rest for about 5 minutes until it thickens before adding it to the batter. The bread will be slightly denser but still moist and flavorful. Chocolate Chips Instead of regular chocolate chips, you can use chopped dark chocolate or chocolate chunks for larger pockets of melted chocolate throughout the loaf. Milk or semi-sweet chocolate also works well if you prefer a sweeter flavor. How to Store Chocolate Banana Bread Proper storage helps keep this loaf soft, moist, and full of chocolate flavor for days after baking. Always allow the bread to cool completely before storing, as wrapping it while warm can trap steam and make the texture gummy. Once cooled, use an airtight container or proper wrapping to protect the loaf from drying out. Room Temperature For short-term storage, keep the bread tightly

Raspberry Muffins (Fluffy, Bakery-Style & Bursting With Berries)
Some recipes never go out of style, and these Raspberry Muffins are one of them. Every bite is packed with juicy raspberries, a soft buttery crumb, and a hint of fresh lemon that makes them taste bright and irresistible. They’re the kind of muffins that disappear from the cooling rack almost as quickly as they come out of the oven. Whether you’re baking for a relaxed weekend breakfast, meal prepping for busy mornings, or serving something special with coffee, these bakery-style raspberry muffins are always a great choice. They’re simple to make, beautifully fluffy, and filled with fresh berry flavor in every bite. Why You’ll Love These Raspberry Muffins These Raspberry Muffins are soft, fluffy, and packed with juicy raspberries, making them a recipe you’ll want to bake again and again. They’re simple to prepare, full of fresh flavor, and perfect for breakfast, brunch, or an afternoon treat. Soft and Fluffy Texture These muffins have a light, tender crumb that stays wonderfully soft and moist. Thanks to the rich, buttery batter, every bite has a delicate texture that’s fluffy without being crumbly. They taste just like the oversized muffins you’d find at your favorite bakery. Bursting with Juicy Raspberries Every muffin is filled with plenty of raspberries, so you get bursts of sweet and tangy berry flavor throughout. As they bake, the raspberries become deliciously juicy, adding natural moisture and making each bite fresh, fruity, and irresistible. Made with Simple Ingredients You don’t need any specialty ingredients to make this recipe. Everything comes together with everyday pantry staples, making it an easy choice whenever you’re craving homemade muffins. Fresh or frozen raspberries both work beautifully, so you can enjoy these muffins all year long. Perfect for Any Time of Day These muffins are incredibly versatile. Serve them warm for breakfast, enjoy one with your afternoon coffee, pack them into lunchboxes, or place them on the brunch table when friends and family come over. They’re suitable for both everyday baking and special occasions. Bakery-Style Results at Home With their beautifully domed tops, golden edges, and soft centers, these muffins look just as impressive as they taste. They’re a simple way to recreate the classic bakery-style muffins at home without any complicated techniques. Great for Make-Ahead Baking These Raspberry Muffins stay fresh for several days when stored properly, making them perfect for busy mornings. They also freeze well, so you can bake a batch ahead of time and always have a homemade treat ready whenever you need a quick breakfast or snack. Ingredients for Raspberry Muffins Dry Ingredients Wet Ingredients Mix-In 1½ cups raspberries, fresh or frozen — if using frozen, keep them frozen until the moment you fold them in; don’t thaw. How to Make Raspberry Muffins (Step by Step) 1. Preheat the Oven Preheat your oven to 375°F (190°C) and line a 12-cup muffin tin with paper liners. Position the oven rack in the center so the muffins bake evenly and develop beautifully golden tops. 2. Combine the Dry Ingredients In a medium bowl, whisk together the flour, baking powder, baking soda, and salt until everything is evenly distributed. This helps the leavening agents mix throughout the batter, giving every muffin an even rise. 3. Cream the Butter and Sugar In a large mixing bowl, beat the softened butter and caster sugar with a hand mixer for about 2 minutes, or until the mixture becomes pale, light, and fluffy. This step incorporates air into the batter, which helps create soft, bakery-style muffins. 4. Add the Eggs and Flavorings Beat in the eggs one at a time, mixing well after each addition. Stir in the vanilla extract and freshly grated lemon zest until fully combined. The lemon zest adds a bright, fresh flavor that pairs perfectly with the sweet-tart raspberries. 5. Alternate the Dry Ingredients and Buttermilk With the mixer on low speed, add the flour mixture in three additions, alternating with the buttermilk, beginning and ending with the dry ingredients. Mix only until no dry streaks remain. Overmixing develops too much gluten, which can make the muffins dense instead of soft and tender I learned this the hard way after trying to make the batter perfectly smooth. 6. Fold in the Raspberries If desired, toss the raspberries with a tablespoon of flour to help prevent them from sinking. Using a rubber spatula, gently fold the berries into the batter with just a few strokes. Be careful not to overmix, especially if you’re using frozen raspberries, as they can break apart and color the batter. 7. Fill the Muffin Pan Divide the batter evenly among the prepared muffin cups, filling each about three-quarters full. This gives the muffins enough room to rise while creating tall, domed tops. 8. Bake Until Golden Bake for 16–18 minutes, or until the tops are lightly golden and spring back when gently pressed. A toothpick inserted into the center should come out clean or with a few moist crumbs attached. Avoid overbaking to keep the muffins moist. 9. Cool and Enjoy Let the muffins cool in the pan for about 5 minutes, then carefully transfer them to a wire rack to cool completely. Enjoy them warm or at room temperature, and store any leftovers in an airtight container to keep them fresh. Expert Tips for Perfect Raspberry Muffins Keep Frozen Raspberries Frozen If you’re using frozen raspberries, don’t thaw them before adding them to the batter. Fold them in straight from the freezer to help prevent the berries from bleeding their color and turning the batter purple. Use Room-Temperature Ingredients Let the eggs and buttermilk sit at room temperature for about 30 minutes before baking. They blend more easily into the batter, creating a smoother mixture and helping the muffins bake with a lighter, more even texture. Fill the Muffin Cups Generously Fill each muffin cup about three-quarters full so the muffins have enough batter to rise into tall, bakery-style domes. Using all the wells in the muffin pan also encourages even baking. Bake at
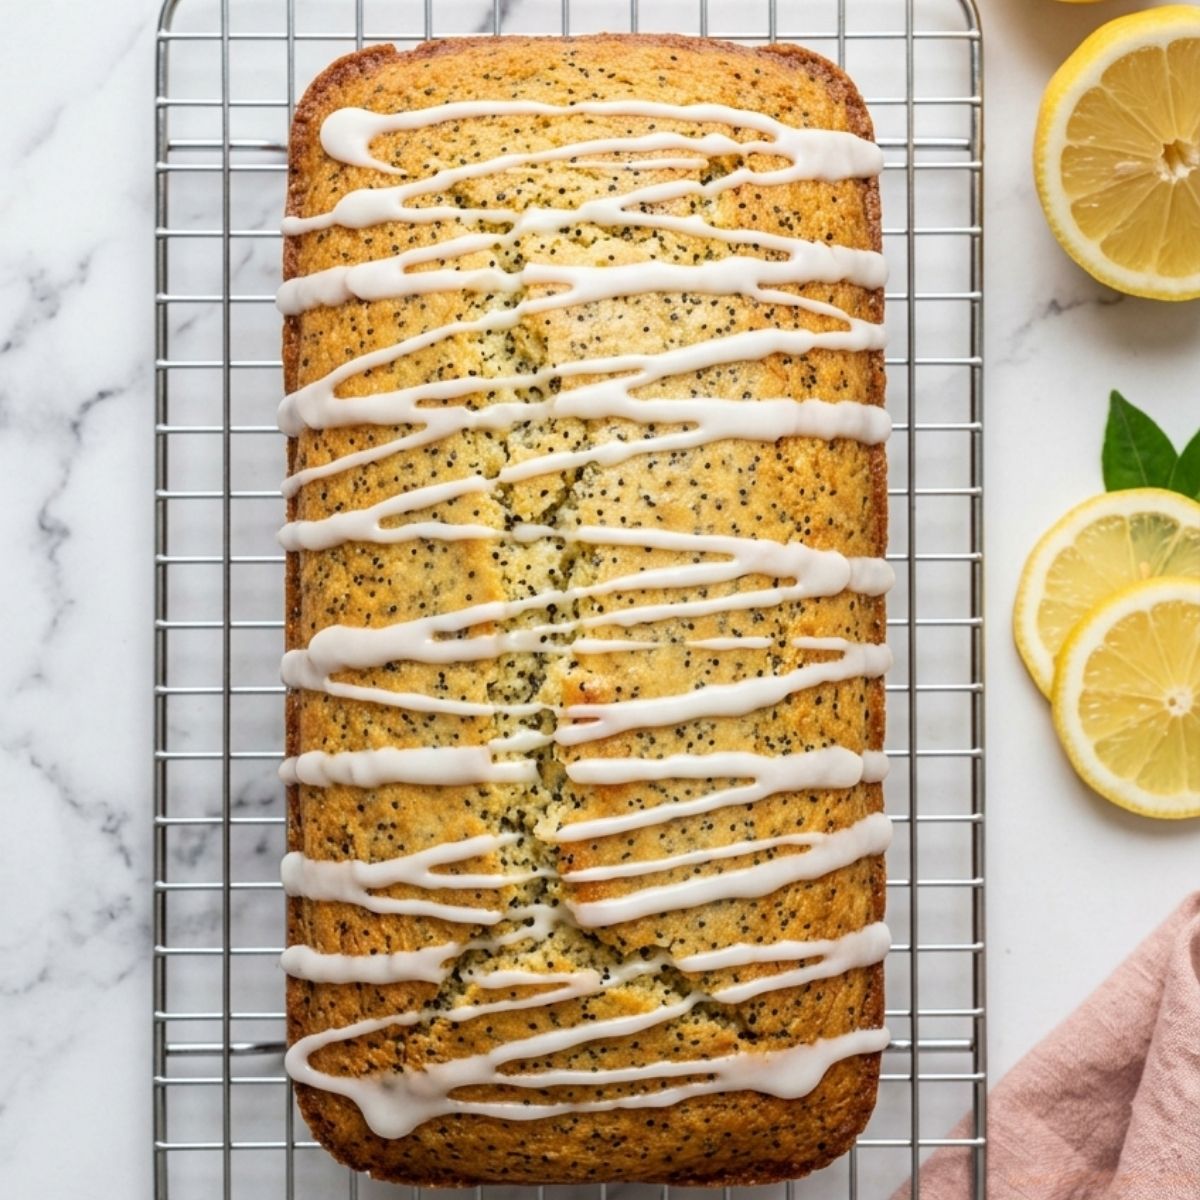
The Best Lemon Poppy Seed Bread with Fresh Lemon Glaze
If you’ve ever baked a Lemon Poppy Seed Bread that turned out dry, dense, or barely tasted like lemon, you’re not alone. Getting a loaf that’s soft, moist, and full of fresh citrus flavor can be trickier than it looks. A few small details like using fresh lemon zest, measuring the flour correctly, and avoiding overbaking make all the difference. This recipe focuses on those details, giving you a tender loaf with a bright lemon flavor and the perfect amount of poppy seeds in every slice. Finish it with a simple lemon glaze, or enjoy it plain for a light homemade treat that’s easy to bake any time of year. Why You’ll Love This Lemon Poppy Seed Bread Ingredients for Lemon Poppy Seed Bread Wet Ingredients Dry Ingredients For the Lemon Glaze How to Make Lemon Poppy Seed Bread (Step by Step) 1. Prepare the Pan Preheat the oven to 350°F (175°C). Grease a 9×5-inch loaf pan and line it with parchment paper, leaving an overhang on the long sides so you can easily lift the bread out after baking. 2. Mix the Wet Ingredients In a large mixing bowl, whisk together the canola oil, eggs, sour cream, milk, vanilla extract, and fresh lemon juice until the mixture is smooth and fully combined. 3. Combine the Dry Ingredients In a separate bowl, whisk together the all-purpose flour, granulated sugar, baking powder, and salt. Mixing them first helps distribute the leavening evenly throughout the batter. 4. Make the Batter Add the dry ingredients to the wet ingredients and gently fold everything together just until no dry streaks of flour remain. Avoid overmixing, as it can make the bread dense instead of light and tender. 5. Fold in the Lemon and Poppy Seeds Gently fold the lemon zest and poppy seeds into the batter until they’re evenly distributed. This ensures fresh lemon flavor and a little crunch in every slice. 6. Fill the Loaf Pan Pour the batter into the prepared loaf pan and spread the top into an even layer using a spatula. 7. Bake the Bread Bake for 50–55 minutes, or until a toothpick inserted into the center comes out clean or with just a few moist crumbs attached. If the top browns too quickly, loosely tent it with foil during the final 10–15 minutes. 8. Cool Completely Let the bread cool in the pan for about 15 minutes, then use the parchment overhang to lift it onto a wire rack. Allow it to cool completely before adding the glaze. 9. Make the Lemon Glaze Whisk together the powdered sugar and fresh lemon juice until smooth. Add a little more lemon juice for a thinner glaze or more powdered sugar for a thicker consistency. 10. Glaze and Serve Drizzle the lemon glaze over the cooled loaf and let it set for about 10 minutes before slicing. Serve as is, or garnish with a little extra lemon zest for a fresh finish. Expert Tips for the Best Lemon Poppy Seed Bread Zest Before You Juice Always zest the lemons before squeezing them. It’s much easier to remove the zest while the lemons are still whole, and you’ll get every bit of flavorful citrus peel. Use Room Temperature Ingredients Let the eggs, sour cream, and milk sit at room temperature for 20–30 minutes before baking. This helps the batter mix together smoothly and promotes an even rise. Mix the Batter Gently Fold the dry ingredients into the wet ingredients with a spatula instead of using an electric mixer. Gentle mixing keeps the gluten from overdeveloping, resulting in a softer, more tender loaf. Protect the Top While Baking If the bread starts browning before the center is fully baked, loosely cover it with aluminum foil during the last 15–20 minutes of baking to prevent the top from becoming too dark. Cool Before Adding the Glaze Allow the loaf to cool completely on a wire rack before drizzling on the lemon glaze. This helps the glaze set on top instead of melting into the bread. Ingredient Substitutions Use a Different Oil Canola oil can be replaced with an equal amount of vegetable oil, sunflower oil, or another neutral-flavored oil. Avoid strongly flavored oils, as they can overpower the fresh lemon taste. Swap the Sour Cream If you don’t have sour cream, use the same amount of full-fat plain Greek yogurt. It provides a similar richness and keeps the bread soft and moist. Choose Your Milk Whole milk creates the richest texture, but 2% milk also works well. In a pinch, you can use 1% milk, though the loaf may be slightly less tender. Try Another Citrus For a different flavor, replace the lemon zest and juice with fresh orange or lime. The bread will have the same soft texture with a new citrus twist. Skip the Poppy Seeds If you don’t have poppy seeds, simply leave them out. The bread will still bake beautifully with the same bright lemon flavor, just without the signature crunch. Make It Without the Glaze The lemon glaze is optional. For a less sweet loaf, dust the cooled bread with powdered sugar or enjoy it plain. How to Store Lemon Poppy Seed Bread Store at Room Temperature Once the bread has cooled completely, wrap it tightly in plastic wrap or store it in an airtight container. It will stay soft and moist at room temperature for up to 3 days. Refrigerate for Longer Freshness If you need to keep it longer, store the loaf in an airtight container in the refrigerator for up to 1 week. Let slices come to room temperature before serving for the best texture. Freeze for Later Wrap the whole loaf or individual slices tightly in plastic wrap, then place them in a freezer-safe bag or container. Freeze for up to 3 months. Thaw overnight in the refrigerator or at room temperature before enjoying. Store the Glazed Loaf If the bread is already glazed, allow the glaze to set completely before wrapping or storing.
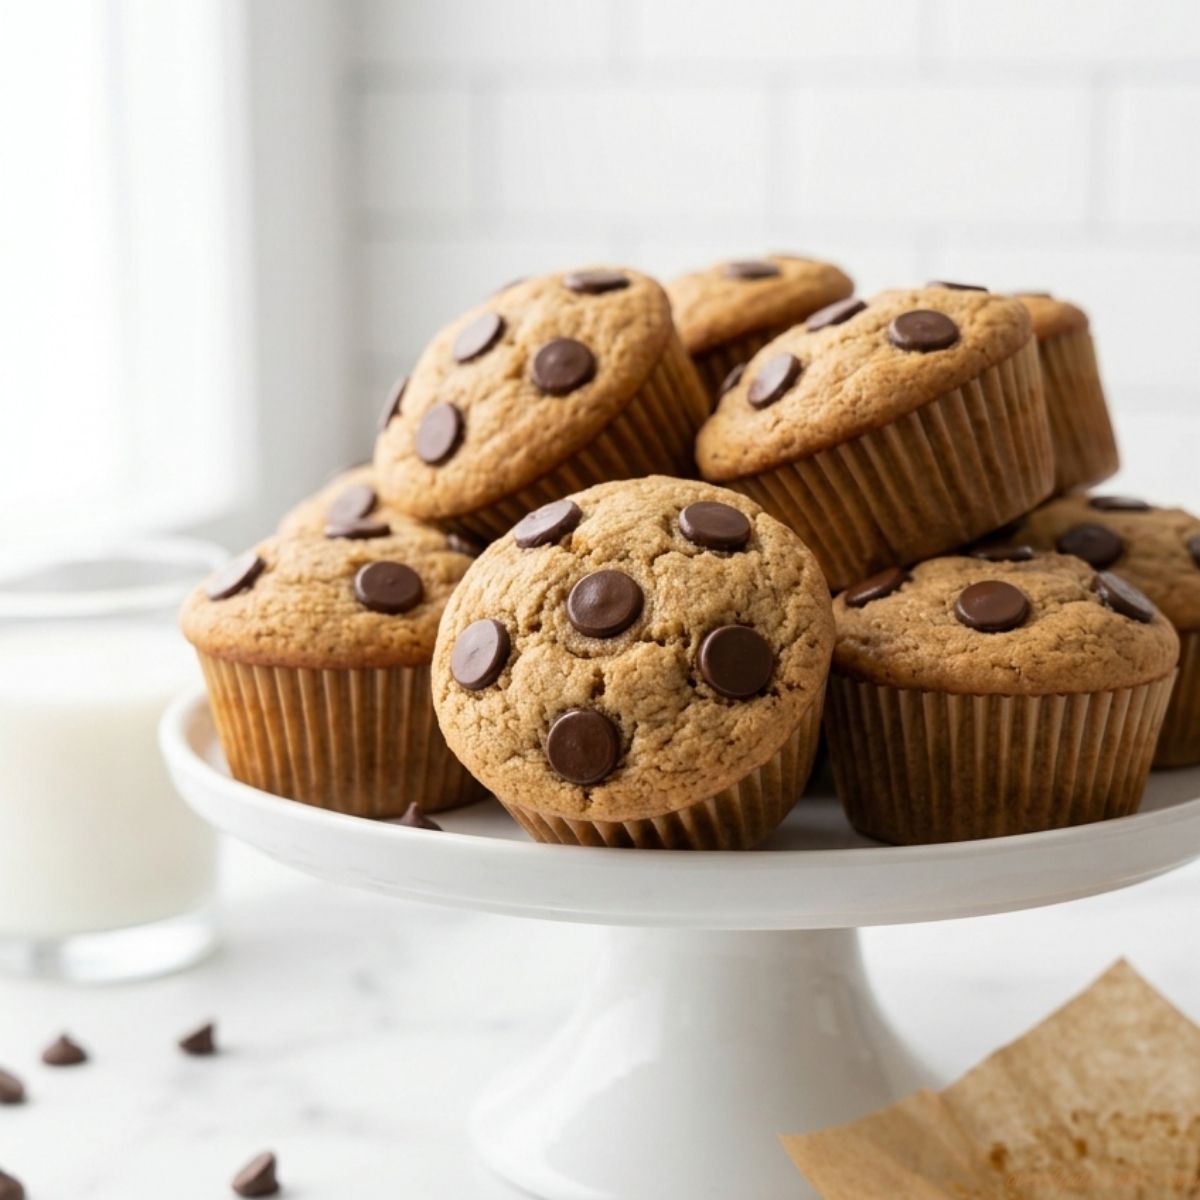
Peanut Butter Muffins (Soft, Bakery-Style & Ready in 35 Minutes)
If you’re anything like me, there’s always a jar of peanut butter sitting in the kitchen. Whenever I’m craving something homemade but don’t want to spend hours baking, these Peanut Butter Muffins are one of the first recipes I reach for. They’re soft, fluffy, and packed with rich peanut butter flavor without being overly sweet. I usually enjoy one while it’s still warm with a cup of coffee, and if there are any left, they disappear by the next morning. The recipe comes together with simple pantry staples, so you don’t need anything fancy to make a batch. Why You’ll Love These Peanut Butter Muffins These Peanut Butter Muffins are the kind of treat you’ll want to keep on repeat. They’re incredibly soft with a tender crumb and just the right amount of peanut butter flavor, making them perfect for breakfast, an afternoon pick-me-up, or a late-night sweet craving. What I love most is how effortless they are to make. There’s no fancy equipment or hard-to-find ingredients just a quick batter that’s ready for the oven in minutes. It’s the recipe I reach for when I want something homemade without spending half the day in the kitchen. You can keep them simple or make them your own by folding in chocolate chips, chopped peanuts, or even a pinch of cinnamon. However you make them, they stay wonderfully moist, freeze beautifully, and taste just as delicious the next day. Ingredients for This Peanut Butter Muffin Recipe How to Make Peanut Butter Muffins (step-bystep) Step 1: Prepare the Oven and Muffin Pan Preheat your oven to 425°F (220°C). Line a 12-cup muffin pan with paper liners or lightly grease each cup with nonstick spray. Starting with a hotter oven helps the muffins rise quickly and creates tall, bakery-style tops. After baking for 5 minutes, reduce the oven temperature to 375°F (190°C) without opening the oven door and continue baking until the muffins are golden and a toothpick inserted into the center comes out clean. Step 2: Mix the Dry Ingredients In a large mixing bowl, whisk together the all-purpose flour, baking powder, and salt until everything is well combined. This evenly distributes the baking powder throughout the flour, giving each muffin a light, fluffy texture. Step 3: Whisk the Wet Ingredients In a separate bowl, whisk together the vegetable oil, light brown sugar, creamy peanut butter, eggs, vanilla extract, and buttermilk until the mixture is smooth and creamy. Make sure the peanut butter is fully incorporated so every bite has rich peanut butter flavor. Step 4: Combine the Batter Pour the wet ingredients into the bowl of dry ingredients. Using a rubber spatula, gently fold the mixture together until no dry streaks of flour remain. The batter will be slightly thick with a few small lumps, and that’s exactly what you want. Avoid overmixing, as it can make the peanut butter muffins dense instead of soft and tender. Step 5: Fold in the Chocolate Chips Add the chocolate chips and gently fold them into the batter until they’re evenly distributed. If you like, save a small handful to sprinkle over the tops before baking for a bakery-style look. You can also leave them out for classic peanut butter muffins. Step 6: Fill the Muffin Cups Divide the batter evenly among the prepared muffin cups, filling each about ¾ full. Using an ice cream scoop makes this step quick and helps all the muffins bake evenly. Smooth the tops slightly if needed, then add a few extra chocolate chips for a prettier finish. Step 7: Bake the Peanut Butter Muffins Place the pan on the center rack and bake for 18–22 minutes. The muffins are done when the tops are lightly golden, spring back when gently pressed, and a toothpick inserted into the center comes out clean or with a few moist crumbs. Be careful not to overbake, as this can dry out the muffins. Step 8: Cool and Serve Let the peanut butter muffins cool in the pan for about 5 minutes before transferring them to a wire rack to cool completely. They’re delicious served warm while the chocolate chips are still melty, but they also stay soft for several days when stored in an airtight container. Expert Tips for Perfect Peanut Butter Muffins Use regular peanut butter.I recommend using a shelf-stable peanut butter like Jif or Skippy instead of natural peanut butter. Since natural peanut butter tends to separate, it can make the batter oily and change the texture of the muffins. Measure the flour the right way.Measure the flour the right way. Instead of scooping the flour straight from the bag, spoon it into your measuring cup and level it off with a knife. Accurate measuring helps prevent dry, dense muffins. If you need to convert cups, grams, or other baking measurements, use this Baking Measurement Converter for quick and accurate conversions. Let your ingredients warm up a bit.Cold eggs and buttermilk don’t mix as smoothly as room-temperature ingredients. If you have the time, let them sit on the counter for about 30 minutes before you start baking. Use the hot oven trick.Start baking the muffins at 425°F (220°C) for the first 5 minutes, then lower the temperature to 375°F (190°C) without opening the oven door. This is one of my favorite tricks for getting those tall, bakery-style muffin tops. Don’t overfill the muffin cups.Fill each cup about three-quarters full. It gives the muffins enough room to rise nicely without spilling over the edges. Move them to a wire rack.After baking, let the muffins rest in the pan for about 5 minutes, then transfer them to a wire rack. If they stay in the pan too long, the trapped steam can make the bottoms a little soggy. Save a few chocolate chips for the top.If you’re adding chocolate chips, press a few extra onto the batter just before baking. It makes the muffins look like they came straight from a bakery, and who doesn’t love a little extra chocolate?
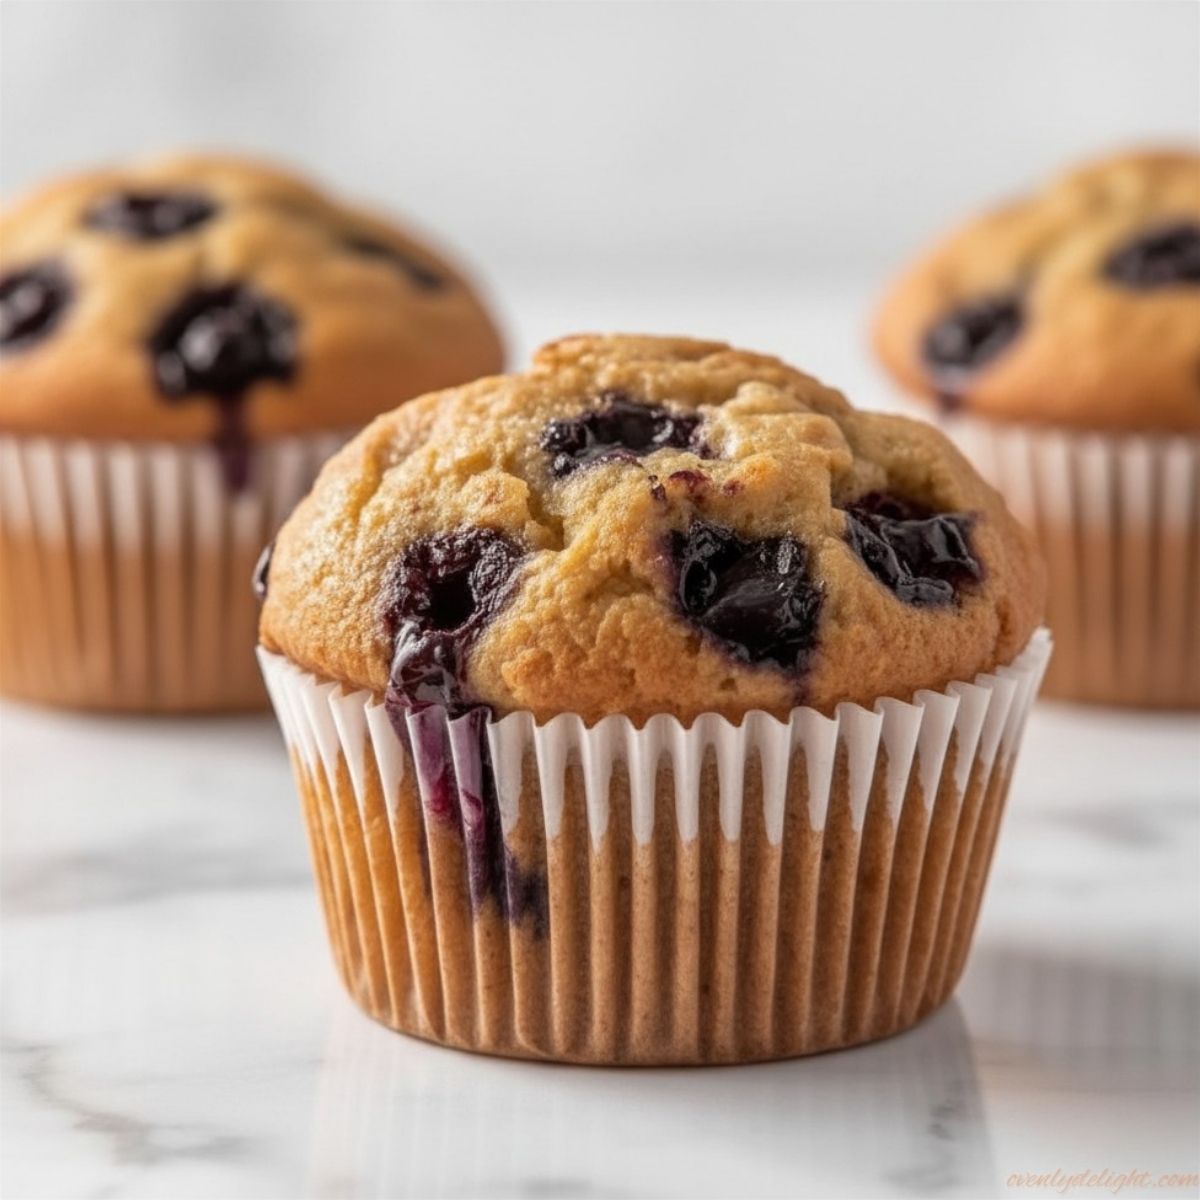
Best Banana Blueberry Muffins Recipe
I didn’t expect bananas and blueberries to work so well together until I baked my first batch of these muffins. The bananas keep everything soft and moist, while the blueberries add just enough freshness to balance the sweetness. Now it’s one of those recipes I make whenever I need an easy breakfast or snack for the week. Why You’ll Love These Banana Blueberry Muffins These Banana Blueberry Muffins are soft, moist, and full of sweet banana flavor with juicy blueberries in every bite. They’re easy to make with simple pantry ingredients, so you don’t need anything fancy to bake a delicious batch. They’re perfect for breakfast, snacks, or lunchboxes, and they stay fresh for days. You can even freeze them for later, making them a great recipe to have on hand whenever you’re craving homemade muffins. Another reason I love this recipe is how reliable it is. Whether you use fresh or frozen blueberries, the muffins bake up tender and flavorful every time, making them a recipe you can count on whenever you have ripe bananas to use. Ingredients for Banana Blueberry Muffins Dry Ingredients Wet Ingredients Mix-Ins How to Make Banana Blueberry Muffins (Step by Step) 1. Prepare the Oven and Muffin Pan Preheat your oven to 375°F (190°C) and place the oven rack in the center. Line a standard 12-cup muffin pan with paper liners or lightly grease each cup with nonstick spray to prevent sticking. 2. Mash the Bananas In a large mixing bowl, mash the ripe bananas with a fork until mostly smooth. A few small lumps are perfectly fine, but avoid leaving large chunks for an even batter. 3. Mix the Wet Ingredients Add the melted butter, brown sugar, and granulated sugar to the mashed bananas and whisk until well combined. Whisk in the eggs, vanilla extract, and sour cream until the mixture is smooth and creamy. 4. Add the Dry Ingredients Add the flour, baking powder, baking soda, and salt to the bowl. Using a spatula, gently fold the ingredients together just until no dry flour remains. The batter will be thick, so be careful not to overmix or the muffins may become dense. 5. Prepare the Blueberries If you’re using frozen blueberries, toss them with 2 teaspoons of flour before adding them to the batter. This simple step helps prevent the berries from sinking and keeps the batter from turning purple. Fresh blueberries can be added as they are. 6. Fold in the Blueberries Reserve a small handful of blueberries for the tops of the muffins. Gently fold the remaining blueberries into the batter with just a few strokes to avoid crushing the fruit. 7. Fill the Muffin Cups Divide the batter evenly among the 12 muffin cups, filling each about ¾ full. Sprinkle the reserved blueberries on top of each muffin for a beautiful bakery-style finish. 8. Bake the Muffins Bake for 18–22 minutes, or until the tops are lightly golden and a toothpick inserted into the center comes out clean or with a few moist crumbs. Start checking around the 18-minute mark to avoid overbaking. 9. Cool Before Serving Let the muffins cool in the pan for about 5 minutes, then carefully transfer them to a wire rack. Allow them to cool a little longer before serving so the blueberries can set and the muffins hold their shape. Expert Tips for Perfect Banana Blueberry Muffins Use Very Ripe Bananas Choose bananas with plenty of brown spots or even black peels. The riper they are, the sweeter and more flavorful your muffins will be, while also keeping the crumb extra moist. Let the Butter Cool Allow the melted butter to cool for about 5 minutes before mixing it with the eggs. This prevents the eggs from cooking and helps create a smooth, even batter. Keep Frozen Blueberries Frozen If you’re using frozen blueberries, add them straight from the freezer. Tossing them with a little flour helps prevent them from sinking and keeps the batter from turning purple. Don’t Skip the Sour Cream A small amount of sour cream makes a big difference. It adds moisture and creates a soft, tender texture. Full-fat Greek yogurt works well if you need a substitute. Add Extra Blueberries on Top Save a few blueberries to press onto the tops of the muffins before baking. It gives them a beautiful bakery-style appearance and adds extra bursts of juicy flavor. Measure Flour the Right Way Spoon the flour into your measuring cup and level it with a knife instead of scooping directly from the bag. This simple step helps keep the muffins light and fluffy instead of dense. Fill the Muffin Cups Evenly Use a large cookie scoop or measuring cup to divide the batter evenly. Uniform muffins bake at the same rate and come out with evenly rounded tops. Ingredient Substitutions Swap Sour Cream If you don’t have sour cream, use the same amount of full-fat Greek yogurt. It keeps the muffins soft and moist with a very similar texture. Use Salted Butter Salted butter works just fine. Simply omit the ¼ teaspoon of added salt to keep the flavor balanced. Make Them Gluten-Free Replace the all-purpose flour with a 1:1 gluten-free baking flour blend. The muffins may be slightly denser but will still be soft and delicious. Make Them Dairy-Free Swap the butter for melted coconut oil and use a full-fat dairy-free yogurt instead of sour cream. The muffins will still bake up moist and tender. Add a Streusel Topping For bakery-style muffins, sprinkle a simple streusel made with flour, brown sugar, butter, and cinnamon over the batter before baking. It adds a sweet, crunchy topping. Add Rolled Oats For a heartier muffin, replace ½ cup of the flour with old-fashioned rolled oats. This gives the muffins a slightly chewier texture that’s perfect for breakfast. How to Store Banana Blueberry Muffins Store at Room Temperature Keep the cooled muffins in an airtight container at room temperature for up to 3 days. Place a paper towel
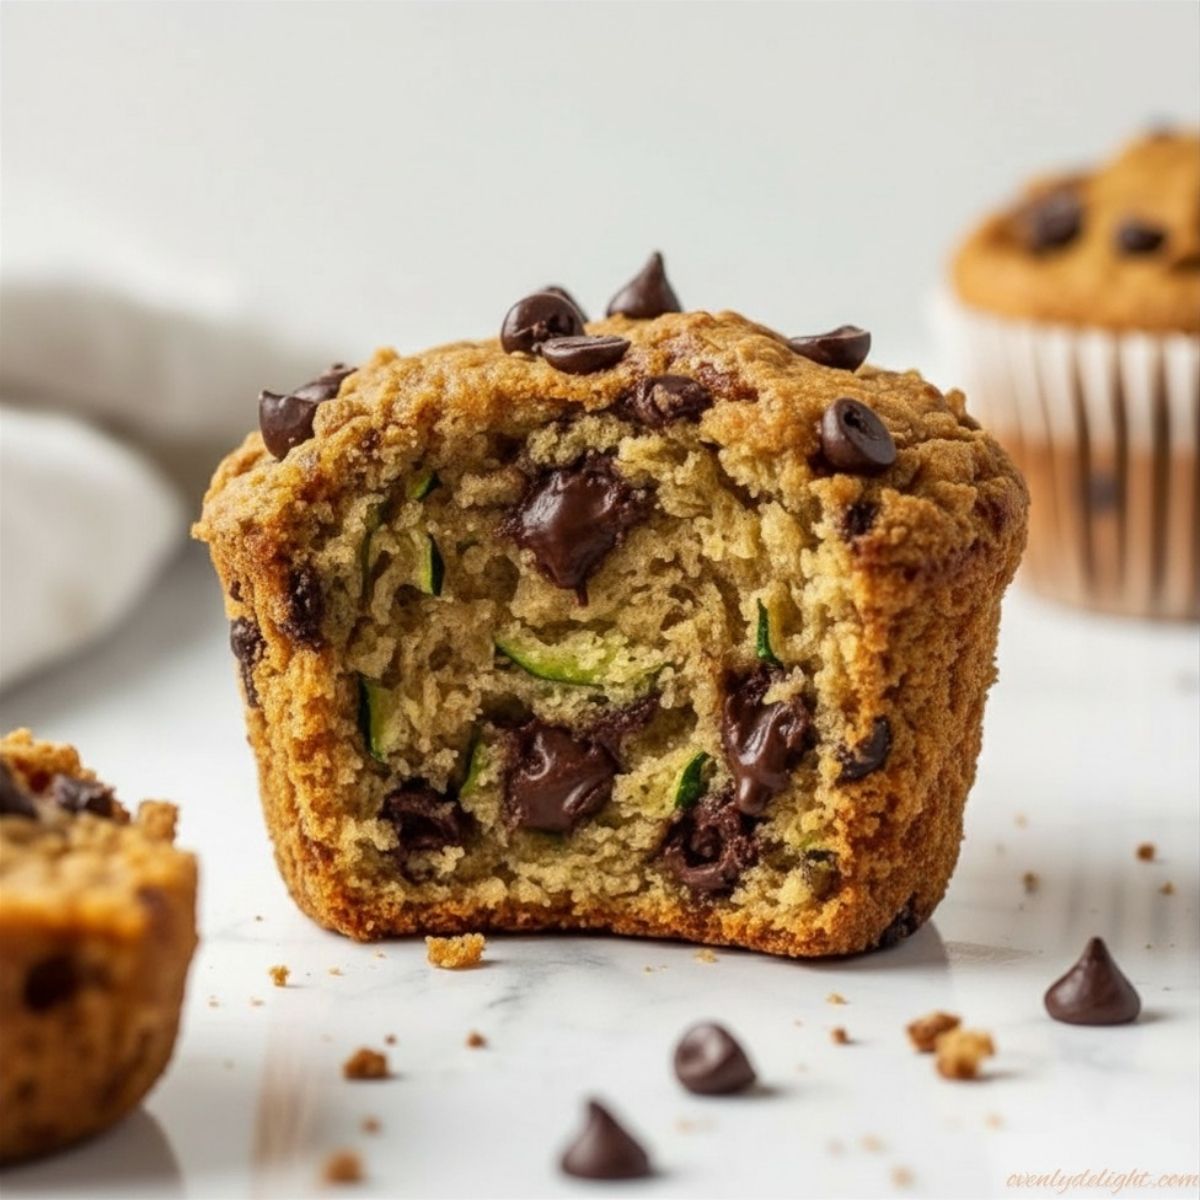
Best Zucchini Chocolate Chip Muffins (Soft, Moist & Bakery Style)
I always seem to have an extra zucchini or two sitting on the kitchen counter during the summer, and these Zucchini Chocolate Chip Muffins have become my favorite way to use them. They’re incredibly soft, perfectly moist, and filled with melty chocolate chips that make every bite taste like a bakery treat. Even people who usually avoid zucchini are surprised by how much they love these muffins. What I enjoy most about this recipe is how simple and dependable it is. The batter comes together with everyday ingredients, the zucchini keeps the muffins tender without adding a strong vegetable flavor, and they stay fresh for several days. Whether I’m baking a batch for breakfast, packing them as a snack, or sharing them with friends, these Zucchini Chocolate Chip Muffins never last long. Why You’ll Love These Zucchini Chocolate Chip Muffins Ingredients for Zucchini Chocolate Chip Muffins Dry Ingredients Wet Ingredients Zucchini & Chocolate Chips How to Make Zucchini Chocolate Chip Muffins 1. Prepare the Oven and Muffin Pan Preheat your oven to 375°F (190°C) and position the oven rack in the center for even baking. Line a standard 12-cup muffin pan with paper liners or lightly grease it with nonstick spray. I like to lightly spray the liners as well because moist zucchini muffins can sometimes stick. 2. Grate the Zucchini Using the large holes of a box grater, grate enough zucchini to measure 1⅓ cups. There’s no need to peel it first since the skin softens as the muffins bake. Most importantly, don’t squeeze out the moisture—the natural liquid is what keeps the muffins soft and tender. 3. Mix the Dry Ingredients In a large mixing bowl, whisk together the flour, cinnamon, nutmeg, baking powder, baking soda, and salt until everything is evenly combined. This helps distribute the leavening agents evenly, giving every muffin a light texture. 4. Whisk the Wet Ingredients In a separate bowl, whisk together the vegetable oil, brown sugar, and granulated sugar until well blended. Add the eggs and vanilla extract, then whisk until the mixture is smooth and slightly glossy with no streaks of egg remaining. 5. Add the Milk and Zucchini Pour the milk into the wet ingredients and stir until combined. Fold in the grated zucchini until it’s evenly distributed throughout the mixture. The batter will look a little loose at this stage, which is exactly how it should be. 6. Combine the Batter Add the dry ingredients to the wet ingredients and gently fold everything together using a spatula. Mix only until the flour disappears. A few small lumps are perfectly fine—overmixing can make the muffins dense instead of soft. 7. Fold in the Chocolate Chips Gently fold most of the chocolate chips into the batter, making sure they’re evenly distributed. Reserve a small handful to sprinkle over the tops before baking for a beautiful bakery-style finish. 8. Fill the Muffin Cups Divide the batter evenly among the prepared muffin cups, filling each about ¾ full. Sprinkle the reserved chocolate chips over each muffin so they bake with plenty of chocolate visible on top. 9. Bake Until Golden Bake for 20–24 minutes, or until the tops are lightly golden and a toothpick inserted into the center comes out with a few moist crumbs but no wet batter. Start checking around the 20-minute mark since every oven bakes a little differently. 10. Cool Before Serving Let the muffins cool in the pan for about 5 minutes before transferring them to a wire rack. They continue to set as they cool, giving them the perfect soft texture that’s easy to peel from the liners. Expert Tips for the Best Zucchini Chocolate Chip Muffins Don’t Squeeze the Zucchini Leave the natural moisture in the grated zucchini. It keeps the muffins soft, tender, and moist without making them taste like vegetables. Grate the Zucchini by Hand Use the large holes of a box grater instead of a food processor. It creates fine shreds that blend smoothly into the batter for a better texture. Measure the Flour Correctly Spoon the flour into your measuring cup and level it off with a knife for the most accurate results. If you’re converting ingredient amounts, a Baking Measurement Converter can help you measure correctly and prevent dense muffins caused by too much flour. Save Chocolate Chips for the Top Reserve a small handful of chocolate chips and press them onto each muffin before baking. This simple step gives the muffins a beautiful bakery-style appearance. Don’t Skip the Nutmeg Even a small amount of nutmeg adds extra warmth and depth of flavor. Combined with cinnamon, it gives the muffins a cozy homemade taste. Use a Cookie Scoop A large cookie scoop makes it easy to divide the batter evenly, helping all the muffins bake at the same rate and finish with a uniform shape. Keep the Oven Door Closed Avoid opening the oven during the first 18–20 minutes of baking. Keeping the heat steady allows the muffins to rise properly and prevents the centers from sinking. Let the Muffins Cool Slightly Allow the muffins to cool in the pan for about 5 minutes before transferring them to a wire rack. This helps them finish setting while keeping the texture soft and tender. Ingredient Substitutions Use Any Milk You Have No regular milk? Whole, 2%, skim, oat, almond, or soy milk all work well in this recipe since only a small amount is used. Make It Gluten-Free Replace the all-purpose flour with a 1:1 gluten-free baking flour blend. The muffins may be slightly denser but will still be soft and delicious. Make It Dairy-Free Use your favorite non-dairy milk and dairy-free chocolate chips for an easy dairy-free version. Add More Whole Grains For a heartier muffin, replace up to half of the all-purpose flour with white whole wheat flour. You can also reduce the granulated sugar slightly if you prefer a less sweet muffin. Try Different Mix-Ins Instead of chocolate chips, use chopped walnuts, pecans, or white chocolate chips. You