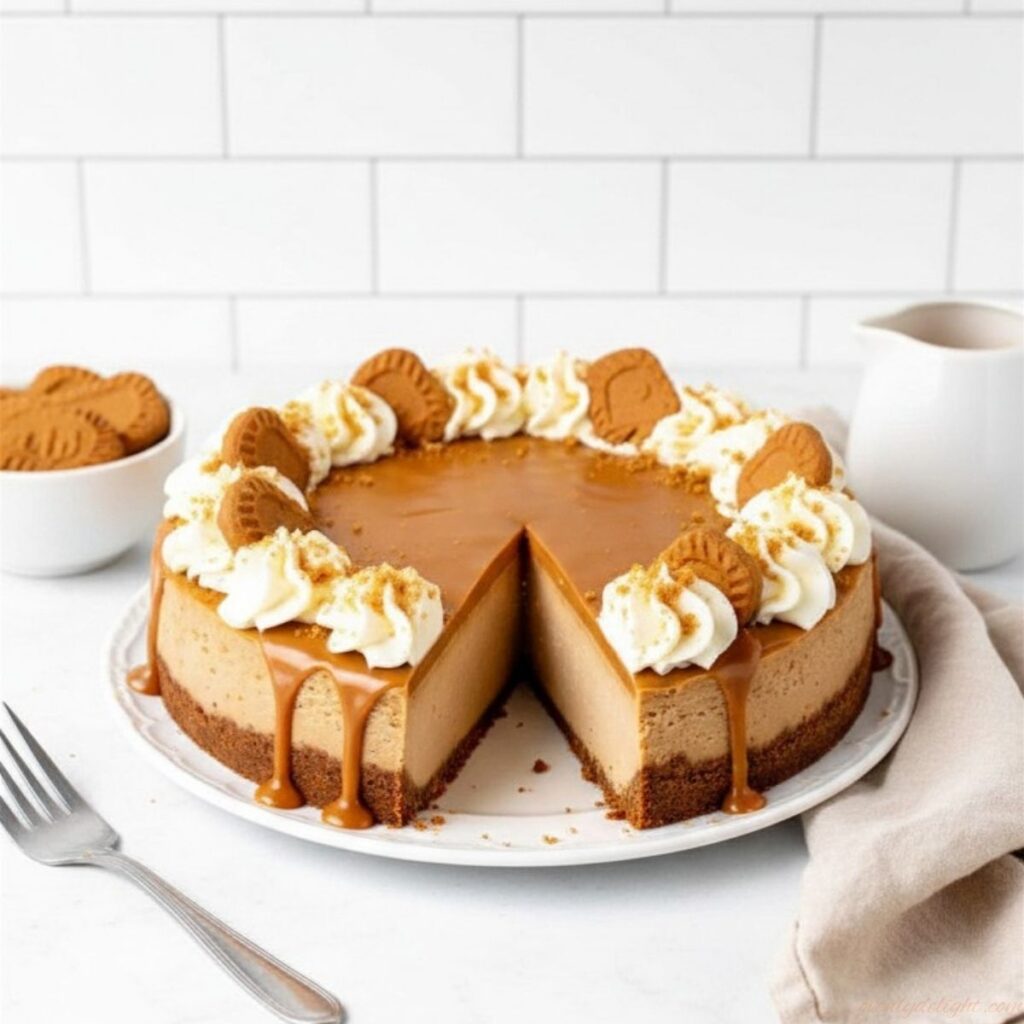
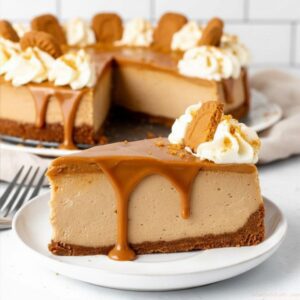
If you love Lotus Biscoff cookies, this Biscoff Cheesecake is a dessert you have to try. It has a buttery Biscoff cookie crust, a rich and creamy cookie butter filling, and a silky Biscoff topping that tastes just like it came from a bakery.
It actually took me three tries to get this cheesecake just right. I kept opening the oven door to check on it because I was worried about overbaking, but that turned out to be my biggest mistake. Once I learned to leave it alone and let it bake properly, everything changed. The cheesecake came out smooth, held its shape perfectly, and had that rich, creamy bakery-style texture I had been trying to achieve. Now it’s one of my favorite desserts to make whenever I want something that looks as good as it tastes.
Why You’ll Love This Biscoff Cheesecake
- If you’re a fan of Lotus Biscoff, this cheesecake is one you’ll want to make again and again. It has a buttery cookie crust, a creamy cookie butter filling, and a smooth topping that comes together in every bite without being overly sweet.
- Even if you’ve never baked a cheesecake before, this recipe is easy to follow. The ingredients are simple, the steps are straightforward, and I’ll guide you through the little details that help you get a smooth cheesecake with minimal risk of cracks.
- It’s also a wonderful dessert to make ahead for birthdays, holidays, or family get-togethers. Since it needs time to chill, you can prepare it in advance and simply decorate and serve when you’re ready.
Ingredients for Homemade Biscoff Cheesecake
For the Biscoff Cookie Crust
- 250g (8.8 oz) Lotus Biscoff Cookies: Creates a buttery, caramelized crust with the signature Biscoff flavor.
- 65g (6 tablespoons) Unsalted Butter, melted: Binds the cookie crumbs into a firm, sliceable crust.
For the Biscoff Cheesecake Filling
- 1 cup Biscoff Spread: Adds rich cookie butter flavor to the cheesecake.
- 680g (24 oz) Full-Fat Cream Cheese: Creates a smooth, rich, and creamy filling.
- 100g (½ cup) Granulated Sugar: Sweetens the cheesecake without overpowering the Biscoff flavor.
- 105g (½ cup) Brown Sugar: Adds a subtle caramel flavor and extra moisture.
- 1 tablespoon Cornstarch: Helps the cheesecake bake with a creamy, stable texture.
- ½ teaspoon Ground Cinnamon: Enhances the warm, spiced Biscoff flavor.
- 180ml (¾ cup) Sour Cream: Makes the filling silky smooth with a slight tang.
- 2 teaspoons Vanilla Extract: Adds depth and enhances the overall flavor.
- 3 Large Eggs + 2 Large Egg Yolks: Provide structure while making the filling extra rich and creamy.
- Boiling Water: Used for the water bath to promote even baking.
For the Biscoff Topping
- ¾ cup Biscoff Spread: Creates a smooth, glossy cookie butter topping.
- 120ml (½ cup) Whipping Cream: Makes the topping silky and easy to pour.
- Lotus Biscoff Cookies (for garnish): Adds a beautiful bakery-style finish and a little crunch.
How to Make Biscoff Cheesecake (Step-by-Step)
Step 1: Prepare the Pan
Preheat your oven to 325°F (165°C) and place the oven rack in the center. Grease a 9-inch springform pan, then wrap the outside with two layers of heavy-duty foil. This extra step keeps water from leaking into the pan during the water bath and prevents a soggy crust.
Step 2: Make the Biscoff Cookie Crust
Crush the Lotus Biscoff cookies into fine crumbs using a food processor or a rolling pin. Mix the crumbs with the melted butter until they resemble wet sand, then press the mixture firmly into the bottom and slightly up the sides of the pan. Bake for 10 minutes, then let the crust cool while you prepare the filling.
Step 3: Beat the Cream Cheese
Add the room-temperature cream cheese to a large bowl and beat until it’s completely smooth. Take your time here because any lumps you see now will still be there after baking.
Step 4: Mix the Filling
Mix in the Biscoff spread until smooth, then add both sugars, cornstarch, and cinnamon. Stir in the sour cream and vanilla, then add the eggs and egg yolks one at a time on low speed. Mix only until everything is combined to keep the filling creamy.
Step 5: Fill the Pan
Pour the cheesecake filling over the cooled crust and spread it into an even layer with a spatula. Gently tap the pan on the counter a few times to release any air bubbles before baking.
Step 6: Prepare the Water Bath
Place the springform pan inside a large roasting pan. Carefully pour boiling water into the roasting pan until it reaches halfway up the sides of the cheesecake pan. The water bath helps the cheesecake bake gently for a smooth, creamy texture.
Step 7: Bake the Cheesecake
Bake for 50 minutes until the edges are set but the center still has a slight wobble. Turn off the oven, crack the door open, and let the cheesecake sit inside for 1 hour. This slow cooling helps prevent cracks.
Step 8: Cool and Chill
Take the cheesecake out of the oven and let it cool completely at room temperature. Run a thin knife around the edges, then refrigerate for at least 6 hours, or overnight if possible. The longer it chills, the better the texture becomes.
Step 9: Make the Biscoff Topping
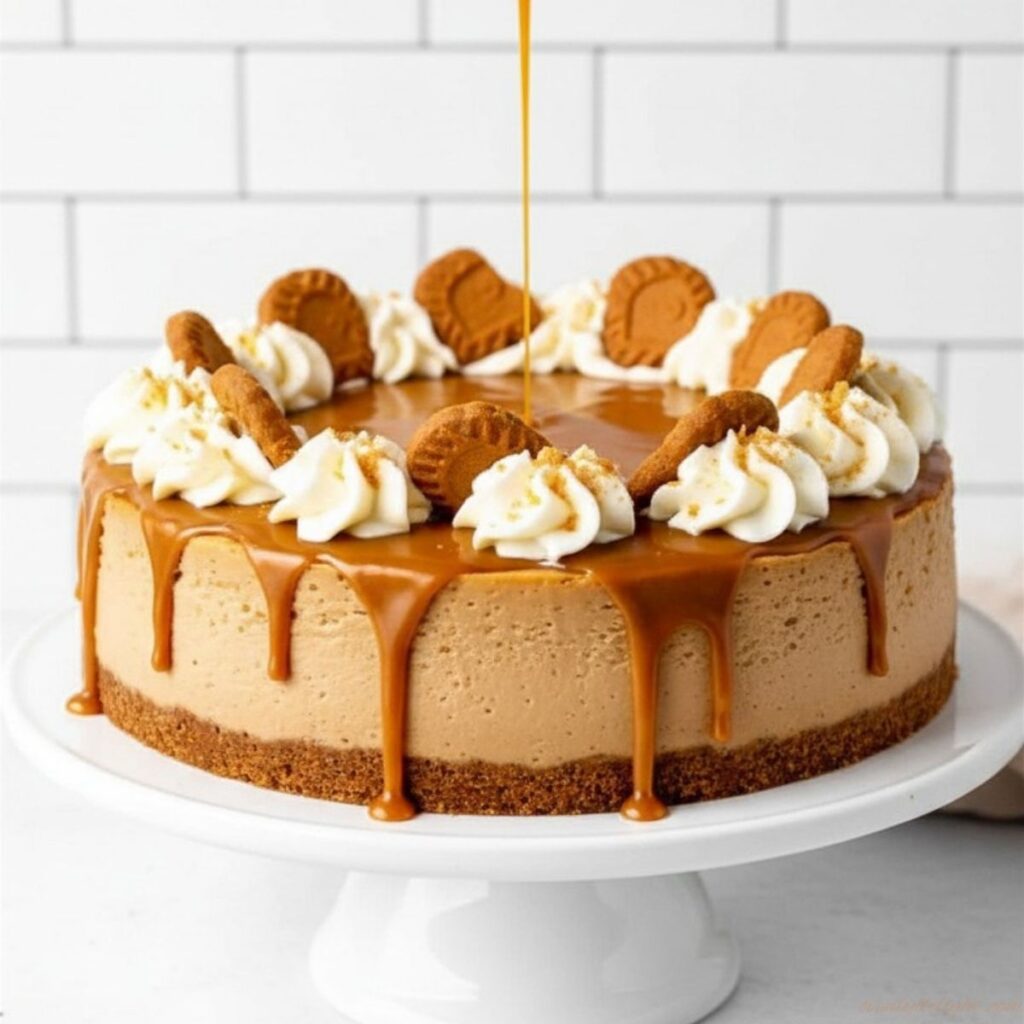
Warm the Biscoff spread until it’s smooth and pourable, then whisk in the whipping cream until glossy. The topping should be silky enough to spread easily over the cheesecake.
Step 10: Decorate and Serve
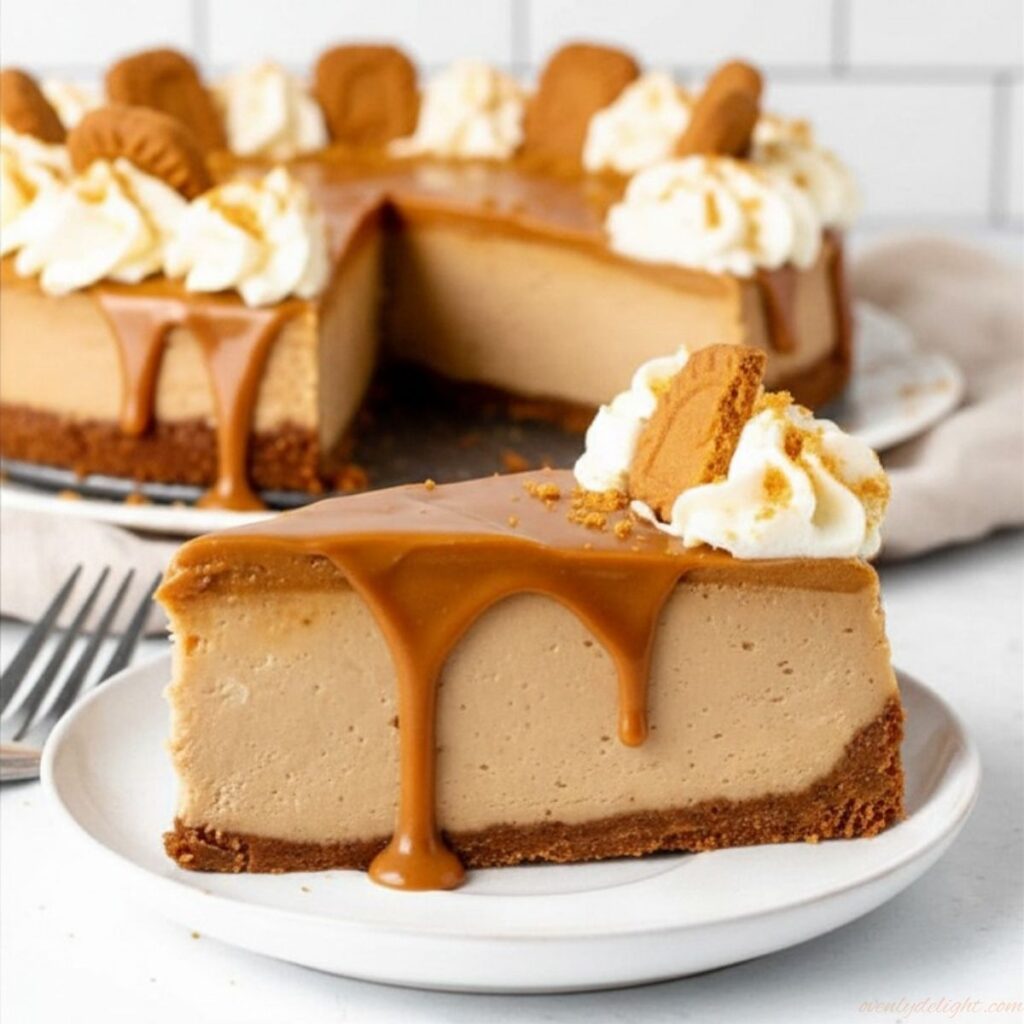
Pour the topping over the chilled cheesecake and gently spread it to the edges. Chill for another 30 minutes, then decorate with Lotus Biscoff cookies or cookie crumbs before slicing. For the cleanest slices, wipe your knife clean between each cut.
Expert Tips for the Best Biscoff Cheesecake
Bring Ingredients to Room Temperature
Set the cream cheese, eggs, and sour cream on the counter for 1–2 hours before starting. Cold ingredients don’t blend smoothly and can leave lumps in the filling.
Double-Wrap the Pan
Use two layers of heavy-duty foil around the springform pan before the water bath. This helps prevent water from leaking in and making the crust soggy.
Use Full-Fat Ingredients
Full-fat cream cheese and sour cream give the cheesecake its rich, thick, bakery-style texture. Low-fat versions can make the filling less creamy.
Trust the Wobble Test
The cheesecake is done when the edges are set but the center still jiggles slightly. It will continue to firm up as it cools.
Chill Overnight
For the cleanest slices and best flavor, refrigerate the cheesecake overnight. The texture becomes firmer, smoother, and easier to cut.
Add the Topping Before Serving
Pour the Biscoff topping onto the fully chilled cheesecake a few hours before serving. This keeps the top smooth, shiny, and firmly set.
Measure Ingredients Accurately
Cheesecakes are all about precision, so try to measure your ingredients as accurately as possible. If your recipe uses different units, a baking measurement converter can be helpful for converting cups, grams, ounces, or tablespoons before you start mixing.
Ingredient Substitutions
Sour Cream → Greek Yogurt
If you’re out of sour cream, don’t worry. I’ve used full-fat plain Greek yogurt as a 1:1 substitute, and the cheesecake still turns out smooth and creamy with just a slightly milder tang.
Biscoff Spread → Cookie Butter
Any good-quality cookie butter works here. I’ve tested other brands when I couldn’t find Biscoff spread, and the flavor stays very close.
Lotus Biscoff Cookies → Graham Crackers
If Biscoff cookies aren’t available, use 2 cups crushed graham crackers mixed with ½ teaspoon ground cinnamon. The flavor won’t be exactly the same, but the crust is still buttery and delicious.
Cream Cheese & Dairy → Dairy-Free Alternatives
For a dairy-free version, use dairy-free cream cheese, coconut-based sour cream, and vegan butter. Since Lotus Biscoff cookies and spread are already dairy-free, these simple swaps work really well.
Brown Sugar → Granulated Sugar
No brown sugar? I’ve made it with all granulated sugar, and it still tastes amazing. You’ll lose a little caramel depth, but the texture stays just as creamy.
Whipping Cream → Coconut Cream
For the topping, full-fat coconut cream is my favorite dairy-free substitute. It blends beautifully with the warm Biscoff spread and creates a smooth, glossy finish.
How to Store Biscoff Cheesecake
Refrigerate
Cover the cheesecake with plastic wrap or store it in an airtight container in the refrigerator for up to 5 days. I actually think it tastes even better the next day as the flavors have more time to develop.
Freeze
For longer storage, freeze individual slices until firm, then wrap them tightly and place them in a freezer-safe bag or container. They’ll keep well for up to 2 months.
Thaw and Serve
Transfer frozen slices to the refrigerator and let them thaw overnight. Before serving, let the cheesecake sit at room temperature for 10–15 minutes for the creamiest texture and the best Biscoff flavor.
More No-Bake Cheesecake Recipes
Frequently Asked Questions
Can I make this as a no-bake Biscoff cheesecake?
Yes! Skip the eggs and water bath, then fold whipped cream into the filling. Chill the cheesecake for at least 8 hours or overnight until fully set. The texture will be lighter and creamier than the baked version.
Why did my Biscoff cheesecake crack?
Cracks are usually caused by overmixing the batter, skipping the water bath, or cooling the cheesecake too quickly. Let it cool gradually in the oven with the door slightly open for the best results.
How far in advance can I make this cheesecake?
You can make it up to 3 days ahead and keep it covered in the refrigerator. For the freshest look, add the Biscoff topping on the day you plan to serve it.
What’s the difference between Biscoff spread and Biscoff cookies?
Biscoff cookies are crisp caramelized cookies, while Biscoff spread is made by blending those cookies into a smooth cookie butter. This recipe uses both for the best flavor and texture.
How do I know when the cheesecake is done baking?
The cheesecake is ready when the edges look set but the center still has a slight wobble when you gently shake the pan. It will continue to set as it cools, so avoid overbaking.
Can I make Biscoff cheesecake without a water bath?
Yes, but I don’t recommend it. A water bath helps the cheesecake bake evenly and greatly reduces the chances of cracks. If you skip it, the texture may not be as smooth and the top is more likely to crack.
Final Thoughts
I know cheesecake can feel a little intimidating, I definitely thought so after my first few attempts! But once I figured out the little things that make a big difference, this Biscoff Cheesecake quickly became one of my favorite desserts to bake. It’s one of those recipes that looks like it came straight from a bakery, yet it’s completely doable at home.
I really hope this recipe helps you make a cheesecake that you’re proud to serve. If you give it a try, I’d genuinely love to hear how it turned out. And if you put your own twist on it, let me know, I always enjoy seeing how others make this recipe their own. Happy baking!
Biscoff Cheesecake Recipe

Ingredients
- 250 g 8.8 oz Lotus Biscoff cookies, crushed
- 65 g 6 tbsp unsalted butter, melted
For the Filling
- 680 g 24 oz full-fat cream cheese, softened
- 1 cup Biscoff spread
- ½ cup 100g granulated sugar
- ½ cup 105g brown sugar
- 1 tbsp cornstarch
- ½ tsp ground cinnamon
- ¾ cup 180ml sour cream
- 2 tsp vanilla extract
- 3 large eggs
- 2 large egg yolks
- Boiling water for the water bath
For the Topping
- ¾ cup Biscoff spread
- ½ cup 120ml whipping cream
- Lotus Biscoff cookies for decoration
Instructions
- Preheat the oven to 325°F (165°C). Grease a 9-inch springform pan and wrap the outside with heavy-duty foil.
- Mix the crushed Biscoff cookies with melted butter and press firmly into the bottom of the pan. Bake for 10 minutes, then let cool.
- Beat the cream cheese until smooth. Mix in the Biscoff spread, both sugars, cornstarch, cinnamon, sour cream, and vanilla.
- Add the eggs and egg yolks one at a time, mixing on low speed until just combined.
- Pour the filling over the cooled crust and smooth the top.
- Place the pan inside a roasting pan and pour boiling water halfway up the sides. Bake for 50 minutes, until the edges are set and the center still has a slight wobble.
- Turn off the oven, crack the door open, and let the cheesecake rest for 1 hour. Cool completely, then refrigerate for at least 8 hours or overnight.
- Warm the Biscoff spread, stir in the whipping cream until smooth, then pour over the chilled cheesecake.
- Chill for another 30 minutes, decorate with Lotus Biscoff cookies, slice, and serve.
Notes
- Use room-temperature ingredients for a smooth, lump-free filling.
- Mix the batter on low speed after adding the eggs to avoid cracks.
- Don’t skip the water bath—it helps the cheesecake bake evenly.
- The cheesecake is done when the center still has a slight wobble.
- Chill for at least 8 hours, but overnight gives the best texture and flavor.
- For clean slices, dip a sharp knife in warm water and wipe it clean after each cut.