I love baking these Red Velvet Chocolate Chip Muffins whenever I want something soft, rich, and easy to make. They have a light cocoa flavor, a tender crumb, and plenty of chocolate chips in every bite, making them perfect for breakfast, brunch, or an afternoon treat. After testing this recipe several times, I found the right balance of moisture and flavor to create bakery-style muffins that turn out delicious and reliable every time.

Why You’ll Love These Bakery-Style Red Velvet Chocolate Chip Muffins
Soft and Moist Texture
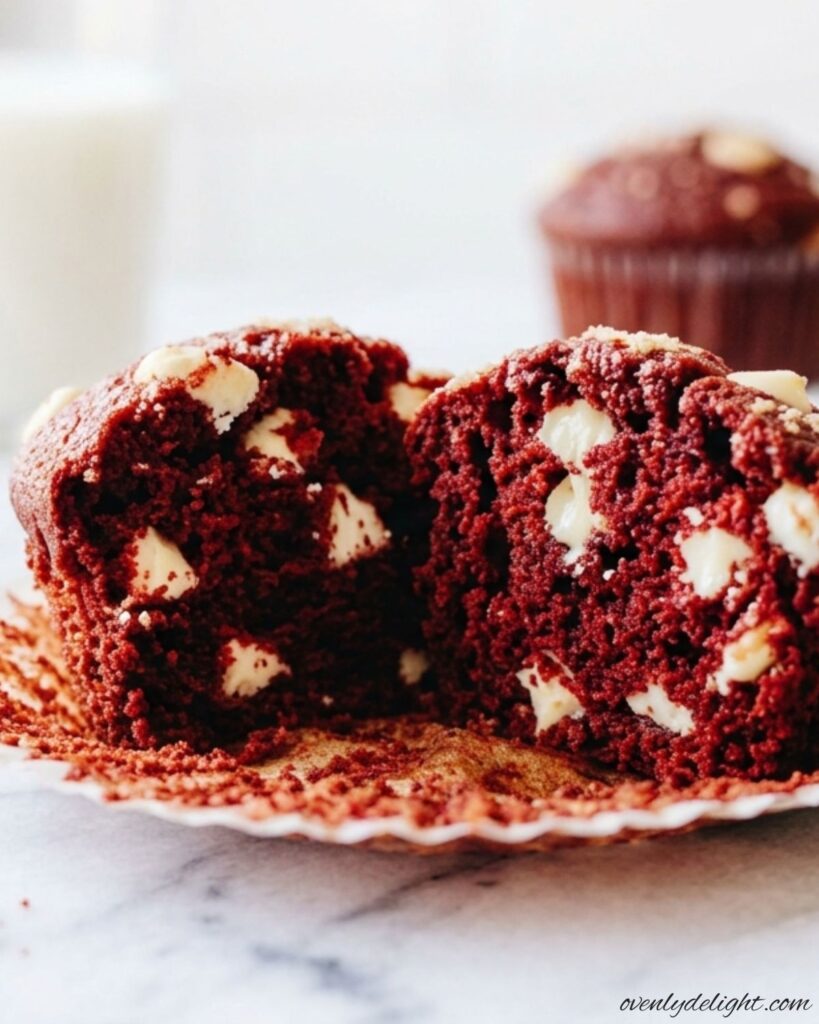
Every bite is tender, fluffy, and perfectly moist thanks to the balanced combination of ingredients. These homemade muffins have a light crumb that stays fresh, making them ideal for enjoying the same day or saving for later.
Loaded with Chocolate Chips
Each muffin is packed with melty chocolate chips that add rich sweetness and extra flavor. They create delicious pockets of chocolate throughout the muffins without overpowering the classic red velvet taste.
Easy to Make from Scratch
This recipe uses simple pantry staples and comes together with minimal effort. Whether you’re an experienced baker or trying homemade muffins for the first time, the easy steps make the process stress-free and reliable.
Perfect for Any Occasion
These chocolate chip muffins are a great choice for breakfast, brunch, lunchboxes, holiday gatherings, bake sales, or an afternoon coffee break. They look beautiful and are easy to share with family and friends.
Bakery-Style Results at Home
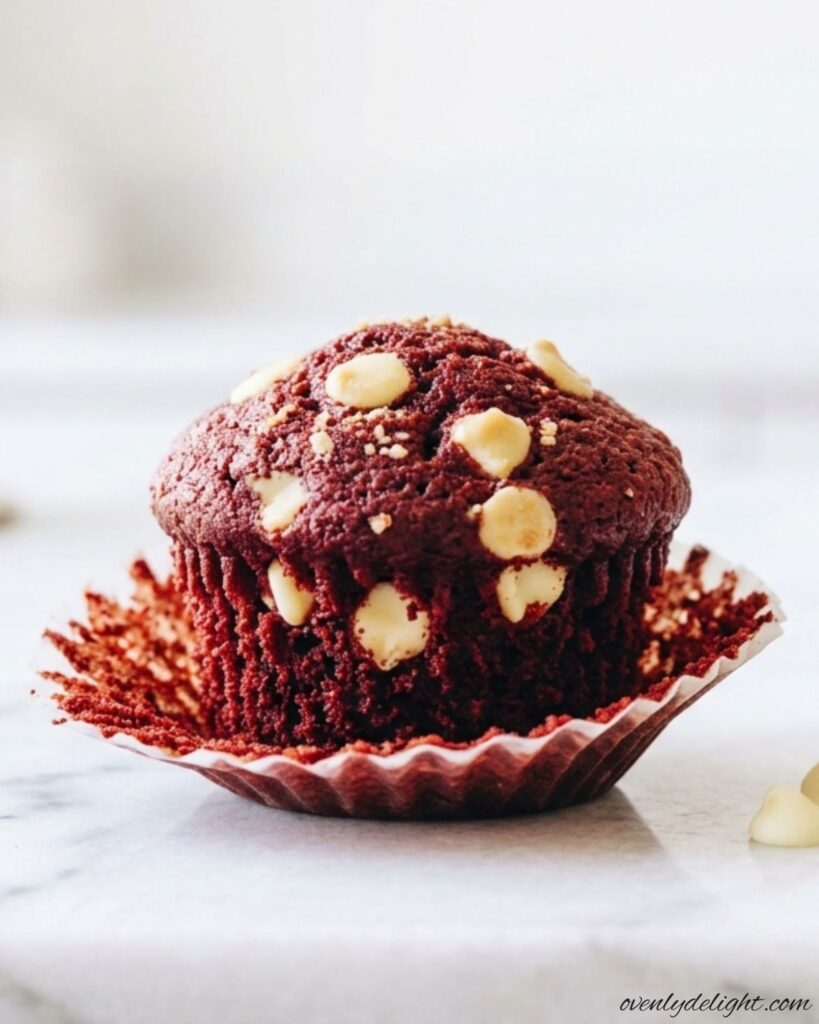
The muffins bake with tall, fluffy tops and a soft interior that rivals your favorite bakery. After testing this recipe multiple times, I found the right method for creating consistent, delicious results in a home kitchen.
Great for Make-Ahead and Freezing
Bake a batch in advance and enjoy them throughout the week. They store well at room temperature, stay moist in the refrigerator, and freeze beautifully, making them perfect for meal prep or whenever you need a quick homemade treat.
Ingredients for Red Velvet Chocolate Chip Muffins
- 2¼ cups (281g) all-purpose flour – Provides structure while keeping the muffins light and tender. Spoon and level the flour for the most accurate measurement.
- 1 cup (200g) granulated sugar – Sweetens the batter and helps create a soft, moist crumb.
- 1½ tablespoons (8g) natural unsweetened cocoa powder – Adds a mild chocolate flavor and reacts with the vinegar for the classic red velvet taste. Use natural cocoa, not Dutch-process.
- 2 teaspoons (8g) baking powder – Helps the muffins rise high with bakery-style domed tops.
- ½ teaspoon (2g) baking soda – Works with the buttermilk and vinegar to create a light, fluffy texture.
- ¼ teaspoon (1.5g) salt – Balances the sweetness and enhances the cocoa flavor.
- ¼ cup (56g) unsalted butter, melted and cooled – Adds richness and a soft, tender crumb.
- ¼ cup (60ml) vegetable oil – Keeps the muffins moist and fresh for several days.
- 2 large eggs (about 100g without shells), room temperature – Bind the ingredients together and provide structure.
- 1 teaspoon (5ml) vanilla extract – Enhances the overall flavor with warm vanilla notes.
- 1 teaspoon (5ml) distilled white vinegar – Gives red velvet its signature tang and helps activate the baking soda.
- 2 teaspoons (10ml) red food coloring – Creates the classic vibrant red color. Gel food coloring also works well.
- ¾ cup (180ml) buttermilk, room temperature – Adds moisture and a slight tang while keeping the muffins soft.
- 1 cup (180g) white chocolate chips – Folded into the batter for creamy sweetness that pairs perfectly with the cocoa flavor.

How to Make Bakery-Style Red Velvet Chocolate Chip Muffins
1. Prepare the Oven and Muffin Pan
Preheat your oven to 375°F (190°C) and place the oven rack in the center position. Line a standard 12-cup muffin pan with paper liners so the muffins release easily after baking.
2. Mix the Dry Ingredients
In a large mixing bowl, whisk together the all-purpose flour, natural cocoa powder, baking powder, baking soda, and salt until well combined. If your cocoa powder has any lumps, sift it first to ensure a smooth batter and even chocolate flavor.
3. Combine the Wet Ingredients
In a separate bowl, whisk together the melted butter and vegetable oil until blended. Add the eggs one at a time, then mix in the vanilla extract, distilled white vinegar, and red food coloring until the color is completely smooth with no streaks remaining.
4. Make the Muffin Batter
Gradually add the dry ingredients to the wet mixture, alternating with the buttermilk in three additions. Stir gently after each addition and stop mixing as soon as the flour disappears. Overmixing can make the muffins dense instead of light and fluffy.
5. Fold in the Chocolate Chips and Fill the Pan
Using a spatula, gently fold in the white chocolate chips, reserving a small handful for the tops. Divide the batter evenly among the prepared muffin cups, filling each about ¾ full. Sprinkle the reserved chocolate chips over each muffin for a beautiful bakery-style finish.
6. Bake and Cool
Bake for 16–18 minutes, or until a toothpick inserted into the center comes out clean or with a few moist crumbs. Let the muffins cool in the pan for 5 minutes, then transfer them to a wire rack to cool completely before serving.
Expert Tips for Bakery-Style Red Velvet Muffins
Use Room-Temperature Ingredients
For the smoothest batter, let the eggs and buttermilk come to room temperature before mixing. Also, allow the melted butter to cool slightly so it blends evenly without separating.
Choose Natural Cocoa Powder
Natural cocoa powder works best in this recipe because it reacts with the vinegar and baking soda, helping the muffins rise properly while creating the classic red velvet flavor and color.
Use Gel Food Coloring
Gel food coloring produces a deeper, more vibrant red without adding extra liquid to the batter. It also gives more consistent results than standard liquid food coloring.
Don’t Overmix the Batter
Mix the wet and dry ingredients just until combined. Overmixing develops the gluten in the flour, which can make the muffins dense instead of soft and fluffy.
Fill the Muffin Cups Evenly
Use a cookie scoop or measuring cup to divide the batter evenly between the muffin liners. Filling each cup about three-quarters full helps create tall, bakery-style muffin tops.
Check for Doneness Carefully
Start checking the muffins after 16 minutes. A toothpick inserted into the center should come out clean or with a few moist crumbs. Avoid overbaking, as it can dry out the muffins and reduce their soft texture.
Ingredient Substitutions for Homemade Red Velvet Muffins
Buttermilk Substitute
If you don’t have buttermilk, mix ¾ cup (180ml) regular milk with ¾ tablespoon lemon juice or white vinegar. Let it sit for 5 minutes before using. This creates a similar tangy flavor and helps keep the muffins tender.
White Chocolate Chip Alternatives
Swap the white chocolate chips with semisweet chocolate chips, milk chocolate chips, dark chocolate chips, or chopped pecans for a different flavor and texture. Each option pairs well with the rich cocoa notes.
Dairy-Free Option
Replace the buttermilk with ¾ cup (180ml) unsweetened almond milk, soy milk, or oat milk mixed with ¾ tablespoon vinegar. Use a dairy-free butter alternative to maintain a soft, moist crumb.
Gluten-Free Option
Use a 1:1 gluten-free all-purpose flour blend in place of regular flour. A blend that contains xanthan gum generally provides the best texture for homemade muffins.
Egg-Free Option
Replace each egg with 1 tablespoon ground flaxseed mixed with 3 tablespoons water. Let the mixture rest for 5 minutes before adding it to the batter. This substitution helps bind the ingredients while keeping the muffins tender.
How to Store Homemade Red Velvet Muffins
Room Temperature
Once the muffins have cooled completely, place them in an airtight container and store them at room temperature for up to 2 days. This helps maintain their soft texture and rich flavor.
Refrigerator
For longer storage, refrigerate the muffins in a sealed container for up to 5 days. Before serving, let them sit at room temperature or warm them in the microwave for 15–20 seconds to restore their soft, bakery-style texture.
Freezer
Wrap each muffin individually in plastic wrap or aluminum foil, then place them in a freezer-safe bag or container. Freeze for up to 3 months. Thaw at room temperature for about 1 hour, or microwave from frozen in 30-second intervals until warmed through.
Reheating Tip
If the muffins are a day or two old, microwave them for 20–30 seconds before serving. This simple step helps bring back their fresh, soft texture and makes the chocolate chips perfectly melty again.
More Easy Muffin Recipes to Try
- Lemon Poppy Seed Muffins
- Cinnamon Roll Muffins
- Coffee Cake Muffins
- Pumpkin Chocolate Chip Muffins
- Apple Cinnamon Crumb Muffins
- Pecan Pie Brown Sugar Muffins
- Banana Chocolate Chip Muffins
- Blueberry Muffins
Frequently Asked Questions
Can I make Red Velvet Chocolate Chip Muffins ahead of time?
Yes. These muffins are perfect for making in advance. Bake them completely, allow them to cool, and store them in an airtight container. They stay fresh for a couple of days at room temperature or can be frozen for up to 3 months.
Why did my red velvet muffins turn out dry?
Dry muffins are usually caused by overbaking or adding too much flour. Measure the flour correctly using the spoon-and-level method, and remove the muffins from the oven as soon as a toothpick comes out with a few moist crumbs.
Can I use milk instead of buttermilk?
Yes, but buttermilk gives the muffins a softer texture and signature tangy flavor. If you don’t have it, mix ¾ cup milk with ¾ tablespoon lemon juice or white vinegar and let it rest for 5 minutes before adding it to the batter.
How do I get tall bakery-style muffin tops?
For tall muffin tops, avoid overmixing the batter, fill each muffin cup about three-quarters full, and bake in a fully preheated oven. Fresh baking powder also helps create a better rise.
Can I use dark or milk chocolate chips instead of white chocolate chips?
Absolutely. Dark chocolate, milk chocolate, or semisweet chocolate chips all work well in this recipe. Each option gives the muffins a slightly different flavor while keeping them soft and delicious.
Can I freeze homemade red velvet muffins?
Yes. Let the muffins cool completely, then wrap each one individually and place them in a freezer-safe container or bag. They can be frozen for up to 3 months and thaw beautifully at room temperature or in the microwave.
Final Thoughts
If you’re looking for an easy muffin recipe that’s soft, moist, and full of chocolatey flavor, these Red Velvet Chocolate Chip Muffins are a wonderful choice. I’ve tested this recipe to create a tender texture with reliable, bakery-style results using simple ingredients you likely already have at home. Whether you’re baking for breakfast, a weekend treat, or sharing with family and friends, these muffins are sure to become a favorite you’ll want to make again.
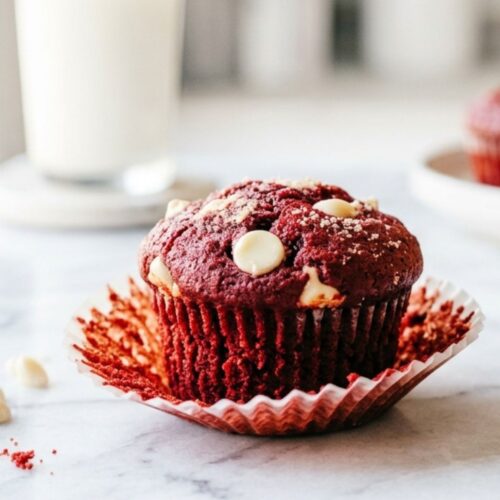
Red Velvet Muffins with Chocolate Chips

Ingredients
- 2¼ cups 281g all-purpose flour
- 1 cup 200g granulated sugar
- 1½ tablespoons 8g natural cocoa powder
- 2 teaspoons baking powder
- ½ teaspoon baking soda
- ¼ teaspoon salt
- ¼ cup 56g unsalted butter, melted and cooled
- ¼ cup 60ml vegetable oil
- 2 large eggs room temperature
- 1 teaspoon vanilla extract
- 1 teaspoon distilled white vinegar
- 2 teaspoons red gel food coloring or liquid food coloring
- ¾ cup 180ml buttermilk, room temperature
- 1 cup 180g white chocolate chips
Instructions
- Preheat the oven to 375°F (190°C). Line a standard 12-cup muffin pan with paper liners.
- In a large bowl, whisk together the flour, cocoa powder, baking powder, baking soda, and salt until evenly combined.
- In another bowl, whisk the melted butter and vegetable oil together. Add the eggs one at a time, then mix in the vanilla extract, vinegar, and food coloring until smooth.
- Gradually add the dry ingredients to the wet ingredients, alternating with the buttermilk. Mix gently until no dry streaks remain. Do not overmix.
- Fold in the white chocolate chips, reserving a small handful to sprinkle over the tops.
- Divide the batter evenly among the prepared muffin cups, filling each about three-quarters full. Sprinkle the reserved chocolate chips on top.
- Bake for 16–18 minutes, or until a toothpick inserted into the center comes out clean or with a few moist crumbs.
- Let the muffins cool in the pan for 5 minutes, then transfer them to a wire rack to cool completely before serving.