

These Strawberry Muffins have become a little tradition in my family, mostly because they’re my sister’s favorite. Every time she visits, she asks me to bake a fresh batch before anything else. She has tried making them herself more than once, but they either turn out dry or sink in the center. After plenty of testing, I realized the biggest mistake was overmixing the batter. Now I mix it just until combined, and the result is soft, fluffy Strawberry Muffins with juicy strawberries in every bite the kind my sister never leaves without taking home. Why You’ll Love These Strawberry Muffins These Strawberry Muffins are everything you want in a homemade muffin soft, fluffy, and incredibly moist with juicy pieces of fresh strawberries in every bite. They have the perfect balance of sweetness, making them ideal for breakfast, brunch, or an afternoon treat with a cup of coffee or tea. What makes this recipe even better is how simple and reliable it is. The batter comes together with basic pantry ingredients, and with a few easy tips, you’ll get tall, bakery-style Strawberry Muffins every time. They’re also freezer-friendly, so you can bake a batch ahead and enjoy a homemade treat whenever you’re craving one. Ingredients for Homemade Strawberry Muffins How to Make Strawberry Muffins (Step by Step) Step 1: Preheat the Oven Start by preheating your oven to 425°F (220°C). Line a 12-cup muffin tin with paper liners or lightly grease it with nonstick spray. That high starting temperature is the secret to getting those tall, bakery-style muffin tops, so don’t skip it. Step 2: Prepare the Strawberries Wash, hull, and chop the strawberries into small, bite-sized pieces. Pat them dry with a paper towel to remove excess moisture, then toss them with 2 teaspoons of flour. This little trick helps keep the berries from sinking to the bottom while the muffins bake. Step 3: Mix the Dry Ingredients In a large mixing bowl, whisk together the flour, baking powder, baking soda, and salt until everything is evenly combined. This only takes a minute, but it helps distribute the leavening agents so every muffin bakes evenly. Step 4: Cream the Butter and Sugar In another bowl, beat the softened butter, granulated sugar, and lemon zest together for about 2 minutes until the mixture looks light and fluffy. This step adds air to the batter, giving your Strawberry Muffins a soft and tender texture. Step 5: Add the Eggs and Vanilla Crack in the eggs one at a time, beating well after each addition. Stir in the vanilla extract until the mixture is smooth and creamy. If needed, scrape down the sides of the bowl so everything mixes together evenly. Step 6: Combine the Batter Add half of the dry ingredients to the butter mixture, then pour in the buttermilk. Mix gently before adding the remaining dry ingredients. Stir just until you no longer see dry flour. The batter may look a little lumpy, and that’s perfectly fine. Overmixing is one of the biggest reasons muffins turn out tough instead of fluffy. Step 7: Fold in the Strawberries Gently fold the floured strawberries into the batter using a rubber spatula. Use slow, gentle strokes so you don’t crush the berries or overwork the batter. You want the strawberries evenly spread throughout without turning the batter pink. Step 8: Fill the Muffin Pan Divide the batter evenly among the prepared muffin cups, filling each about ¾ full. If you love extra-tall muffin tops, fill them a little higher. An ice cream scoop works really well for evenly sized muffins. Step 9: Bake the Muffins Place the muffin tin in the oven and bake at 425°F (220°C) for 5 minutes. Then, without opening the oven door, reduce the temperature to 350°F (175°C) and continue baking for another 15 minutes. This two-temperature method gives you beautifully risen muffins with soft centers. Step 10: Check for Doneness Insert a toothpick into the center of one muffin. If it comes out clean or with just a few moist crumbs, they’re ready. If you see wet batter, bake for another 2–3 minutes before checking again. Step 11: Let Them Cool Allow the muffins to cool in the pan for about 5 minutes, then carefully transfer them to a wire rack. It might be tempting to eat one right away (I always do!), but letting them cool for a few more minutes gives them the best texture and keeps them from falling apart. Expert Tips for Bakery-Style Strawberry Muffins Use the Two-Temperature Baking Method Bake the muffins at 425°F (220°C) for the first 5 minutes, then lower the oven to 350°F (175°C) for the remaining bake time. This simple trick creates those beautiful tall, domed muffin tops you see in bakeries. If your oven uses a different temperature scale, this Oven Temperature Converter makes it easy to switch between Fahrenheit, Celsius, and Gas Mark before you start baking. Pat the Strawberries Dry Fresh strawberries hold a lot of moisture, especially when they’re perfectly ripe. After chopping, gently pat them dry with a paper towel and toss them with a little flour. This helps prevent soggy muffins and keeps the berries from sinking to the bottom. Don’t Overmix the Batter This is probably the most important tip for soft, fluffy Strawberry Muffins. Mix the batter just until the flour disappears. A few small lumps are completely normal. Overmixing develops the gluten, which can leave you with dense, chewy muffins instead of light and tender ones. Use Room Temperature Ingredients Take the butter, eggs, and buttermilk out about 30 minutes before baking. Room-temperature ingredients blend together much more smoothly, creating a soft, even crumb without dense spots. Chop the Strawberries Evenly Try to cut the strawberries into small, even pieces about ½ inch. Large chunks tend to sink and create wet pockets, while tiny pieces almost disappear into the batter. Even-sized pieces give you juicy strawberries in every bite. Fill the Muffin Cups Generously For those bakery-style muffin tops,
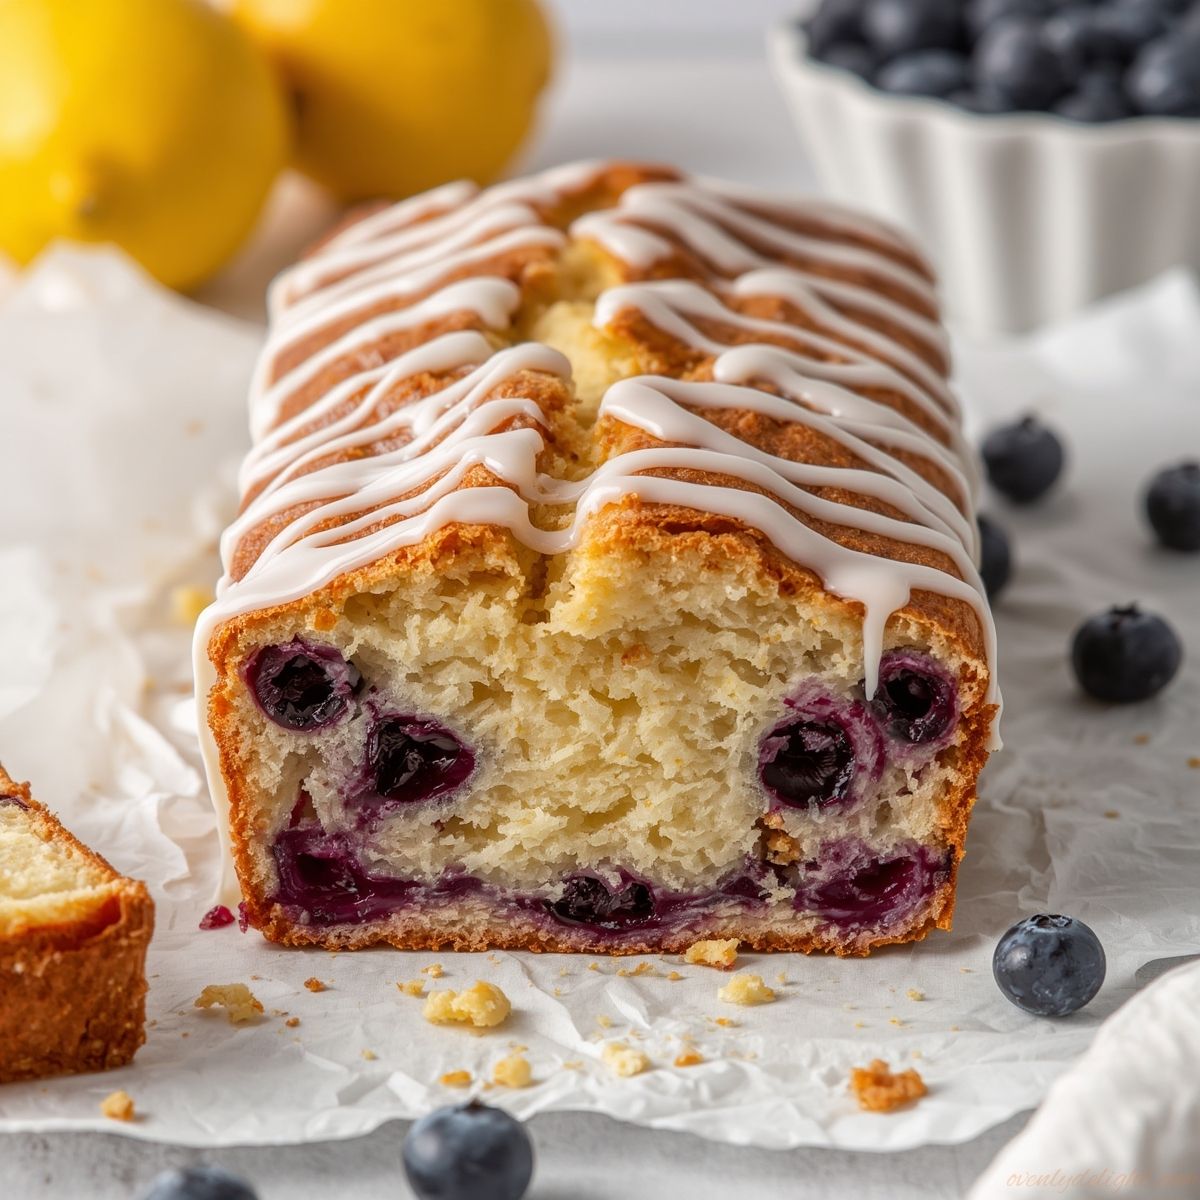
Best Lemon Blueberry Bread (Moist, Easy & From Scratch)
Lemon Blueberry Bread is one of those recipes I didn’t expect to love, but it quickly became a kitchen favorite. I first made it on a quiet afternoon with extra blueberries and fresh lemons I had on hand, just to try something simple. From the moment it came out of the oven, the fresh citrus aroma and sweet blueberry bursts made it unforgettable. Since then, it’s become my go-to moist quick bread for a soft, fresh, and comforting treat with tea or breakfast. Why We Love This Lemon Blueberry Bread We love this Lemon Blueberry Bread because it perfectly balances bright citrus flavor with sweet, juicy bursts of blueberries in every bite. It’s soft, moist, and incredibly comforting, making it ideal for breakfast, brunch, or an afternoon treat with tea or coffee. The fresh lemon adds a refreshing twist that keeps it from feeling too heavy, while the blueberries bring just the right amount of natural sweetness. What makes it even better is how forgiving and reliable the recipe is, I didn’t get it perfect on my first try, but once I learned a few small tricks, it quickly became a no-fail favorite in my kitchen. It’s also a simple, no-fuss recipe that comes together easily with everyday ingredients, yet feels special enough to share with family and friends. Every slice tastes like homemade comfort with a fresh, bakery-style touch. Ingredients for Lemon Blueberry Bread Dry Ingredients Wet Ingredients For the Berries & Topping How to Make Lemon Blueberry Bread (Step by Step) 1. Prepare the Oven & Pan Preheat your oven to 350°F (175°C). Place a rack in the center so the heat spreads evenly and your bread bakes properly. Grease a 9×5-inch loaf pan and line the bottom with parchment paper this little step makes it super easy to lift the bread out later without breaking it. 2. Mix the Dry Ingredients In a medium bowl, whisk together flour, baking powder, baking soda, salt, and fresh lemon zest. This helps everything distribute evenly so you don’t get uneven bites later. Set it aside while you work on the wet ingredients. 3. Combine Butter & Sugar In a large bowl, whisk the melted butter and sugar until smooth and well combined. Then add the eggs one at a time, whisking after each addition so everything blends nicely. I’ve learned the hard way that adding both eggs at once (especially if the butter is slightly cool) can create little greasy lumps so trust me, one by one is the way to go for a smooth batter. 4. Add the Flavor Base Now whisk in the sour cream, fresh lemon juice, and vanilla extract. Keep mixing until the batter turns smooth, creamy, and slightly thick. This is where the bright lemon flavor really starts to come alive. 5. Bring It All Together Gently fold the dry ingredients into the wet mixture using a spatula. Go slow and easy here mix just until you don’t see any flour streaks anymore. Overmixing will make the bread dense instead of soft and tender. 6. Prepare the Blueberries Toss the blueberries lightly with 1 tablespoon of flour. This simple trick helps them stay evenly spread instead of sinking to the bottom. Then gently fold them into the batter with just a few soft strokes so they don’t break. 7. Fill the Pan Pour the batter into your prepared loaf pan and smooth out the top with a spatula. If you like a little bakery-style touch, sprinkle a bit of coarse sugar on top for a light crunchy finish. 8. Bake to Perfection Bake for 55–65 minutes, or until a toothpick inserted in the center comes out clean or with a few moist crumbs. If you notice the top browning too quickly, loosely cover it with foil after about 35 minutes. 9. Cool Before Slicing Let the bread cool in the pan for about 15 minutes, then carefully transfer it to a wire rack to cool completely. I know it’s tempting to slice it warm, but letting it cool properly helps the texture set and keeps it soft and moist instead of slightly gummy inside. Expert Tips for Perfect Lemon Blueberry Bread Don’t Skip the Flour Coating on Blueberries I learned this after two sad loaves where every berry sank straight to the bottom. A quick toss in flour makes a huge difference and keeps the blueberries evenly spread throughout the bread. Use Room-Temperature Eggs Cold eggs don’t blend well with melted butter and can leave you with a lumpy, slightly separated batter. I used to rush this step, but now I always let my eggs sit out first for a smoother mix. Stick Butter Works Best I once used spreadable tub butter out of laziness, and the loaf turned out greasy and didn’t rise properly. Stick butter gives better structure, a softer crumb, and a more reliable bake. Zest Before You Juice Trying to zest a juiced lemon is honestly a struggle I wouldn’t recommend to anyone. Always zest first while the lemon is still firm it’s faster, easier, and way less messy. Don’t Trust the Golden Top The loaf can look perfectly baked on the outside but still be underdone inside. I usually start checking mine around 50 minutes since my oven runs hot, just to be safe. Keep Frozen Blueberries Frozen If they thaw, they bleed into the batter and turn everything an odd purple-gray color. Straight from freezer to bowl works best for clean, pretty swirls of blueberry. Let It Cool Completely Before Slicing This is the hardest part because the smell is amazing but cutting it warm can make the center collapse or turn slightly gummy. Patience here really pays off with perfect slices. Measure Ingredients Properly (Important Tip) Baking is all about accuracy, so if you ever get confused with conversions, this baking measurement converter can help you get perfect results every time. Ingredient Substitutions for Lemon Blueberry Bread These easy swaps let you adjust the recipe based on
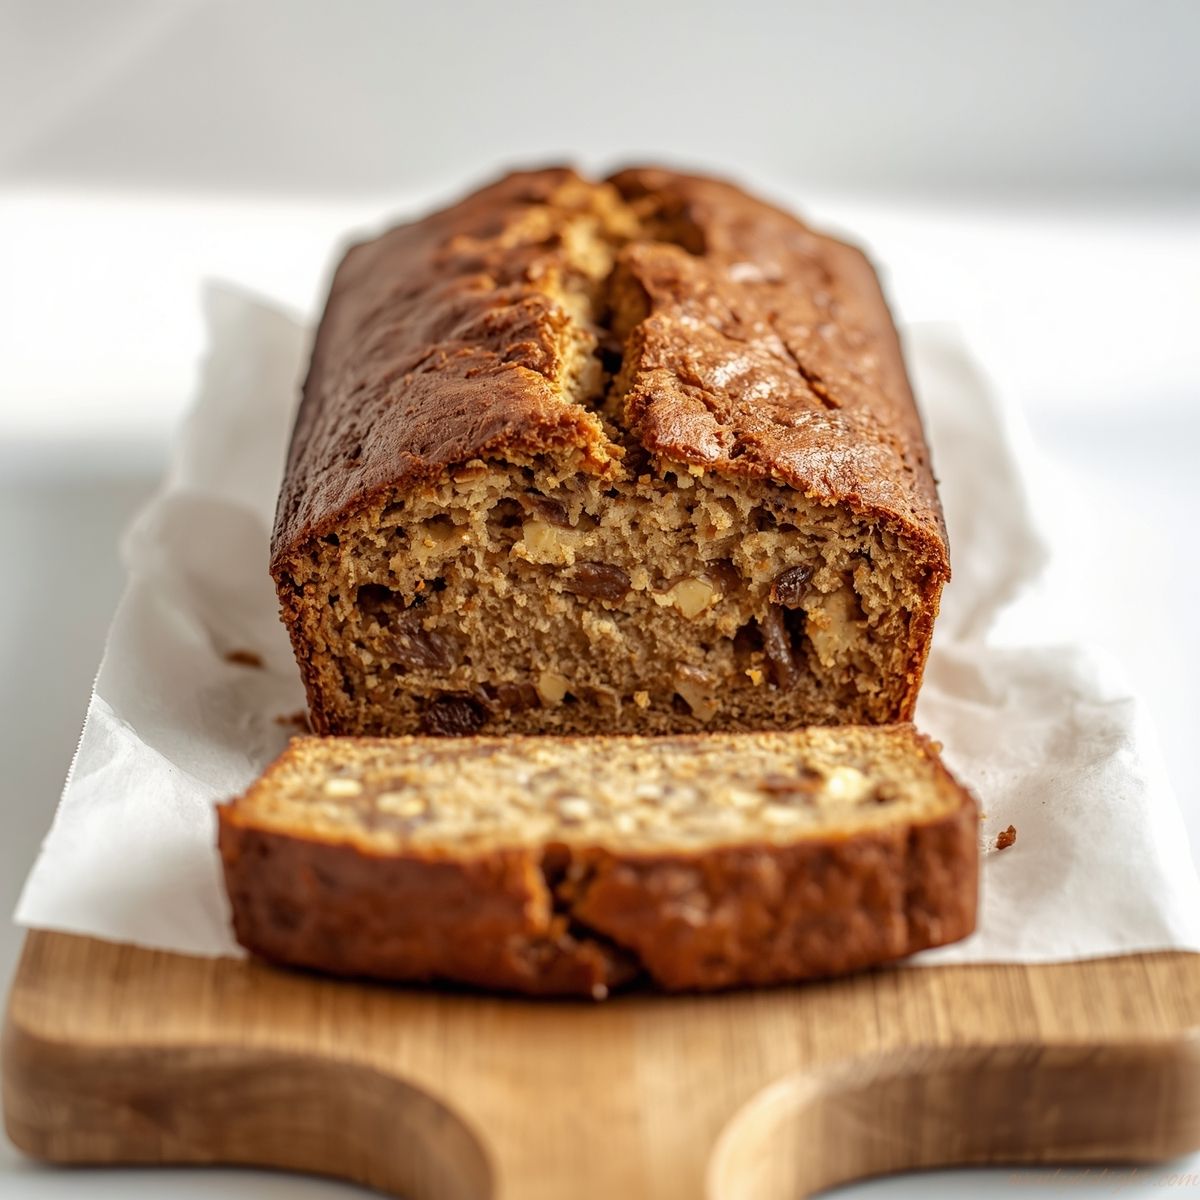
Easy Moist Banana Bread Recipe (One Bowl & Perfectly Sweet)
I usually make this Banana Bread when I notice a few bananas turning too soft on my kitchen counter. Instead of throwing them away, I mash them up and turn them into something warm and comforting. The first time I made this recipe, I wasn’t expecting much, but the loaf came out so soft, moist, and full of sweet banana flavor that I kept going back for another slice. Now it’s one of my favorite easy baking recipes whenever I want a simple homemade treat without spending hours in the kitchen. Why You’ll Love This Banana Bread Ingredients for Moist Banana Bread Dry Ingredients Wet Ingredients Optional Mix-Ins How to Make Banana Bread Recipe (Step-by-Step) 1. Prepare the Loaf Pan Preheat your oven to 350°F (175°C) so it is fully hot when the batter is ready. Grease a 9×5-inch loaf pan with butter or nonstick spray, then line the bottom with parchment paper. Leave a little parchment overhang on the sides if you want to lift the loaf out easily after baking. 2. Mix the Dry Ingredients Add the flour, baking soda, cinnamon, and salt to a medium bowl. Whisk well for about 20 seconds so the baking soda and salt are evenly distributed throughout the flour. This helps the banana bread rise evenly and prevents any salty or bitter spots. 3. Mash and Sweeten the Bananas Place the very ripe bananas in a large mixing bowl and mash them with a fork until mostly smooth. A few small banana pieces are completely fine and add extra flavor and texture. Add both sugars and whisk until the mixture is glossy and the sugars are evenly mixed through the bananas. 4. Add the Wet Ingredients Add the room-temperature yogurt, lightly beaten eggs, melted butter, oil, and vanilla extract to the banana mixture. Whisk until smooth and fully combined. Make sure the melted butter is warm, not hot, so it does not cook the eggs when you add it. 5. Fold in the Dry Ingredients Add the flour mixture to the wet ingredients in one addition. Use a spatula to gently fold from the bottom of the bowl over the top, turning the bowl as you work. Stop as soon as the last streaks of flour disappear. The batter may look a little lumpy, which is exactly what you want for soft, tender banana bread. 6. Add Your Mix-Ins If using walnuts or chocolate chips, gently fold them into the batter with just a few strokes. Do not keep mixing after they are added. For a prettier top, save a small handful of chocolate chips or walnuts to sprinkle over the batter before baking. 7. Fill the Pan Pour the batter into the prepared loaf pan and use your spatula to spread it evenly into the corners. Smooth the top lightly, but do not press down on the batter. You can add a few thin banana slices on top for a bakery-style look, if you like. 8. Bake the Banana Bread Bake for 55–65 minutes, placing the pan on the center oven rack. Start checking at 55 minutes by inserting a toothpick into the center. It is ready when the toothpick comes out clean or with a few moist crumbs, but no wet batter. If the top starts getting too dark before the center is baked, loosely cover the loaf with foil for the final 10–15 minutes. 9. Cool Before Slicing Let the banana bread rest in the pan for 10 minutes so it can set properly. Carefully lift or turn it out onto a wire rack and let it cool completely before slicing. Cutting it while hot can make the slices crumble and may make the center seem underbaked. Expert Tips for Perfect Banana Bread Use Very Ripe Bananas For the best banana flavor, use bananas with peels that are more black than yellow. I once used bananas that looked ripe but were still too yellow, and the loaf tasted bland instead of naturally sweet and rich. Do Not Overmix the Batter Once you add the flour, fold the batter gently and stop as soon as no dry streaks remain. I learned this the hard way on a rushed morning when I mixed too much, and the banana bread turned out tough instead of soft and tender. Cover the Top If It Browns Too Quickly Check the loaf after about 35 minutes of baking. If the top is getting dark but the center still needs more time, loosely tent the pan with foil. This keeps the crust from overbaking while the middle finishes cooking. Toast the Walnuts First Toast walnuts in a dry pan for 3 to 4 minutes before adding them to the batter. This small step brings out their nutty flavor and makes them taste much better than raw walnuts after baking. Choose the Right Loaf Pan A glass or light-colored metal loaf pan works best for even baking. Dark metal pans absorb more heat and can make the outside too dark before the center is fully baked. Cool Completely Before Slicing Let the banana bread cool fully before cutting into it, even if it smells impossible to resist. Hamza always tries to slice it early, and the result is usually a gummy, messy piece instead of a clean and tender slice. Weigh the Mashed Bananas If you have a kitchen scale, weigh your mashed bananas instead of relying only on the number of bananas. Banana sizes vary a lot, so using the exact amount helps the loaf bake with the right texture every time. Measure Ingredients Carefully For the best texture, measure the flour and mashed bananas as accurately as possible. If you bake with a kitchen scale, you can use a Baking Measurement Converter to quickly check the correct weight before you start. It is especially useful for flour, since even a little extra can make banana bread dense. Ingredient Substitutions Use Gluten-Free Flour You can replace the all-purpose flour with a 1:1 gluten-free baking flour
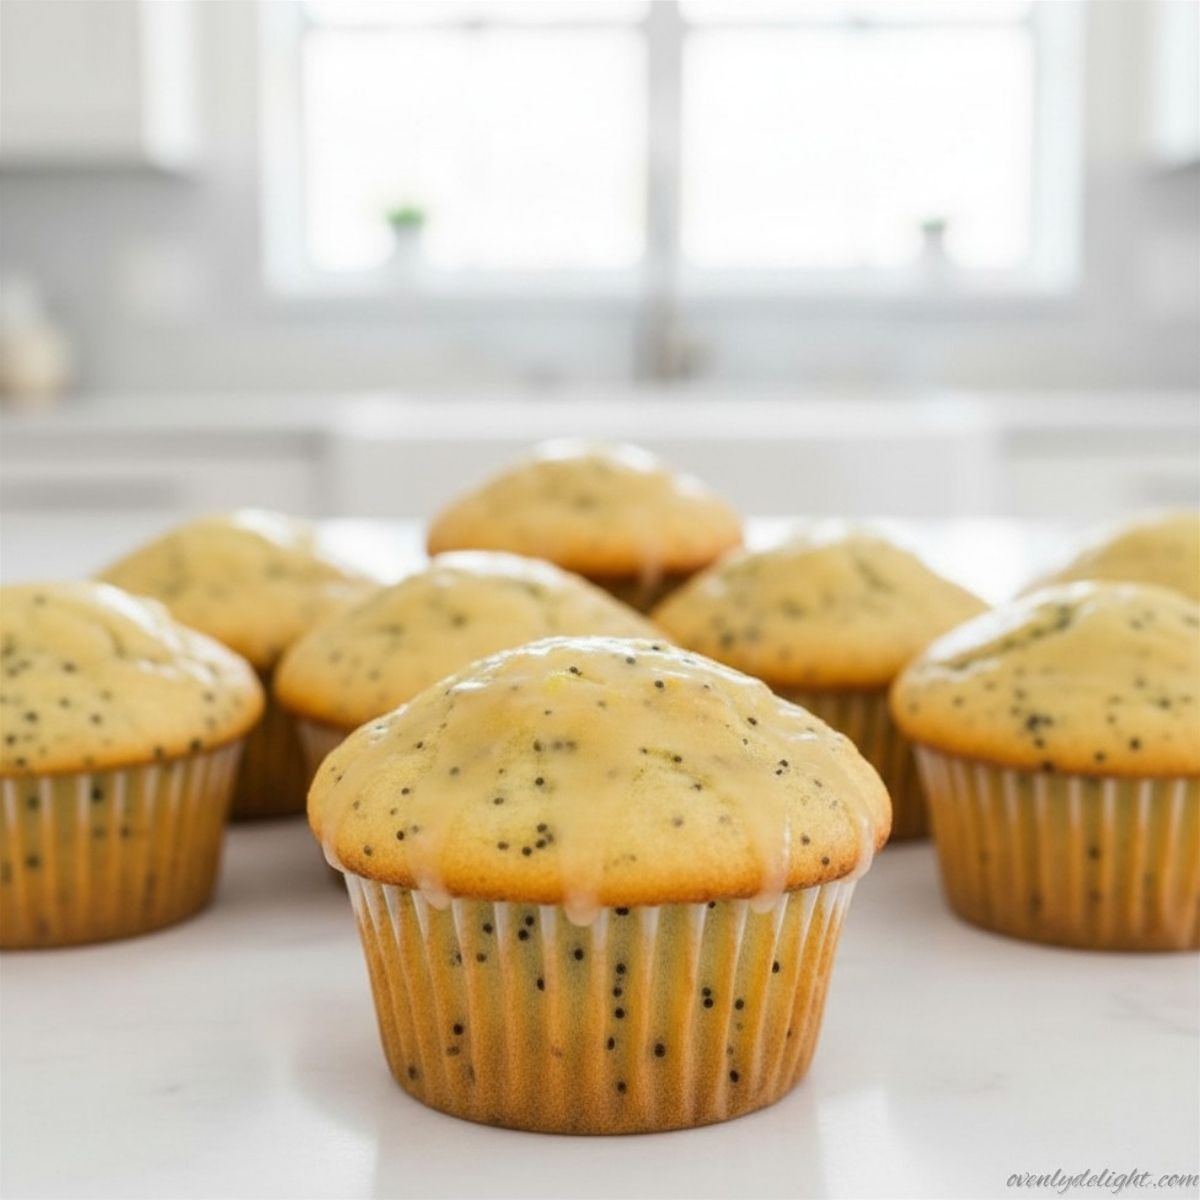
Lemon Poppy Seed Muffins — Moist, Bakery-Style
I started making these Lemon Poppy Seed Muffins when I wanted something lighter and brighter than my usual muffin recipes. After one bite, I was hooked. The fresh lemon flavor makes them taste incredibly refreshing, while the poppy seeds add the perfect little crunch. Now, these muffins are one of my favorite treats for spring and summer mornings. They’re soft, moist, and easy to make with simple ingredients, making them perfect for breakfast, brunch, or a quick snack whenever you’re craving something sweet and citrusy. Why You’ll Love This Recipe These Lemon Poppy Seed Muffins are everything a great homemade muffin should be soft, moist, and bursting with fresh lemon flavor. The batter comes together quickly with simple pantry ingredients, and there’s no mixer required. Fresh lemon zest adds a bright citrus flavor that bottled juice simply can’t match, while sour cream helps create an incredibly tender crumb. What really makes these muffins special is the combination of sweet, tangy lemon and the subtle crunch of poppy seeds in every bite. Finished with a simple lemon glaze, they’re perfect for breakfast, brunch, or an afternoon treat. Best of all, they stay soft and moist for days, making them just as delicious the next morning as they are fresh from the oven. What Makes These Muffins Special? If you ask me, the best thing about these Lemon Poppy Seed Muffins is how fresh and bright they taste. The lemon flavor really stands out, while the poppy seeds add a light crunch that makes every bite more interesting. They’re soft, moist, and perfectly balanced not too sweet and not too tart. The first time I made them, I wasn’t expecting much beyond a simple batch of muffins, but my family loved them so much that they disappeared by the end of the day. Since then, they’ve become one of those recipes I make whenever I want something easy, reliable, and guaranteed to get compliments. Ingredients for Glazed Lemon Poppy Seed Muffins Dry Ingredients Wet Ingredients Lemon Icing How to Make Lemon Poppy Seed Muffins (Step by Step) Step 1: Prepare the Oven and Muffin Pan Preheat the oven to 425°F (218°C) and position the rack in the center. Line a standard 12-cup muffin tin with paper liners or spray with nonstick baking spray. Starting at a higher temperature is what gives you those tall, domed tops. Step 2: Mix the Dry Ingredients Whisk together the flour, baking powder, baking soda, salt, and poppy seeds in a medium bowl. Set this aside pre-mixing the dry ingredients ensures everything is evenly distributed before it hits the wet batter. Step 3: Cream the Butter and Sugars Beat the softened butter, granulated sugar, and brown sugar together in a large bowl with a hand whisk or silicone spatula until light and creamy, about 2 minutes. Do not rush this step under-creamed butter leads to a dense crumb. I learned that the hard way on my first batch. Step 4: Add the Wet Ingredients Add the eggs one at a time, whisking well after each addition. Then stir in the sour cream, lemon zest, lemon juice, and vanilla extract. The batter may look slightly curdled at this point that is completely normal. Step 5: Combine the Batter Add the dry ingredient mixture to the wet ingredients and stir gently until just combined. Pour in the milk and stir again stop as soon as no flour streaks remain. Overmixing activates gluten and makes the muffins tough. Step 6: Fill and Bake Divide the batter evenly among all 12 muffin cups, filling each about three-quarters full. Bake at 425°F for 5 minutes, then without opening the oven reduce the temperature to 350°F (177°C) and bake for an additional 13 to 15 minutes. A toothpick inserted in the center should come out clean. Step 7: Cool and Add the Lemon Icing Let the muffins cool in the pan for 5 minutes, then transfer to a wire rack. While they cool, whisk together the sifted confectioners’ sugar, lemon juice, and milk until smooth. Drizzle over the muffins once they have cooled completely so the icing sets properly. Expert Tips for Perfect Lemon Breakfast Muffins Zest before you juice This sounds obvious, but I have forgotten more than once and ended up trying to zest an already-squeezed lemon, which is a mess. Get your zest first, then cut and squeeze. You will get far more zest from a whole lemon than from a squished one. The two-temperature bake is not optional Starting at 425°F creates a burst of steam that pushes the batter upward before the crust sets. Then dropping to 350°F lets the center bake through without burning the outside. I tried skipping this once flat tops, every time. Not worth it. If you’re ever unsure about oven settings, using an oven temperature converter can really help keep your baking accurate and consistent. Room temperature dairy makes a real difference Cold sour cream or cold eggs can cause the butter to seize into small clumps, which affects the final texture. Set everything on the counter at least 30 minutes before you start. Do not skip the sour cream It is the key to keeping these fresh lemon muffins moist for days. Plain full-fat yogurt works equally well if that is what you have on hand, but do not substitute with low-fat the texture suffers. Fill the cups generously These muffins need about three-quarters full to get that bakery-style dome. I used to underfill out of habit from other recipes and ended up with flat tops that did not look nearly as impressive. Sift your confectioners’ sugar for the icing Even a few small lumps in the glaze will be visible once it sets on top of the muffin. A quick sift takes 30 seconds and makes the drizzle look polished and professional. How to Store Lemon Poppy Seed Muffins Storage Tips Room Temperature:Once the Lemon Poppy Seed Muffins have cooled completely, store them in an airtight container at room temperature
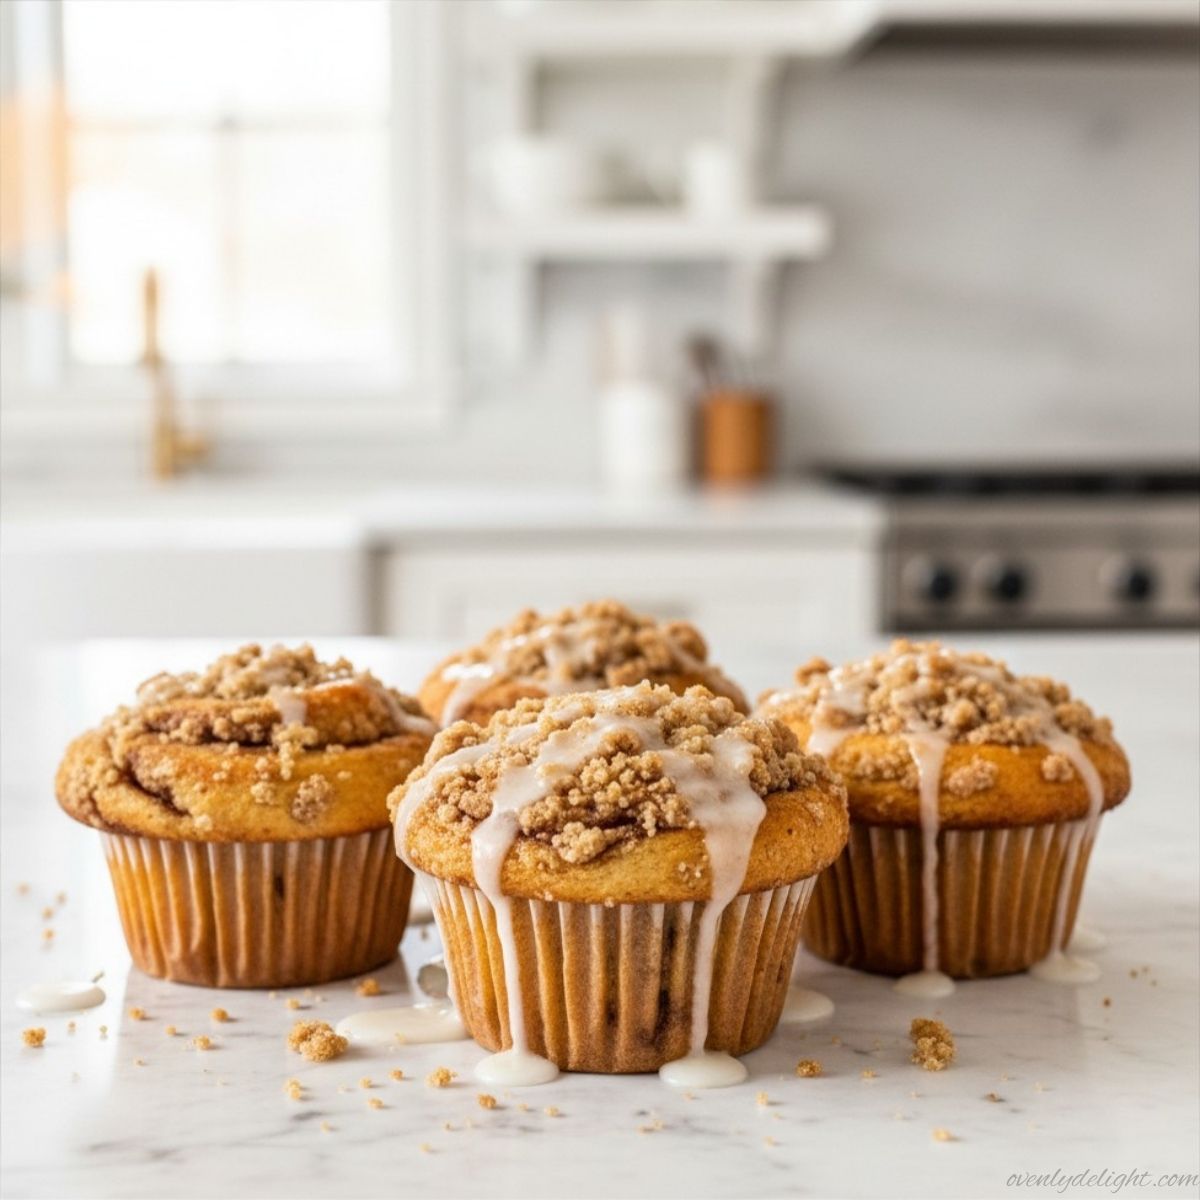
Cinnamon Roll Muffins — Soft, Glazed &Bakery-Style From Scratch
If you love the flavor of classic cinnamon rolls but don’t want to wait for yeast dough to rise, these Cinnamon Roll Muffins are going to be your new favorite. I first made them on a cozy weekend morning when I was craving something warm and sweet with my coffee but didn’t have the time for traditional cinnamon rolls. They turned out so soft, fluffy, and full of cinnamon flavor that they quickly became a regular in my kitchen. These muffins give you all the cozy cinnamon roll taste in a much quicker and easier way. Why You’ll Love This Muffins Recipe Ingredients for Cinnamon Roll Muffins These Cinnamon Roll Muffins are made with simple pantry staples, but each ingredient plays an important role in creating soft muffins, a gooey cinnamon swirl, and a rich cream cheese glaze. For the Muffin Batter For the Cinnamon Sugar Filling For the Cream Cheese Glaze How to Make Cinnamon Roll Muffins (Step by Step) Step 1: Preheat the Oven Start by preheating your oven to 400°F (204°C). Line a standard 12-cup muffin pan with paper liners or grease each cup well with butter or non-stick spray. Since the cinnamon sugar filling can become sticky as it bakes, proper greasing helps prevent the muffins from sticking. Step 2: Prepare the Cinnamon Sugar Filling In a small bowl, combine the brown sugar, ground cinnamon, chopped pecans or walnuts (if using), and melted butter. Stir everything together until the mixture resembles damp sand. Set it aside while you prepare the muffin batter. Step 3: Mix the Muffin Batter In a large mixing bowl, whisk together the flour, baking powder, salt, and sugar. In a separate bowl or measuring jug, whisk the melted butter, egg, and milk until combined.Pour the wet ingredients into the dry ingredients and gently stir with a spatula until no dry flour remains. The batter should be thick but still scoopable. If it seems overly stiff, add a tablespoon or two of extra milk. Be careful not to overmix, as this can make the muffins dense instead of light and fluffy. Step 4: Layer and Create the Swirl Spoon about 1 tablespoon of batter into the bottom of each muffin cup. Sprinkle a layer of the cinnamon sugar filling over the batter. Add more batter on top until each cup is about three-quarters full, then finish with another sprinkle of the cinnamon mixture.For a beautiful cinnamon swirl, use a toothpick or skewer to gently swirl the batter and filling together with a few figure-eight motions. Step 5: Bake the Muffins Place the muffin pan in the preheated oven and bake for 15 minutes, or until a toothpick inserted into the center comes out clean. The tops should be lightly golden and spring back when gently touched. Allow the muffins to cool in the pan for about 5 minutes before transferring them to a wire rack. Step 6: Make the Cream Cheese Glaze While the muffins cool, prepare the glaze. In a small bowl, beat the softened cream cheese until smooth. Add the powdered sugar, milk, and vanilla extract, then whisk until creamy and lump-free. If the glaze seems too thick, add a few drops of milk. If it’s too thin, mix in a little more powdered sugar until you reach your desired consistency. Step 7: Glaze and Serve Once the muffins have cooled completely, drizzle the cream cheese glaze generously over the tops. Let the glaze set for a few minutes before serving if you’d like a neater finish.Enjoy these warm, fluffy Cinnamon Roll Muffins with a cup of coffee, tea, or a glass of milk for the ultimate cozy treat. Expert Tips for Soft and Fluffy Cinnamon Roll Muffins 1. Avoid Overmixing the Batter One of the most common muffin mistakes is overmixing. Once the wet ingredients are added to the dry ingredients, gently fold everything together with a spatula until just combined. A few small lumps are perfectly fine. Overmixing develops too much gluten, which can make the muffins dense and chewy instead of light and tender. 2. Let the Butter Cool Slightly After melting the butter, allow it to cool for a few minutes before mixing it with the egg. Hot butter can partially cook the egg, creating unwanted lumps in the batter. For an easy shortcut, stir the melted butter into the cold milk first to bring the temperature down. 3. Use Fully Softened Cream Cheese For a silky-smooth glaze, make sure the cream cheese is softened before mixing. Cold cream cheese often leaves lumps that are difficult to remove. Let it sit at room temperature for 30 to 45 minutes, or microwave it for about 10 seconds if you’re short on time. 4. Adjust the Milk as Needed The exact amount of milk needed can vary slightly depending on how your flour is measured. Start with the listed amount, then check the consistency of the batter. It should be thick but still easy to scoop. If it feels too stiff, add an extra tablespoon or two of milk until it reaches the right texture. 5. Add Extra Filling on Top A little extra cinnamon sugar filling sprinkled over the tops before baking creates a delicious caramelized crust. This simple step adds extra flavor, a touch of crunch, and gives the muffins a beautiful bakery-style appearance. 6. Create a Visible Cinnamon Swirl For that classic cinnamon roll look, use a toothpick or wooden skewer to gently swirl the batter and filling together before baking. A quick figure-eight motion is all it takes to create beautiful ribbons of cinnamon throughout the muffins. 7. Don’t Skip the Nuts if You Enjoy Them Chopped pecans or walnuts add a wonderful crunch that contrasts with the soft muffin crumb. They also bring a rich, nutty flavor that complements the cinnamon filling perfectly. If you don’t have nut allergies to consider, they’re a simple addition that makes these muffins even more delicious. 8. Don’t Overbake Keep a close eye on the muffins during
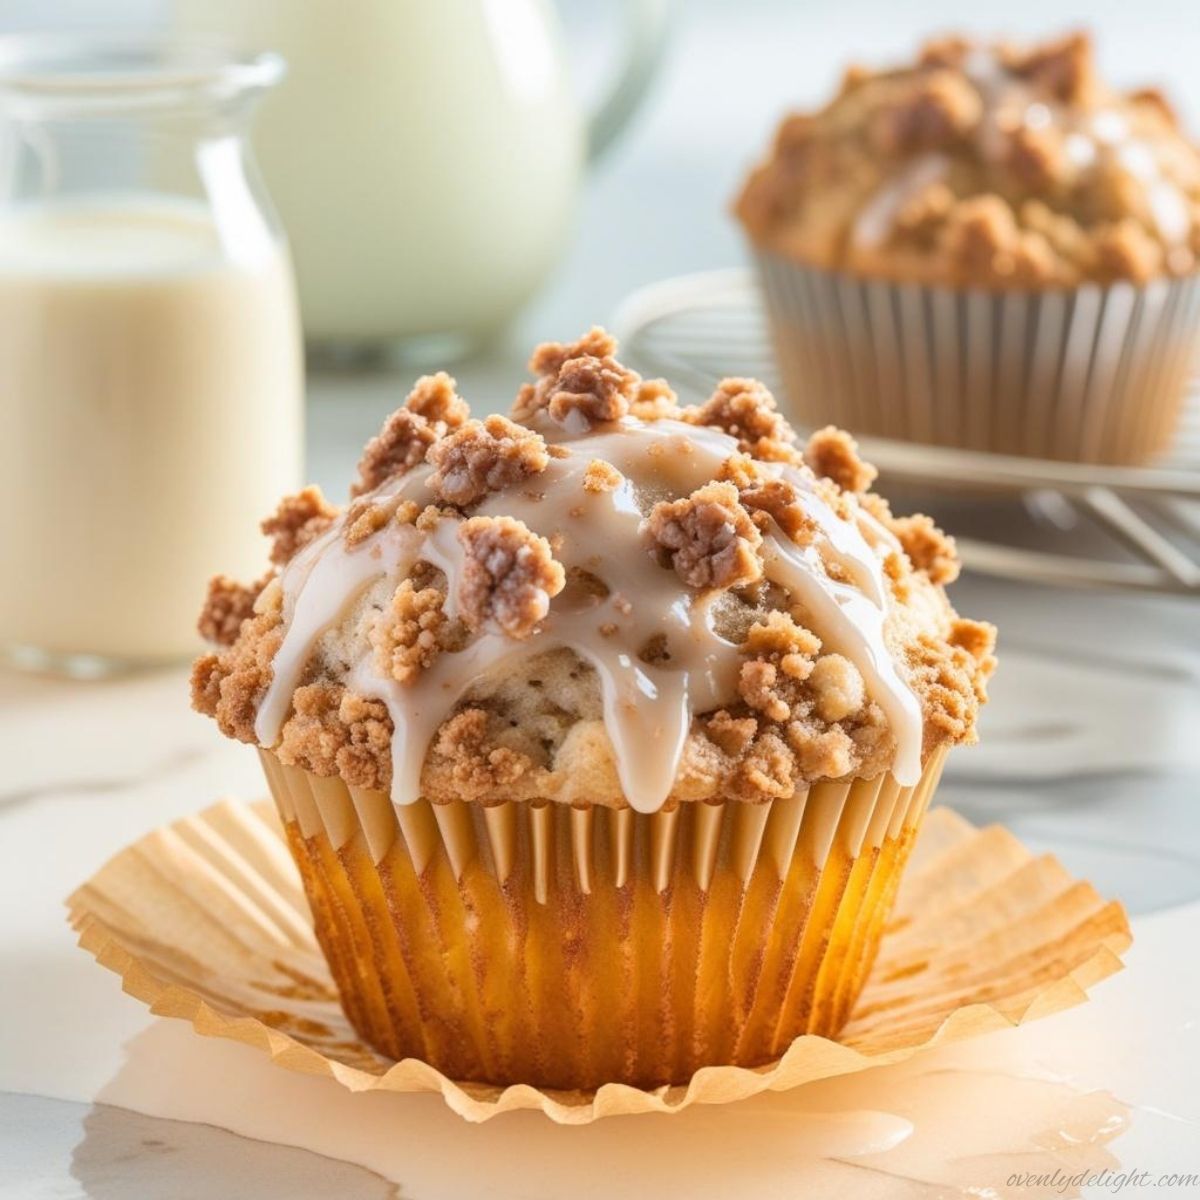
Coffee Cake Muffins — Soft, Buttery &Topped With Cinnamon Streusel
These Coffee Cake Muffins actually came out of one of those slow, sleepy mornings when I didn’t feel like making anything complicated but still wanted something warm and comforting with my coffee. I had a classic coffee cake craving, but instead of baking a full tray, I turned it into easy muffins with a soft, buttery crumb and a generous cinnamon streusel on top. The moment they came out of the oven, the whole kitchen smelled like a cozy bakery sweet cinnamon, brown sugar, and vanilla all at once. Now they’ve become my go-to when I want something simple but special. Soft in the center, slightly crisp on top, and perfect with a hot cup of coffee honestly, they don’t last long in my house. Why You’ll Love This Recipe These homemade Coffee Cake Muffins bring everything you love about a bakery-style breakfast right into your kitchen. With a soft, tender crumb, a buttery crumble topping, and warm cinnamon sweetness in every bite, they deliver all the comfort of classic coffee cake without the effort of baking a full cake. It’s an easy coffee cake muffins from scratch recipe that requires no mixer, no complicated steps, and no chilling. The simple milk-based batter comes together in just minutes, while the brown sugar streusel topping is made with basic pantry ingredients you likely already have at home. Perfect for breakfast, tea time, or whenever you’re craving a cozy coffee shop-style treat, these muffins are quick to make and even quicker to disappear. Ingredients for Coffee Cake Muffins For Muffin Batter For Streusel (Crumble Topping) How to Make Coffee Cake Muffins (Step by Step) Step 1: Preheat and Prep Preheat your oven to 375°F (190°C). Line a 12-cup muffin tin with paper liners or lightly grease each cup with butter or non-stick spray. Place the rack in the middle of the oven. This helps the muffins bake evenly and makes them easier to remove once baked. Step 2: Make the Streusel Topping First In a medium bowl, mix ¾ cup flour, ½ cup brown sugar, and 1 tsp cinnamon. Add the softened butter and use your fingertips to rub it in until you get a crumbly mixture with uneven pieces. Avoid turning it into a paste you want a sandy, chunky texture. Chill the streusel in the fridge while you prepare the batter so it stays crisp during baking. Step 3: Mix the Dry Ingredients In a large bowl, whisk together flour, granulated sugar, baking powder, salt, and cinnamon until well combined. Make a small well in the center for the wet ingredients. Step 4: Mix the Wet Ingredients In another bowl, whisk together the melted (cooled) butter, eggs, milk, and vanilla extract until smooth. Make sure the butter isn’t hot, or it may cook the eggs and ruin the batter. Step 5: Combine Fold, Don’t Stir Pour the wet mixture into the dry ingredients. Gently fold with a spatula until just combined (about 10–12 folds). The batter should look slightly lumpy that’s exactly what gives soft, fluffy muffins. Overmixing will make them dense. Step 6: Fill the Muffin Cups Divide the batter evenly into the 12 muffin cups, filling each about ¾ full. For bakery-style domed tops, you can fill them slightly higher up to the rim. Step 7: Add the Streusel Take the chilled streusel and generously sprinkle it over each muffin. Lightly press it down so it sticks to the batter and forms that classic bakery-style crumb topping. Step 8: Bake Bake for 18–22 minutes, or until a toothpick inserted in the center comes out clean and the tops are lightly golden. Avoid opening the oven in the first 15 minutes to prevent sinking. Let muffins cool in the pan for 5 minutes, then transfer to a wire rack to finish cooling. Expert Tips for the Best Coffee Cake Muffins 1. Always make the streusel before the batter and refrigerate it The first time I made these, I rushed and did the batter first. By the time I got to the streusel, the butter had warmed up too much from handling, and the topping baked up greasy instead of crumbly. Now I always make the streusel first and chill it while I prep everything else. Cold butter is the secret to those perfect bakery-style crumbs every time. 2. Use softened butter for the streusel, melted for the batter This step matters more than people think. Softened butter creates those chunky, sandy crumbs when rubbed into flour, while melted butter blends smoothly into the batter for a soft, tender crumb. If you swap them, the texture just won’t come out right greasy topping or dense muffins. 3. Don’t skip cinnamon in both layers Cinnamon in just the topping isn’t enough. When it’s added to both the batter and streusel, every bite tastes like a true coffee cake muffin warm, cozy, and evenly spiced instead of just sweet on top. 4. Fold the batter never whisk it Once the dry ingredients meet the wet, switch to a spatula and fold gently. Stop as soon as the flour disappears. Overmixing is the fastest way to dry, dense muffins, while gentle folding keeps them soft and fluffy. 5. Press the streusel gently onto the batter A light press helps the crumble stick during baking so it doesn’t fall off later. Too much pressure, though, and it sinks into the batter. A soft touch gives you that perfect bakery-style topping that stays put. 6. Can I make coffee cake muffins ahead of time? Yes here’s how You can make the streusel up to 3 days in advance and keep it chilled. The batter can also be refrigerated overnight and baked straight from the fridge just add 2–3 extra minutes to the baking time. Baked muffins also store well for several days, making them great for meal prep or busy mornings. 7. Room temperature eggs matter Cold eggs mixed with warm melted butter can cause the batter to look uneven or slightly curdled. Let
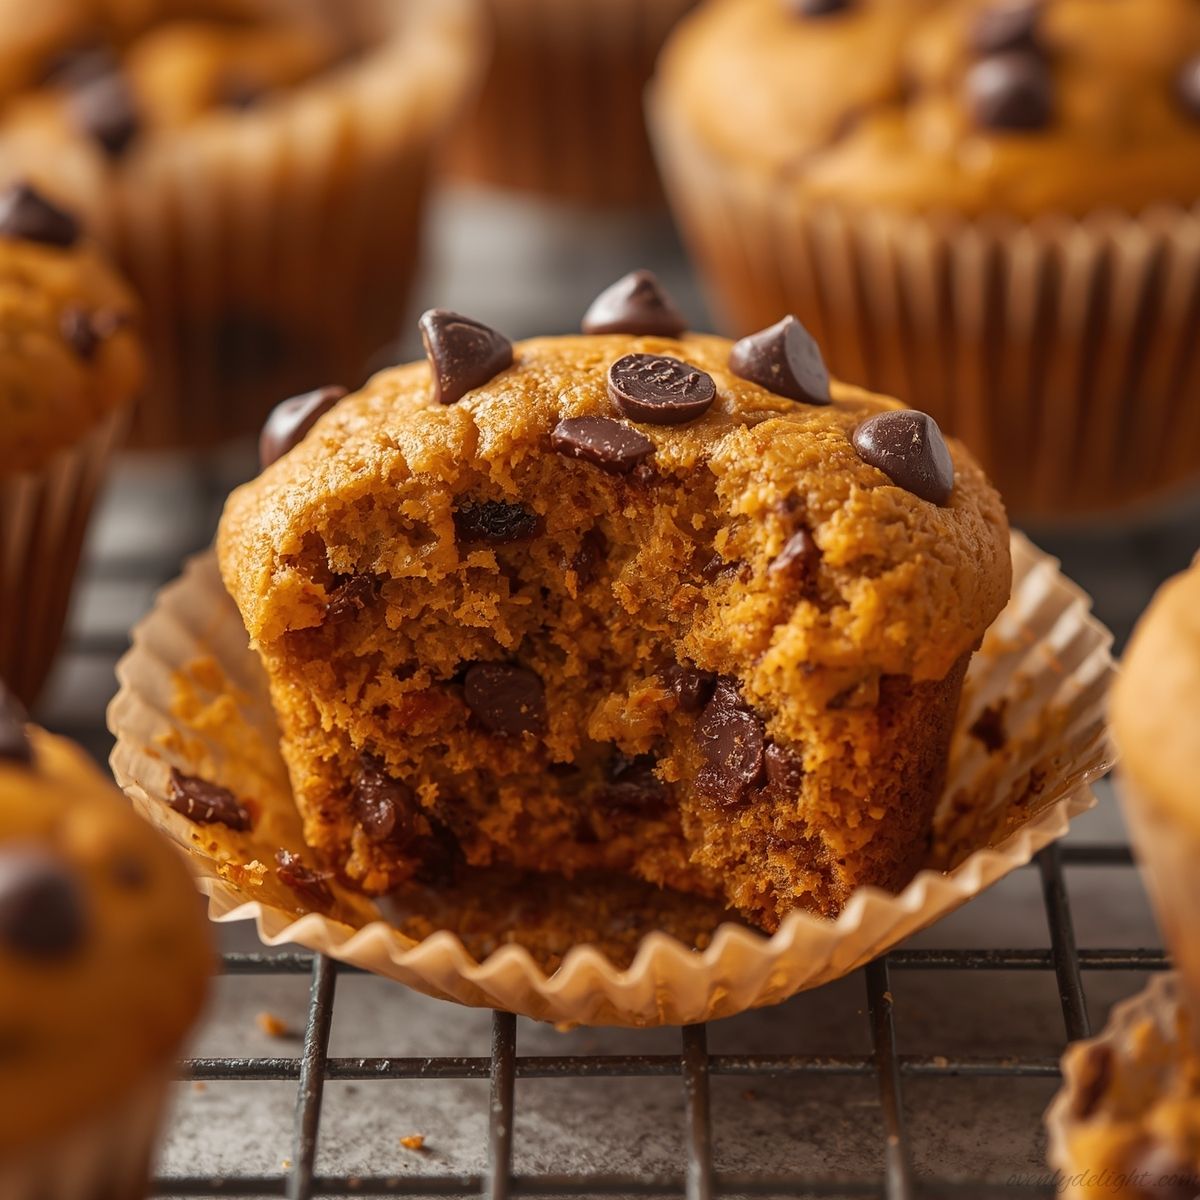
Best Pumpkin Chocolate Chip Muffins — Soft, Moist & Bakery-Style
I made these Pumpkin Chocolate Chip Muffins on a quiet morning when I was craving something warm, soft, and a little comforting. I had a can of pumpkin puree sitting in the pantry and a half bag of chocolate chips leftover from another recipe, so I thoughtwhy not bring them together? I wasn’t expecting much at first, just a simple batch of muffins for the week. But the moment they came out of the oven, the kitchen smelled like cinnamon, brown sugar, and cozy fall mornings. The chocolate chips were slightly melted, the muffins were soft and fluffy, and honestly. I couldn’t wait for them to cool completely before taking a bite. Now they’ve become one of those recipes I go back to every time I want something easy, homemade, and comforting without too much effort. Why You’ll Love Pumpkin Chocolate Chip Muffins These pumpkin chocolate chip muffins are soft, moist, and stay tender for days thanks to oil instead of butter. The pumpkin puree keeps them naturally moist while adding a warm, subtle sweetness that pairs perfectly with melted chocolate chips. It’s a simple one-bowl recipe no mixer, no chilling, and no complicated steps. Just mix, bake, and enjoy. You’ll get 12 fluffy muffins in under an hour, making them perfect for cozy fall mornings or whenever you’re craving an easy homemade treat. Ingredients for Pumpkin Chocolate Chip MuffinsWet Ingredients Ingredients You’ll Need For Pumpkin Chocolate Chip Muffins Wet Ingredients Dry Ingredients Mix-Ins How to Make Pumpkin Chocolate Chip Muffins (Step-by-Step) Step 1: Prep Oven & Muffin Tin Preheat your oven to 425°F (218°C). Line a 12-cup muffin tin with paper liners or grease it well with oil or non-stick spray. Place the rack in the middle of the oven. Starting at a high temperature is important it helps create those tall, bakery-style muffin tops. Step 2: Mix Wet Ingredients In a large bowl, whisk together pumpkin puree, granulated sugar, brown sugar, and vegetable oil until smooth. Add the eggs one at a time, whisking after each addition. Then mix in vanilla extract and sour cream until fully combined. The batter will look thick and rich orange in color that’s perfect. Step 3: Add Dry Ingredients Add flour, baking powder, baking soda, pumpkin pie spice, and salt directly into the wet mixture. Gently fold everything together using a spatula until just combined. A few small streaks of flour are fine. Do not overmix overmixing can make muffins dense and heavy instead of soft and fluffy. Step 4: Add Chocolate Chips Fold in 1¼ cups chocolate chips with just a few gentle strokes. For best results, toss the chocolate chips in 1 teaspoon of flour before adding them. This helps prevent them from sinking to the bottom while baking. Step 5: Fill Muffin Cups Divide the batter evenly between 12 muffin cups, filling each one all the way to the top. Press a few extra chocolate chips on top of each muffin for a bakery-style look. Step 6: Bake Bake at 425°F (218°C) for 5 minutes, then (without opening the oven door) reduce the temperature to 350°F (177°C) and bake for another 17–20 minutes. They’re done when a toothpick inserted in the center comes out with a few moist crumbs not wet batter. Step 7: Cool Let muffins cool in the pan for 5 minutes, then transfer to a wire rack. Wait at least 10 minutes before eating, as the texture continues to set while cooling. Expert Tips for Perfect Pumpkin Chocolate Chip Muffins 1. Use plain pumpkin puree, not pumpkin pie filling Always double-check the label. Plain pumpkin puree should have only one ingredient: pumpkin. Pumpkin pie filling already contains sugar and spices, which will throw off the flavor balance and make the muffins overly sweet and heavily spiced. 2. The 425°F start creates tall bakery-style domes Starting at 425°F for the first 5 minutes creates a burst of heat that lifts the batter quickly before the structure sets. Then reducing to 350°F allows the muffins to bake through gently. This two-temperature method is the secret behind tall, bakery-style muffin tops. 3. Toss chocolate chips in flour to prevent sinking Before folding in the chocolate chips, lightly coat them with about 1 teaspoon of flour. This helps them stay evenly distributed instead of sinking to the bottom during baking. 4. Don’t overmix the batter Once you add the dry ingredients, gently fold until just combined. Stop as soon as you no longer see dry flour. Overmixing develops gluten and leads to dense, chewy muffins instead of soft and fluffy ones. A slightly lumpy batter is completely fine. 5. Use oil for long-lasting moisture Oil keeps muffins soft for 3–4 days, unlike butter which can dry out faster. Because oil stays liquid at room temperature, it keeps the crumb tender even after the muffins cool. 6. Fill muffin cups to the rim for tall tops For bakery-style muffins, fill each cup all the way to the top, not ¾ full. When combined with the high initial baking temperature, this helps create a strong domed top without overflowing. 7. Add chocolate chips on top before baking Press a few extra chocolate chips on top of each muffin before baking. This step doesn’t affect taste much, but it gives a rich, bakery-style finish that makes the muffins look more appealing and loaded. Ingredient Substitutions Vegetable oil You can swap vegetable oil with canola oil or melted coconut oil in a 1:1 ratio. Coconut oil adds a very light coconut flavor that actually pairs really well with pumpkin and chocolate, giving a slightly richer taste. Sour cream Replace sour cream with plain full-fat Greek yogurt or regular plain yogurt (1:1 ratio). Avoid flavored yogurt, as it will make the muffins too sweet and change the flavor balance All-purpose flour Use Bob’s Red Mill 1-to-1 Baking Flour or King Arthur Measure for Measure as a direct swap. The muffins will be slightly more tender and may rise a little less, but the taste
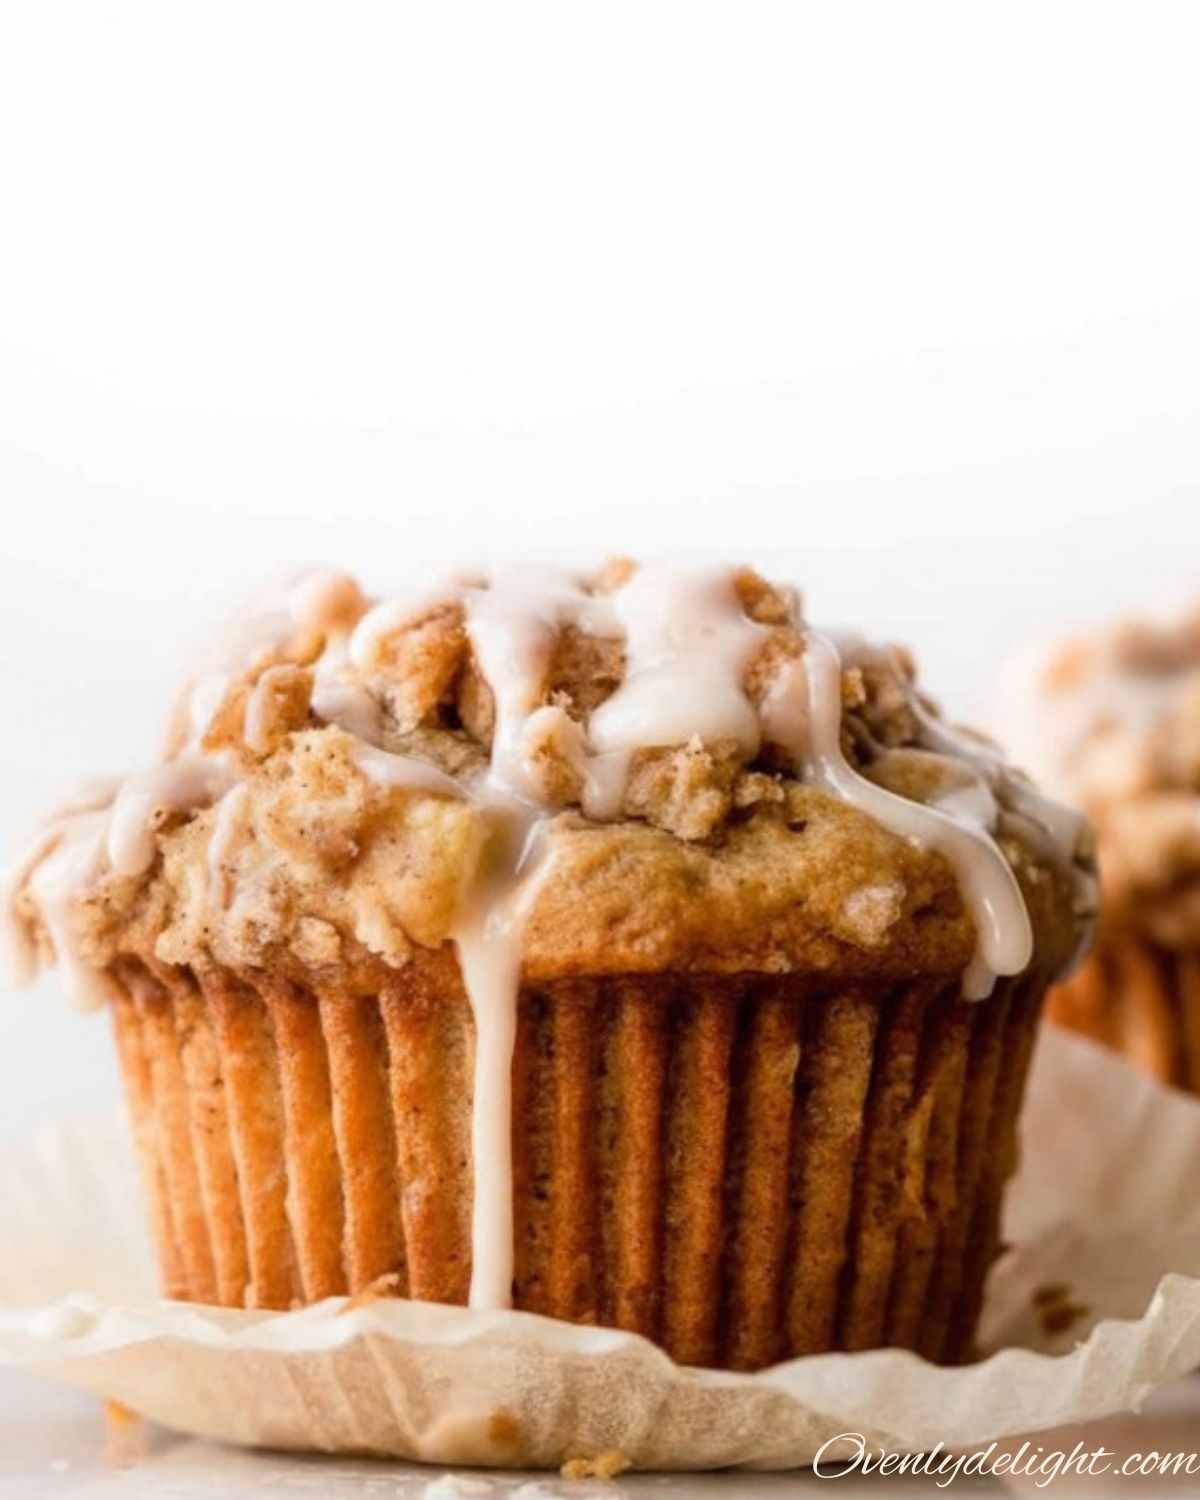
Apple Cinnamon Crumb Muffins — The Only Recipe You’ll Ever Need
It started five years ago, long before I ever called myself a baker. Back then, I was just experimenting in a small kitchen, trying recipes without really knowing what I was doing. Most things didn’t turn out right, but I kept going anyway. Over time, baking became my quiet place the one thing that didn’t need perfection, just patience. These Apple Cinnamon Crumb Muffins reminded me of that journey. Two soft apples on the counter, a slow morning, and that same old habit of just trying things without overthinking. Funny how even after all these years, the best recipes still start the same way. Why These Muffins Are Actually Worth Making We love these Apple Cinnamon Crumb Muffins because they strike the perfect balance between cozy and simple. They’re soft, fluffy, and packed with real apple flavor, while the cinnamon crumb topping adds just the right amount of crunch and sweetness. What makes them even better is how easy they are to make. No fancy tools, no complicated steps just basic ingredients that come together beautifully in one bowl They feel like a bakery-style treat, but made right at home. Perfect for slow mornings, tea time, or when you just want something warm and comforting straight from the oven. Ingredients You’ll Need For Apple Cinnamon Muffins For the Crumb Topping For the Muffin Batter For the Vanilla Icing (Optional but Recommended) How to Make Apple Cinnamon Crumb Muffins (Step by Step) Step 1: Make the Crumb Topping First Always start with the crumb topping this is something I learned after doing it backwards and watching it get greasy from sitting too long. In a medium bowl, mix together both sugars, cinnamon, and melted butter until combined. Add the flour and stir with a fork until it clumps together into pea-sized bits. Pop this in the fridge while you make the batter. Chilling it helps it keep its shape in the oven instead of spreading flat. Step 2: Prep Your Oven and Pan Preheat your oven to 425°F (218°C). I know that sounds high, but starting at a high temperature is what creates that beautiful, tall muffin dome. You’ll lower the temp partway through. Line a standard 12-cup muffin pan with paper liners and grease any extra cups you’ll use separately (since this recipe makes 14, I use a second pan for the remaining two). Step 3: Whisk the Dry Ingredients In a large bowl, whisk together the flour, baking soda, baking powder, cinnamon, and salt. Set it aside. Don’t skip whisking it aerates the flour and makes sure your leavening is evenly distributed, which means even rising. Step 4: Cream the Butter and Sugars Using a hand mixer or stand mixer with the paddle attachment, beat the softened butter with both sugars on medium-high speed for about 2 minutes until pale and fluffy. This step is crucial. Don’t rush it. Proper creaming traps air in the batter, which is part of what makes these muffins so light. Step 5: Add the Wet Ingredients Add the eggs one at a time, beating well after each. Then mix in the yogurt (or sour cream) and vanilla extract. Don’t panic if it looks slightly curdled at this point that’s totally normal and it’ll come together once the flour goes in. Step 6: Combine Wet and Dry (Gently!) Add the dry ingredients to the wet ingredients alternating with the milk start and end with the dry ingredients. Mix by hand with a rubber spatula using gentle folding strokes. Overmixing is the number one thing that ruins muffins. Stop as soon as you don’t see dry flour streaks, even if the batter looks a little lumpy. Step 7: Fold in the Apples Gently fold in the chopped apples with your spatula. Make sure they’re evenly distributed throughout the batter so every muffin gets a good amount. If some chunks are bigger than 1/2 inch, trim them down too large and they can make the muffins fall apart. Step 8: Fill the Cups and Add the Crumb Spoon the batter into the prepared muffin cups, filling each about 3/4 full. Take your crumb topping out of the fridge and press generous clumps onto the top of each muffin. Don’t be shy here pile it on. The more the better, honestly. Step 9: Bake at Two Temperatures Bake at 425°F for the first 5 minutes, then without opening the oven door, reduce the temperature to 350°F (177°C) and bake for another 16-17 minutes. Total bake time is about 22 minutes. A toothpick inserted into the centre should come out clean, or with just a moist crumb or two. The two-temperature trick is legit it’s what gives you that tall, beautiful top. Step 10: Cool and Drizzle (If Using Icing) Let the muffins cool in the pan for 5 minutes, then transfer to a wire rack. While they’re still slightly warm not hot whisk together the confectioners’ sugar, cream, and vanilla until smooth. Drizzle it over the muffins with a spoon or piping bag. It’ll set up into a beautiful, delicate glaze as they finish cooling. Expert Tips for Perfect Apple Cinnamon Crumb Muffins Every Time Use room temperature ingredients. I know it sounds like one of those fussy baking things, but cold eggs and cold yogurt genuinely affect how the batter comes together. Set everything out 30 minutes before you start. Choose the right apple. Granny Smith is my go-to for baking because they hold their shape and add a lovely tartness. Honeycrisp works great too. Avoid Red Delicious — they go mushy and watery when baked. Don’t skip the chill on the crumb topping. Even 10-15 minutes in the fridge makes a huge difference. Warm crumb topping melts into the batter instead of staying clumpy and crunchy. Spoon and level your flour. Sally’s Baking Addiction has a great guide on this (sallysbakingaddiction.com). Too much flour = dense, dry muffins. It’s such an easy thing to get wrong. Overfill the cups a little. Unlike cupcakes, muffins
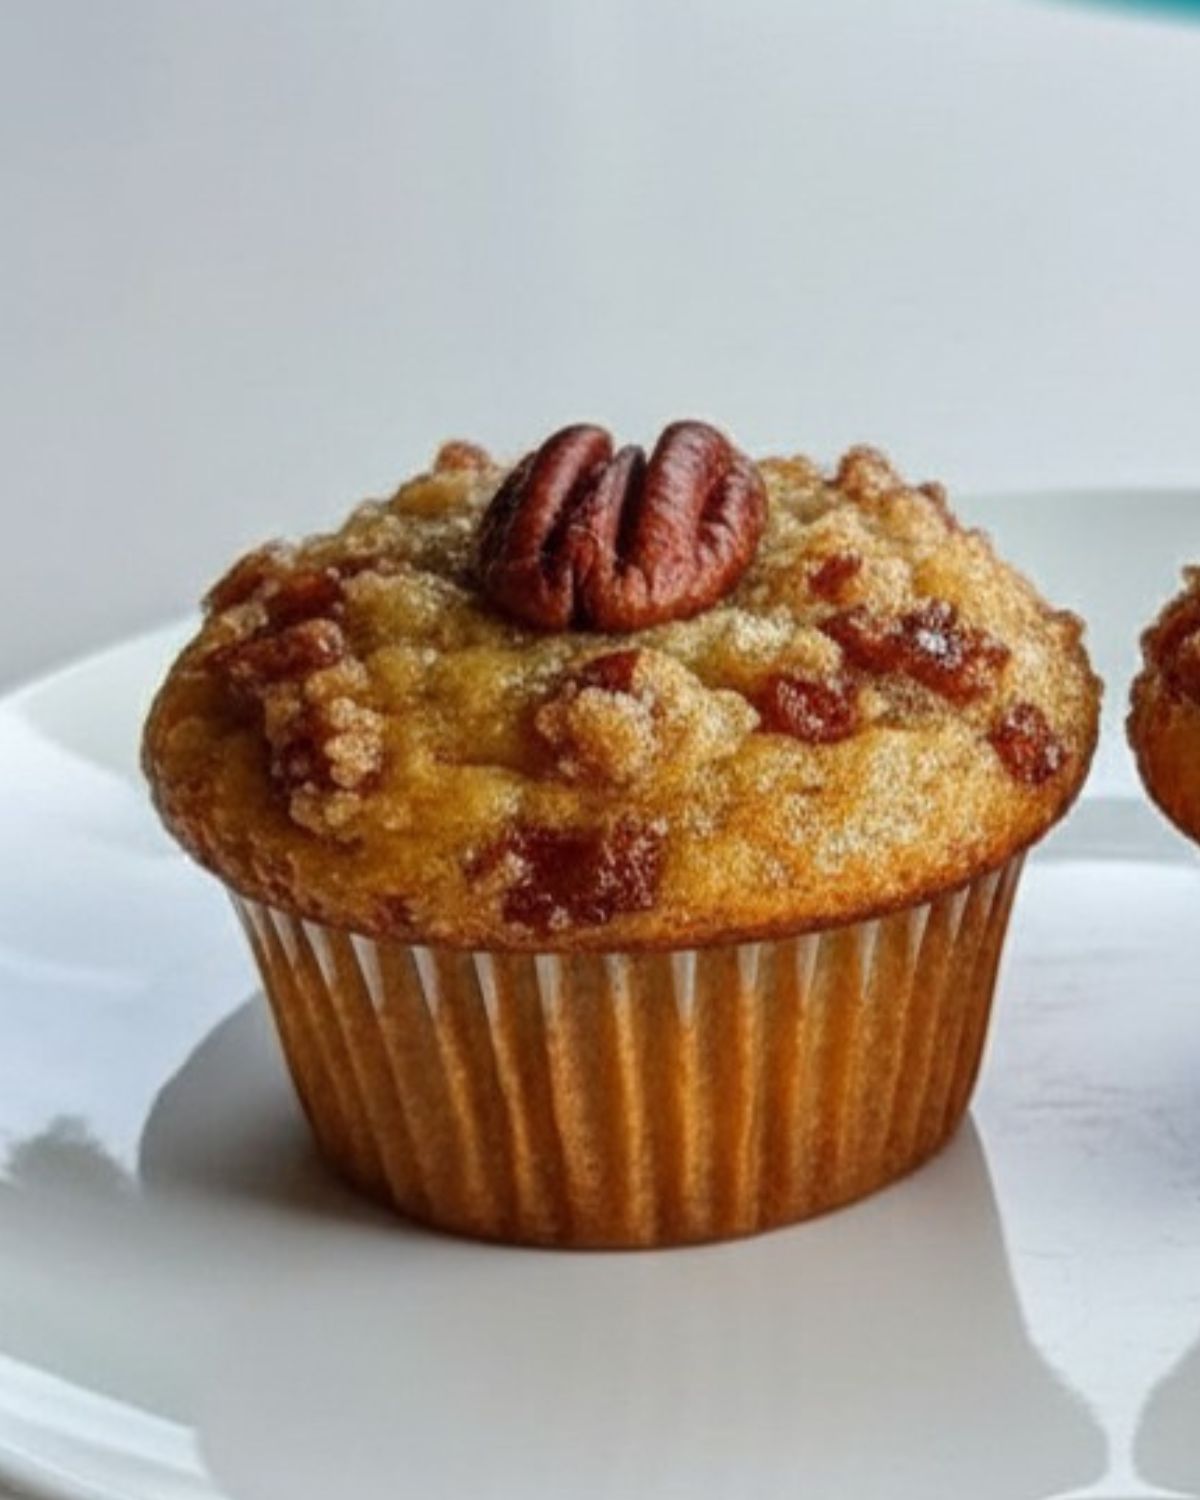
Pecan Pie Brown Sugar Muffins — Bakery-Style with Crunchy Pecan Topping
I first made these Pecan Pie Brown Sugar Muffins on a chilly fall morning when I was craving pecan pie but didn’t have the time to make a whole dessert. I decided to turn those cozy flavors into muffins instead, and the result was even better than I expected. The brown sugar keeps them soft and rich, while the crunchy pecan topping adds that classic pecan pie texture in every bite. Now they’re one of my favorite treats for breakfast, brunch, or an afternoon coffee break. They come together in just 35 minutes and fill the kitchen with the warm aroma of butter, brown sugar, and toasted pecans. Why You’ll Love These Brown Sugar Pecan Muffins Ingredients for Pecan Pie Brown Sugar Muffins Dry Ingredients Wet Ingredients Mix-Ins & Topping How to Make Pecan Pie Brown Sugar Muffins (Step by Step) 1. Prepare the Oven and Muffin Pan Preheat your oven to 375°F (190°C) and position a rack in the center. Line a standard 12-cup muffin tin with paper liners or lightly grease each cup. I usually use liners because they make cleanup much easier and help the muffins release perfectly. 2. Make the Pecan Topping In a small bowl, stir together ¼ cup brown sugar, 2 tablespoons melted butter, and ¼ cup pecan halves until evenly coated. Set aside while you prepare the batter. Having the topping ready ahead of time makes assembly quick and easy. 3. Combine the Dry Ingredients In a large mixing bowl, whisk together the flour, baking soda, baking powder, salt, and cinnamon. Whisking helps distribute the leavening agents evenly, ensuring the muffins rise properly and bake with a consistent texture. 4. Mix the Wet Ingredients In a separate medium bowl, whisk the melted butter and brown sugar until smooth. Add the eggs one at a time, whisking well after each addition. Stir in the sour cream, milk, and vanilla extract until the mixture looks smooth and creamy. 5. Combine the Wet and Dry Mixtures Pour the wet ingredients into the bowl of dry ingredients. Using a spatula, gently fold everything together until just combined. A few small streaks of flour are perfectly fine. Avoid overmixing, as it can create dense, tough muffins instead of a soft, tender crumb. 6. Fold in the Chopped Pecans Add the finely chopped pecans and gently fold them into the batter. Mix only until they are evenly distributed so the batter stays light and fluffy. 7. Fill the Muffin Cups Divide the batter evenly among the prepared muffin cups, filling each about three-quarters full. Spoon a little of the pecan topping over each muffin, then gently press one or two pecan halves into the top for a bakery-style finish. 8. Bake Until Golden Bake for 20 to 22 minutes, or until a toothpick inserted into the center comes out clean or with a few moist crumbs attached. The tops should be lightly golden and the brown sugar topping should look caramelized around the edges. 9. Cool Before Serving Allow the muffins to cool in the pan for about 5 minutes before transferring them to a wire rack. This gives the topping time to set and makes the muffins easier to handle. Serve warm or at room temperature and enjoy every bite of that pecan pie flavor. Expert Tips for Perfect Pecan Pie Brown Sugar Muffins 1. Don’t Overfill the Muffin Cups Fill each muffin cup about three-quarters full. Overfilling can cause the batter to spill over the edges and create unevenly shaped muffins. If you have extra batter, bake an additional muffin instead of overcrowding the pan. 2. Let the Butter Cool Slightly Hot melted butter can partially cook the eggs and affect the batter’s texture. Allow the butter to cool for about 5 minutes before mixing it with the other wet ingredients. 3. Use Room-Temperature Ingredients Room-temperature eggs and sour cream blend more smoothly into the batter, creating a more even texture. If needed, place eggs in warm water for a few minutes to take the chill off. 4. Measure Flour Correctly For the most accurate results, spoon the flour into the measuring cup and level it off with a knife. Scooping directly from the bag can pack in too much flour, resulting in dense muffins. 5. Add the Pecan Halves Last For the best presentation, spoon the topping onto the muffins first, then gently press the pecan halves into the topping. This helps keep them visible and crunchy after baking. 6. Watch the Baking Time Every oven bakes a little differently. Begin checking the muffins around 18 to 20 minutes. They’re done when a toothpick inserted into the center comes out clean or with a few moist crumbs. 7. Use Full-Fat Sour Cream Full-fat sour cream provides the richest flavor and softest texture. While Greek yogurt can be substituted, the muffins may be slightly less moist and tender. Ingredient Substitutions Sour Cream Substitute Instead of sour cream, you can use full-fat plain Greek yogurt. The muffins will be slightly firmer, but still moist and delicious. Milk Substitutes Instead of whole milk, you can use oat milk, almond milk, or 2% milk with almost no noticeable difference in texture. Avoid skim milk, as it can make the crumb slightly dry. Butter Substitute Instead of unsalted butter, use salted butter and reduce the added salt in the recipe to ¼ teaspoon to keep the balance right. Flour Substitute Instead of all-purpose flour, use a 1:1 gluten-free baking flour (such as Bob’s Red Mill or King Arthur Measure for Measure). The texture will be slightly more tender and may require an extra 2–3 minutes of baking time. Nut Substitutes Instead of pecans, you can use walnuts for a slightly more earthy, bitter flavor. Almonds also work but create a drier crunch and different texture. Dairy-Free Option For a dairy-free version, use vegan butter (like Earth Balance), coconut cream instead of sour cream, and any plant-based milk. The flavor will change slightly, but the muffins still hold together well. Lower
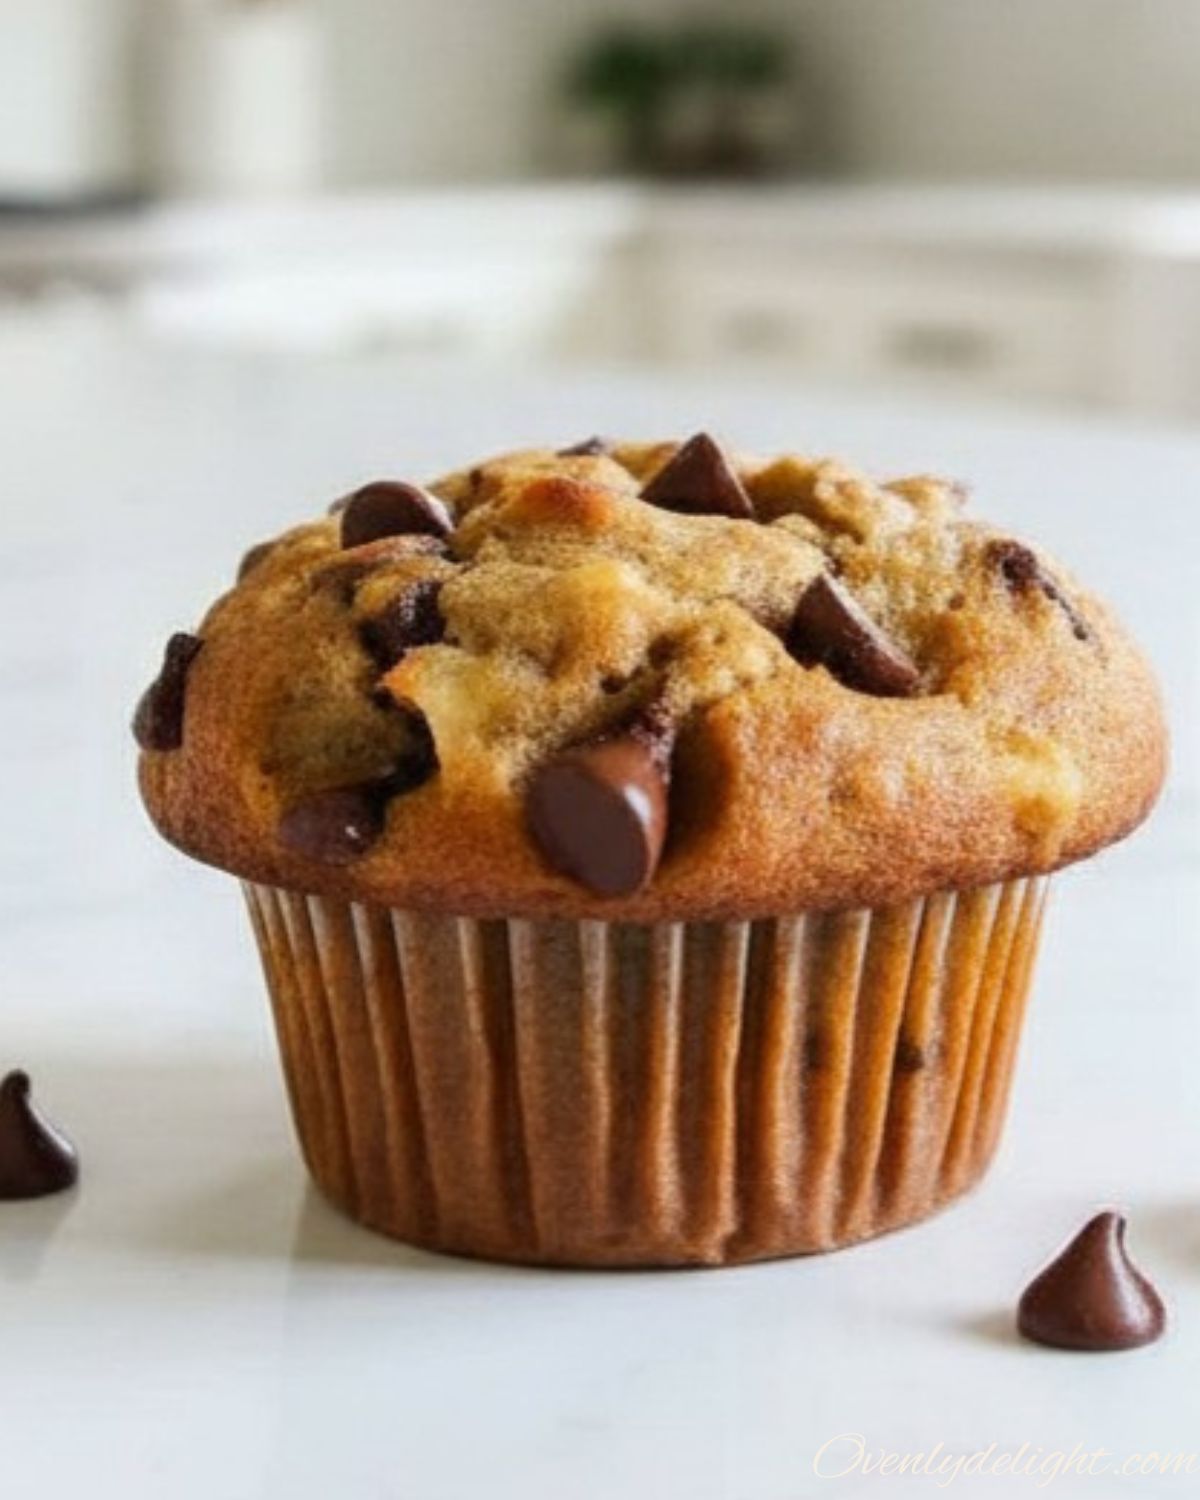
Best Banana Chocolate Chip Muffins (Moist & Bakery-Style Recipe)
If you’ve got a couple of overripe bananas sitting on your counter, don’t throw them away this is the recipe you’ll actually want to make. These banana chocolate chip muffins turn out super soft, moist, and packed with chocolate in every bite. They’re quick to make, so simple ingredients turn into something really satisfying. I remember I first made these on a weekend when I just wanted something homemade with my tea. I didn’t follow anything complicated just mixed what I had in the kitchen. The muffins came out so good that I ended up saving the recipe right away because I knew I’d be making them again. What I love most is how bakery-style they feel even though they’re so simple. Soft in the middle, slightly golden on top, and that warm banana smell makes them hard to resist once they’re out of the oven. Why You’ll Love This Recipe This recipe is all about simplicity one bowl, no mixer, and no waiting for butter to soften. The melted butter goes straight in, giving the muffins a rich flavor and helping create that golden, slightly crisp top just like bakery-style banana chocolate chip muffins. What makes them even better is how soft they stay. The bananas keep the muffins moist for up to three days at room temperature, which you don’t usually get with homemade muffins. Semisweet chocolate chips balance the sweetness perfectly, making them rich but not overly heavy. They’re quick, easy, and perfect for using up overripe bananas. Plus, they bake up with beautiful domed tops and that warm, homemade smell that makes it hard to wait for them to cool. Ingredients for Banana Chocolate Chip Muffins Dry Ingredients⦁ 1½ cups all-purpose flour (180g) Spoon and level for accuracy; too much flour makes dense muffins⦁ 1 teaspoon baking soda: Helps the muffins rise properly with banana⦁ ½ teaspoon salt:Balances sweetness and enhances flavor⦁ ⅔ cup granulated sugar (113g) Keeps sweetness balanced without overpowering banana Wet Ingredients⦁ 3 medium ripe bananas, mashed (about 1 cup) The riper, the better for moisture and flavor⦁ ⅓ cup melted butter (75g) Gives richness and that bakery-style texture⦁ 1 large egg: Binds everything together⦁ 1 teaspoon vanilla extract (5ml) Adds depth and enhances flavor Mix-Ins⦁ 1 cup semisweet chocolate chips: Adds rich chocolate pockets in every bite How to Make Banana Chocolate Chip Muffins (Step by Step) Preheat your oven to 375°F (190°C). Position the oven rack in the center not the top. I baked a batch on the top rack once and the muffin tops burned before the centers set. Center rack every time. Step 1: Line your muffin tin Line a standard 12-cup muffin tin with paper liners or spray generously with nonstick spray. I prefer liners because they keep the muffins moist longer. Step 2: Mash the bananas In a large bowl, mash the ripe bananas with a fork until smooth with only a few lumps. Chunky mash = uneven pockets in the muffin. Spend an extra 30 seconds here. Step 3: Add the wet ingredients Pour in the melted butter (make sure it has cooled slightly hot butter can cook the egg), then add the egg and vanilla. Stir until fully combined. Step 4: Add sugar Stir in the granulated sugar until dissolved. The batter will look thin at this point that is correct. Step 5: Add the dry ingredients Sprinkle the flour, baking soda, and salt over the banana mixture. Fold gently with a spatula until just combined. Stop when you no longer see streaks of dry flour. Overmixing is the number one reason muffins turn out tough. Step 6: Fold in the chocolate chips Reserve about 2 tablespoons to press onto the tops of the muffins before baking. That is what gives you the bakery-style look. Step 7: Fill the muffin cups Divide the batter evenly among the 12 cups, filling each about ¾ full. Press a few extra chocolate chips on top of each one. Step 8: Bake Bake for 18–22 minutes at 375°F, until a toothpick inserted in the center comes out with just a few moist crumbs. Start checking at 18 minutes. Ovens vary more than anyone admits. Step 9: Cool Let the muffins sit in the tin for 5 minutes before transferring to a wire rack. This lets the structure set and keeps the bottoms from getting soggy. Expert Tips for Perfect Banana Chocolate Chip Muffins Use bananas that look past saving. I made this recipe twice with yellow bananas when I was in a hurry. Both batches were fine not great. The black-spotted, almost-mush bananas are what make these genuinely moist banana chocolate chip muffins. The natural sugars develop as the banana ripens, and that sweetness carries through every bite. Do not overmix the batter. After ruining a full batch with a slightly rubbery texture, I learned this the hard way. Overmixing develops the gluten in the flour and gives you muffins that bounce back like a sponge instead of crumbling softly. Fold until the flour disappears and then stop immediately. Fill the cups ¾ full for domed tops. Underfilled cups give you flat muffins. The batter needs enough volume to push up and over the edge of the liner slightly. Three-quarters full is the right amount for that classic homemade banana chocolate chip muffins dome. Press chips on top right before baking. The chips folded into the batter will mostly disappear inside the muffin as it bakes. The ones pressed on top stay visible, melt slightly, and make the finished muffins look like they came from a bakery case. It takes 30 extra seconds and makes a genuine difference. Cool the butter before adding the egg. Melt the butter a few minutes before you start mashing the bananas. If it is still hot when you add the egg, you will scramble it slightly. Slightly warm or room temperature is what you want. Let them rest 5 minutes before removing from the tin. I know it is tempting to pull