
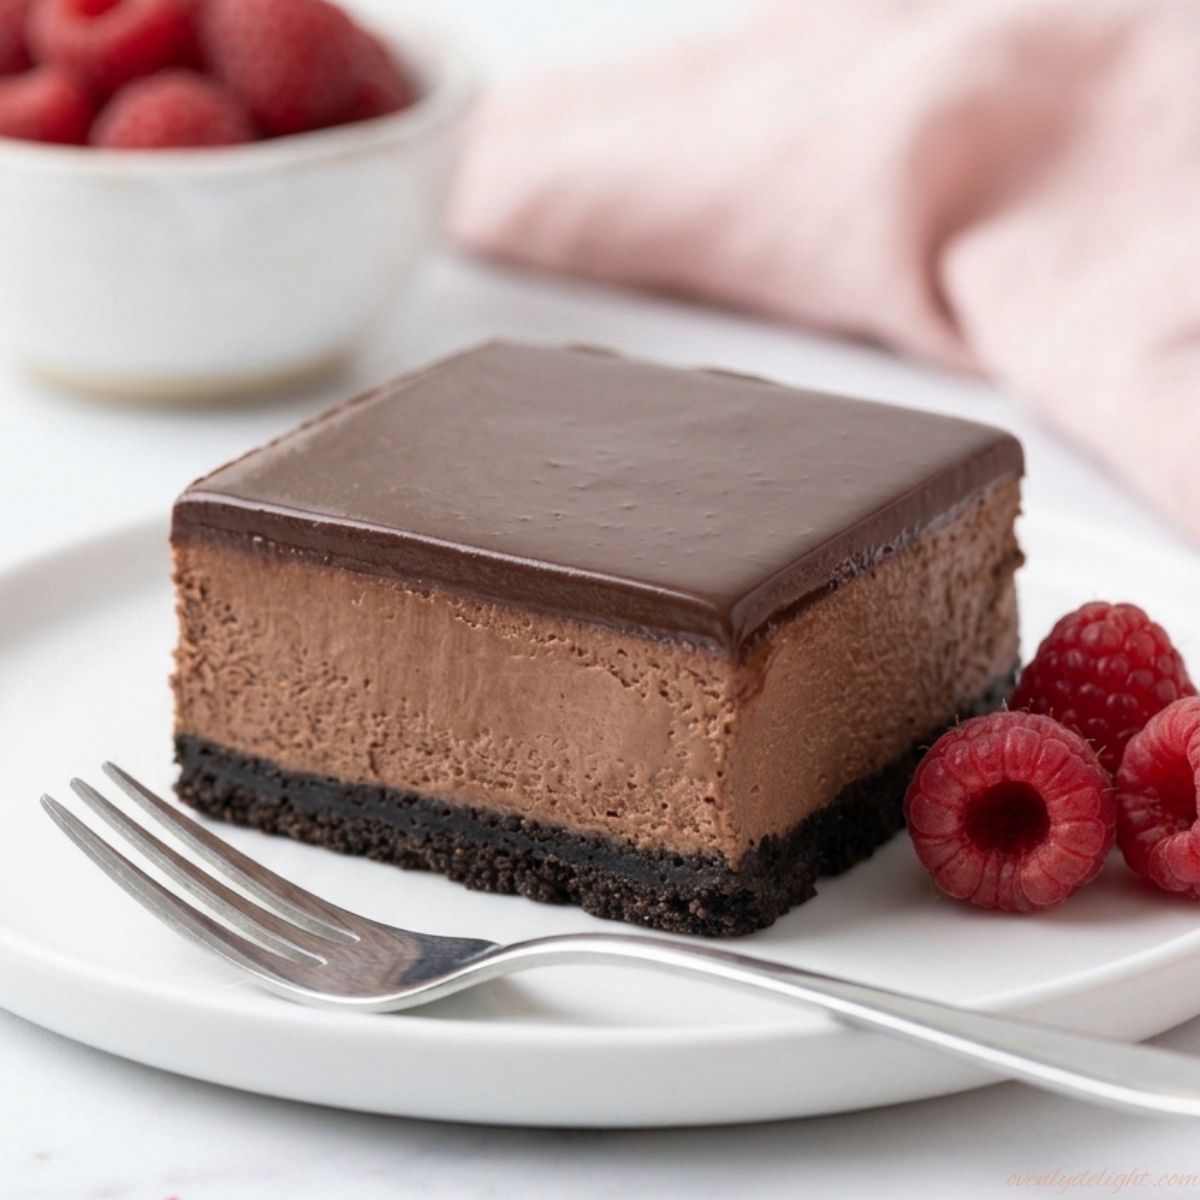
I first made these chocolate cheesecake bars for a family get-together, and they quickly became a favorite. I was looking for a dessert that was simple to make but still felt impressive, and these bars were the perfect choice. The rich chocolate flavor, creamy cheesecake layer, and smooth texture create a deliciously decadent treat that everyone loves. They’re easy enough for a weekend bake and special enough for holidays, celebrations, or sharing with family and friends. Why You’ll Love These Cheesecake Bars Ingredients for These Cheesecake Bars Oreo Crust Chocolate Cheesecake Filling Chocolate Ganache Topping How to Make These Cheesecake Bars (Step by Step) Preheat the Oven and Line the Pan Preheat your oven to 325°F (163°C) and prepare a 9×13-inch baking pan by lining it with parchment paper. Leave a little extra paper hanging over the sides so you can easily lift the chilled bars out of the pan later. This simple step makes slicing and serving much easier. Crush the Oreo Cookies into Fine Crumbs Add the whole Oreo cookies, including the cream filling, to a food processor and pulse until they become fine crumbs. The cream filling helps bind the crust and adds extra chocolate flavor. If you don’t have a food processor, place the cookies in a sealed bag and crush them with a rolling pin. Combine the Crumbs with Melted Butter Pour the melted butter over the Oreo crumbs and mix until the texture resembles wet sand. The butter helps hold the crust together and creates a firm base that won’t fall apart when you slice the cheesecake bars. Press the Crust into the Pan Transfer the Oreo mixture into the prepared pan and press it firmly into an even layer. Use the bottom of a measuring cup or a flat glass to compact the crust tightly. A well-packed crust gives you clean, sturdy slices after chilling. Make the Chocolate Cheesecake Filling Melt the Dark Chocolate Melt the dark chocolate in short microwave intervals, stirring well between each one until smooth and completely melted. Let the chocolate cool for a few minutes before adding it to the cheesecake mixture. This prevents the warm chocolate from affecting the texture of the filling. Beat the Cream Cheese and Sugar Until Smooth In a large mixing bowl, beat the softened cream cheese and granulated sugar together until smooth, creamy, and free of lumps. Make sure your cream cheese is at room temperature because cold cream cheese can create a bumpy filling that won’t blend properly. Add the Flavoring Ingredients Add the cornstarch and vanilla extract, then mix until combined. Next, add the sour cream and melted chocolate, mixing just until the filling becomes smooth and evenly chocolatey. Avoid mixing longer than needed to keep the cheesecake texture creamy. Add the Eggs Slowly Add the eggs one at a time, mixing on low speed after each addition until just incorporated. Overmixing after adding the eggs can add too much air into the batter, which may cause cracks as the cheesecake cools. Bake and Chill the Cheesecake Bars Pour the Filling Over the Crust Pour the chocolate cheesecake batter over the prepared Oreo crust and spread the top evenly with a spatula. Make sure the surface is smooth so the finished bars have a neat, bakery-style appearance. Bake Until Set Place the pan on the middle rack and bake for about 35 minutes. The edges should look set while the center should still have a slight jiggle when you gently move the pan. This means the cheesecake will stay creamy instead of becoming dry. Cool Slowly to Prevent Cracks Turn off the oven and leave the door slightly open. Allow the bars to cool inside the oven for about 30 minutes. This gradual temperature change helps prevent the cheesecake surface from cracking. Chill Completely Before Cutting Remove the pan from the oven and refrigerate the cheesecake bars uncovered for at least 4 hours, or preferably overnight. Chilling allows the filling to fully set and makes it easier to get clean, beautiful slices. Add the Chocolate Ganache Topping Make the Chocolate Ganache Heat the heavy cream until it is steaming but not boiling. Pour it over the chopped chocolate and let it sit for about 2 minutes. Stir slowly until the mixture becomes smooth, shiny, and completely combined. Spread the Ganache Over the Cheesecake Pour the prepared ganache over the chilled cheesecake layer and gently tilt the pan or use a spatula to spread it into an even layer. The glossy chocolate topping adds extra richness and makes these bars look bakery-worthy. Chill and Slice the Bars Place the pan back in the refrigerator for another 30 minutes to allow the ganache to set. Use the parchment paper overhang to lift the bars out of the pan, then slice into 15 even pieces using a sharp knife for clean edges. Expert Tips for Perfect Cheesecake Bars Cool the Bars Slowly to Prevent Cracks After my first batch cracked right down the middle, I realized the problem was temperature shock. Letting the bars cool gradually in the turned-off oven with the door slightly open helps the cheesecake adjust slowly and keeps the surface smooth. Use Room Temperature Ingredients I used to mix in cream cheese straight from the fridge to save time, but the filling always turned out slightly lumpy. Softened cream cheese blends much better, so let it sit at room temperature for at least an hour along with the eggs before starting. Bring Sour Cream to Room Temperature Room-temperature sour cream helps create a silky, smooth filling. Cold sour cream can make the melted chocolate tighten up and leave small chocolate flecks instead of blending evenly into the batter. Choose a Chocolate Bar Instead of Chips I once tested this recipe with chocolate chips, and the texture wasn’t as smooth. A good-quality chopped chocolate bar melts more evenly and gives the cheesecake filling a richer, silkier consistency. Chill Before Adding the Ganache Make sure the cheesecake layer is completely
Best Blueberry Crumble Bars Recipe (Easy & Buttery)
There’s something so comforting about a pan of Blueberry Crumble Bars cooling on the counter. The sweet aroma of buttery crumble and bubbling blueberries fills the kitchen, making it almost impossible to wait before slicing into them. They’re the kind of dessert that feels just as right for a casual weekend bake as it does for sharing at picnics, potlucks, or family gatherings. I love this recipe because it keeps things simple without sacrificing flavor. A buttery crust doubles as the crumble topping, while the juicy blueberry filling adds the perfect balance of sweetness and a hint of tartness in every bite. Whether you use fresh blueberries during the summer or frozen berries any time of year, these bars bake up beautifully and are always a crowd-pleaser. Why You’ll Love These Blueberry Crumble Bars Ingredients for These Blueberry Crumble Bars For the Blueberry Filling For the Shortbread Base & Crumble Topping For the Crumble Topping How to Make Blueberry Crumble Bars (Step-by-Step) Step 1: Prepare Your Baking Pan Preheat the oven to 350°F (175°C). Line an 8×8-inch baking pan with parchment paper, leaving a little overhang on two sides. This makes it much easier to lift the Blueberry Crumble Bars out of the pan once they’ve cooled, so you get clean, even slices. Step 2: Make the Blueberry Filling In a medium bowl, combine the blueberries, cornstarch, lemon zest, lemon juice, and granulated sugar. Toss everything together until the berries are evenly coated. The cornstarch will thicken the juices as the bars bake, while the lemon brightens the blueberry flavor without making the filling taste overly tart. Set the bowl aside while you prepare the crust. Step 3: Mix the Dry Ingredients In a large mixing bowl, whisk together the flour, granulated sugar, baking powder, and salt. Giving the dry ingredients a quick whisk now helps everything mix evenly once the butter is added. Step 4: Cut in the Butter Add the cold, cubed butter and work it into the flour mixture using a pastry cutter or your fingertips. Keep mixing until the mixture resembles coarse crumbs with a few pea-sized pieces of butter still visible. Those little pieces of butter melt in the oven, creating the buttery, tender texture that makes these Crumble Blueberry Bars so irresistible. Step 5: Add the Egg Yolk Mix in the egg yolk until the dough starts coming together. It shouldn’t look like a smooth cookie dough instead, it should stay slightly crumbly but hold together easily when squeezed in your hand. Step 6: Press the Crust into the Pan Set aside about 1 cup of the dough for the crumble topping. Transfer the remaining dough to the prepared pan and press it into an even layer, making sure to reach the corners. A flat-bottomed measuring cup works well if you want a smooth, even crust. Step 7: Bake the Crust Bake the crust for 15 minutes, or until the edges are just beginning to turn lightly golden. This quick bake helps the crust stay firm underneath the juicy blueberry filling instead of becoming soft. Step 8: Prepare the Crumble Topping While the crust bakes, stir the brown sugar, granulated sugar, and flour into the reserved dough. Rub everything together gently with your fingertips until you have plenty of chunky crumbles. Don’t overmix you want a variety of small and large pieces for the best crumble topping. Step 9: Add the Blueberry Layer Remove the warm crust from the oven and spoon the blueberry filling evenly over the top. Spread the berries into an even layer so every bite of these Blueberry Bars has plenty of juicy blueberry filling. Step 10: Sprinkle on the Crumble Scatter the crumble topping evenly over the blueberries. Don’t press it into the filling leaving it loose creates those beautiful golden crumbles that add the perfect buttery crunch. Step 11: Bake Until Golden Return the pan to the oven and bake for about 35 minutes, or until the crumble is golden brown and the blueberry filling is bubbling gently around the edges. Your kitchen will smell amazing by this point, and that’s usually a good sign they’re almost ready. Step 12: Cool Before Slicing Let the Blueberry Crumble Bars cool completely in the pan for about 2 hours. It may be tempting to cut into them right away, but letting them cool allows the blueberry filling to set properly, making the bars much easier to slice neatly. Once cooled, lift them out using the parchment paper and cut into squares. Expert Tips for the Best Blueberry Crumble Bars Let the Bars Cool Completely It can be tempting to slice into these Blueberry Bars while they’re still warm, but trust me it’s worth the wait. Letting them cool for the full 2 hours gives the blueberry filling time to set, so you’ll get clean, bakery-style slices instead of a runny mess. Stick with Just the Egg Yolk Using only the egg yolk might seem unusual, but it makes a noticeable difference. The extra richness keeps the shortbread base tender and buttery without adding too much moisture, giving the bars their signature melt-in-your-mouth texture. Adjust the Cornstarch for Frozen Blueberries If you’re using frozen blueberries, don’t skip the extra cornstarch. Frozen berries release more juice as they bake, and increasing the cornstarch helps the filling thicken properly so your bars hold together beautifully. Don’t Skip the Crumble Add-Ins Mixing the brown sugar, granulated sugar, and a little flour into the reserved dough may seem like a small step, but it’s what creates those chunky, golden crumbles. Without it, the topping can bake into one flat layer instead of staying crisp and crumbly. Press the Crust Firmly Take a minute to firmly press the crust into the pan before baking. I like using the bottom of a measuring cup because it creates a smooth, even layer that holds the juicy blueberry filling without falling apart when sliced. Use Parchment Paper with an Overhang Lining the pan with parchment paper and leaving
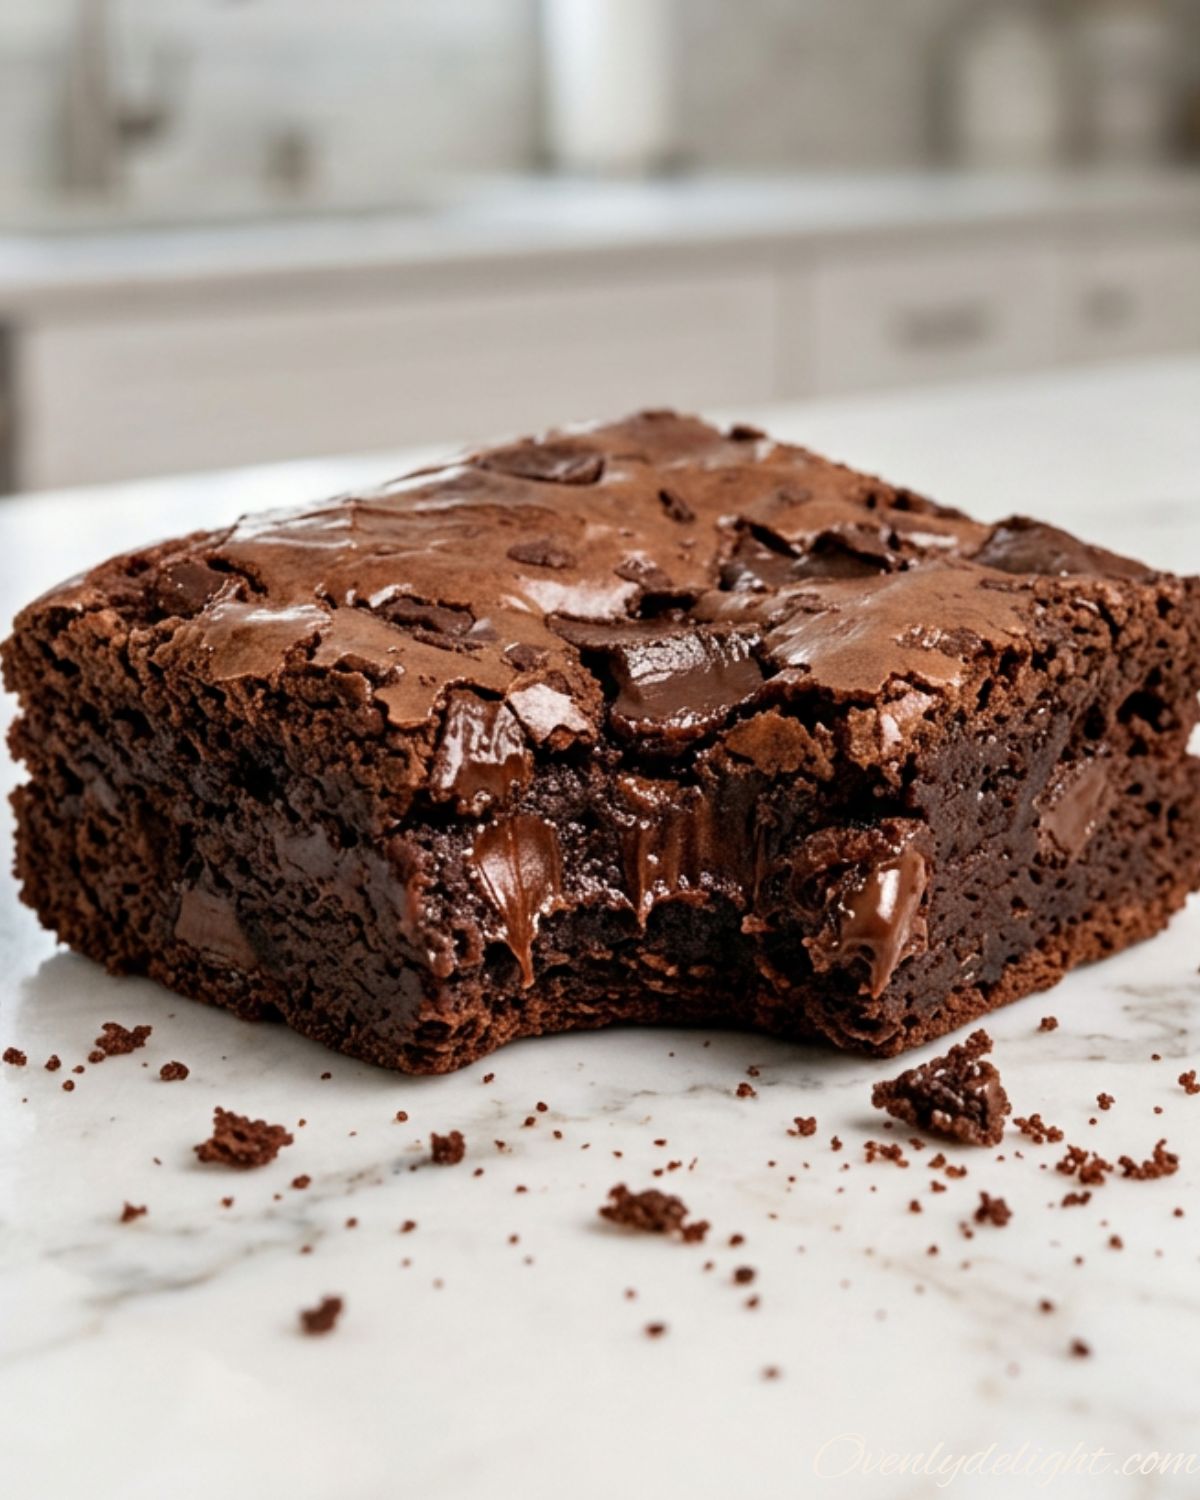
Fudgy Chocolate Brownies (One Bowl, No Mixer, Better Than the Box)
I pulled a pan of fudgy chocolate brownies out of the oven on a Tuesday night and my husband walked straight past the stove, stopped, turned around, and said. Did you buy those?’ He was looking at the crinkly, paper-thin top and the way the edges had pulled slightly from the pan. He genuinely thought I had gone to the bakery. That’s the reaction these get. The top crackles. The center is dense and gooey without being raw. The chocolate flavor is deep enough that a single square feels like it’s actually enough which never happens with a boxed mix.One bowl. No mixer. About 10 minutes of real hands-on work. The hardest part is the 2-hour wait after they come out of the oven. Why You’ll Love This Fudgy Brownies Recipe Ingredients for Rich Chocolate Brownies (Benefits) Dry Ingredients Wet Ingredients Mix-In How to Make Fudgy Chocolate Brownies (Step by Step) Preheat the oven and prepare the pan Preheat your oven to 350°F and set the rack to the middle position. Line an 8×8-inch metal baking pan with parchment paper, leaving an overhang on two sides so you can lift the brownies out cleanly. Grease the parchment lightly. I’ve made this in a glass pan and the edges always overcook before the center is done metal conducts heat more evenly here. Melt the butter Melt the butter in a large microwave-safe bowl in 30-second intervals, stirring between each one. You can also do this in a small saucepan over low heat. Let it cool for about 5 minutes before adding the eggs you want it warm, not steaming hot. Hot butter scrambles the eggs. Whisk the sugar into the eggs for the crinkly top In a separate medium bowl, whisk together the eggs, egg yolk, and sugar until the mixture turns pale, thick, and slightly foamy about 2 full minutes of vigorous whisking by hand. This is the step that creates the signature crinkly, shiny top. I rushed this once and the top came out dull and flat. Take the two minutes. Combine the butter mixture with the egg mixture Pour the cooled melted butter and oil into the egg-sugar mixture and whisk together. Stir in the vanilla extract and espresso powder if using. The mixture should look smooth and glossy. Add the dry ingredients Sift in the cocoa powder, then add the flour, baking powder, and salt. Switch to a spatula and fold everything together until just combined stop when no dry streaks remain. The batter will be thick. Overmixing at this stage develops gluten and can turn the crumb slightly tough. A few folds is all it takes. Fold in the chocolate chips Add the chocolate chips and fold them in with a few turns of the spatula. Folding not stirring keeps the batter from becoming overworked. Some chips will sink to the bottom during baking, which means pockets of chocolate in the base layer. That’s not a problem. Pour and bake Pour the batter into the prepared pan and use the spatula to spread it into an even layer. Bake at 350°F for 26–30 minutes start checking at 26 minutes. The edges should look set and the center should have a very slight jiggle when you gently shake the pan. A toothpick inserted 2 inches from the edge should come out with a few moist crumbs attached. If it comes out clean, they’re slightly overbaked. Pull them now. Cool completely before cutting (this part matters) Transfer the pan to a wire rack and let the brownies cool at room temperature for a full 2 hours before lifting them out and cutting. The interior continues to set as they cool. I cut into a batch at 45 minutes once and the center was still molten and the slices fell apart. The cooling time is built into the total time for a reason. Expert Tips for Perfect Fudgy Chocolate Brownies Whisk the eggs and sugar until the mixture turns pale and thick (don’t skip this) After ruining two batches with a flat, dull top, I tracked down the cause: I was mixing the eggs and sugar with just a quick stir instead of whisking properly. The crinkly, shiny top that makes these look bakery-made comes from dissolving the sugar into the eggs over about 2 minutes of real whisking. The mixture should change color from golden-yellow to pale, almost cream-colored and fall from the whisk in a thick ribbon before you stop. Use a metal 8×8-inch pan, not glass. Glass retains heat differently from metal and the edges overcook before the center sets. I’ve tested both. The metal pan gives you evenly baked, fudgy brownies edge to edge. If metal is all you have, that’s the right answer. Don’t overbake. Pull the pan when the center barely jiggles. The most common reason moist chocolate brownies come out dry or cakey is overbaking. At 26 minutes, shake the pan gently. The very center should still have a slight wobble. A toothpick should come out with moist crumbs, not clean. Remember they continue cooking on the hot pan after you pull them from the oven. Let the butter cool before adding the eggs. Hot butter scrambles the eggs and you end up with yellow streaks baked into your brownies. I learned this the messy way. After melting the butter, give it 5 minutes on the counter. It should feel warm to the touch, not steaming hot, before anything else goes in. The extra egg yolk is not a mistake. Two whole eggs give you structure. The extra yolk tips the balance toward rich and fudgy the way bakery style fudgy brownies taste, where the center is almost like a thick ganache. Leaving it out makes a slightly cakier, less dense brownie. Not bad, just different from what this recipe is going for. Add the espresso powder even if you don’t like coffee. Extra fudgy brownies with cocoa powder can sometimes taste a little flat or one-note without something to amplify
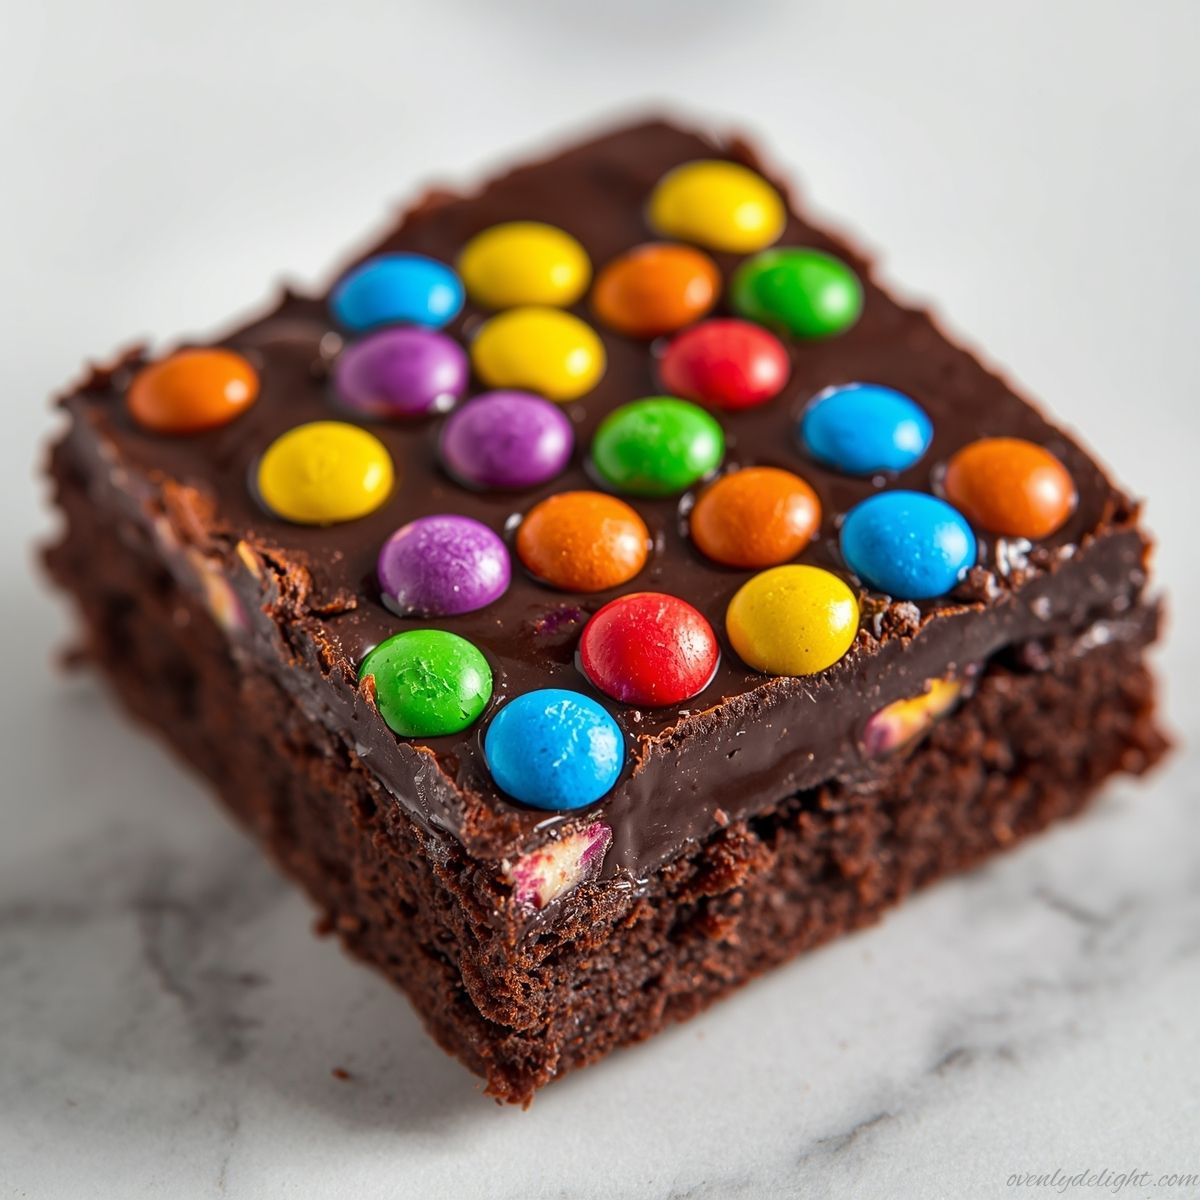
Cosmic Brownies Recipe (Fudgy Homemade Little Debbie Copycat)
Cosmic Brownies have always been one of those treats I could never ignore. That thick layer of chocolate on top, the chewy brownie underneath, and those tiny colorful candy pieces make them feel a little more fun than an ordinary brownie. This homemade Cosmic Brownies recipe brings back that same nostalgic flavor with a rich, fudgy texture and smooth chocolate ganache. I love making a batch when I want an easy chocolate dessert that looks impressive without needing any fancy decorating. Why You’ll Love These Cosmic Brownies Ingredients for Cosmic Brownies For the Brownies For the Ganache Frosting How to Make Cosmic Brownies (Step by Step) 1. Prepare Your Pan & Oven Start by preheating your oven to 325°F (163°C) so it’s ready when your batter is done. Line an 8×8-inch baking pan with parchment paper and leave a little overhang on two sides this will help you lift the brownies out easily later. Lightly grease the parchment so nothing sticks and you get clean edges. 2. Melt Butter & Mix Sugars In a medium saucepan, melt the butter over medium heat. Once it’s fully melted, take it off the heat and whisk in both sugars. Don’t worry if it looks a little grainy at first it will smooth out. Now add the cocoa powder and whisk until the mixture looks glossy and smooth. Let it cool for about 5 minutes so the eggs don’t scramble later. 3. Add Eggs & Flavor Whisk in the vanilla extract first, then add the eggs one by one, mixing well after each addition. Add the extra egg yolk and corn syrup, then whisk until the batter becomes thick, shiny, and smooth. This step is what gives you that classic fudgy brownie top, so don’t rush it. 4. Fold in Dry Ingredients Switch to a spatula and add flour, cornstarch, and salt all at once. Gently fold everything together just until you no longer see dry flour. Be careful not to overmix just treat it softly like you’re folding air into the batter. This keeps your brownies dense and fudgy instead of cakey. 5. Bake the Brownies Pour the batter into your prepared pan and spread it evenly. It will be thick, so take your time smoothing it out. Bake for 23–26 minutes, or until the edges look set and the center doesn’t jiggle. A toothpick should come out with moist crumbs that’s the sweet spot for fudgy brownies. 6. Cool Completely Let the brownies cool fully in the pan for at least 1 hour (or chill for 30 minutes if you’re in a hurry). This step is important because if you add ganache too early, it will melt and slide instead of sitting nicely on top. 7. Make the Ganache Heat the heavy cream until it just starts to simmer don’t let it boil. Pour it over the chocolate chips and let it sit for 2 minutes without stirring. Then whisk from the center outward until it turns smooth, shiny, and silky. This is your rich chocolate topping. 8. Add Topping & Set Pour the ganache over cooled brownies and spread it evenly to all edges. Immediately sprinkle rainbow candy-coated chips or mini M&Ms on top and gently press them in so they stick. Let it set at room temperature for 30 minutes or chill for 15 minutes until firm. 9. Slice & Serve Lift the brownies out using the parchment paper and place them on a cutting board. Use a sharp knife and wipe it clean after each cut for neat squares. Slice into 16 pieces and enjoy your rich, fudgy Cosmic Brownies. Expert Tips for Perfect Cosmic Brownies Sift the Cocoa Powder Always sift your cocoa powder before adding it to the batter. Cocoa tends to clump, and sifting only takes a minute or two but makes a big difference. It ensures a smooth, lump-free batter and evenly rich chocolate flavor in every bite. Don’t Overbake the Brownies This is the most important rule. Take the brownies out when the center still looks slightly underdone and a toothpick shows moist crumbs. They will continue to set as they cool, and overbaking will make them dry instead of fudgy. Don’t Skip the Corn Syrup Corn syrup is what gives Cosmic Brownies their signature chewy, slightly gummy texture. Without it, the brownies turn out more like regular brownies instead of that classic snack cake-style bite. Let the Ganache Cool Slightly After making the ganache, let it sit for a few minutes before pouring. If it’s too hot, it will be too thin and won’t spread nicely. A slightly thickened ganache gives you a smooth, even chocolate layer. Use a Hot Knife for Clean Slices For bakery-style squares, run your knife under hot water, dry it, and then slice. The warm blade cuts through the ganache cleanly without cracking it. Wipe and reheat the knife between cuts for best results. Chill for Best Texture Once the ganache is set, refrigerate the brownies. Cold Cosmic Brownies become even fudgier and denser, closely matching the classic store-bought version. Line the Pan Properly Always use parchment paper with an overhang on at least two sides. This makes it easy to lift the brownies out cleanly and prevents messy edges when slicing. Ingredient Substitutions Corn Syrup Alternatives If you don’t have corn syrup, you can use golden syrup or light agave in the same amount. The texture will still be chewy, though slightly less gummy. Try not to skip it completely, as it helps create the signature Cosmic Brownies texture. Dairy-Free Ganache Option For a dairy-free version, replace heavy cream with the thick part of full-fat coconut cream (chilled can). The ganache will set a bit firmer and may have a very light coconut flavor, but it still tastes rich and smooth. Gluten-Free Option Use a 1:1 gluten-free baking flour blend like Bob’s Red Mill or King Arthur Measure for Measure. The brownies stay fudgy and soft because the recipe already includes cornstarch for structure. Chocolate Chip
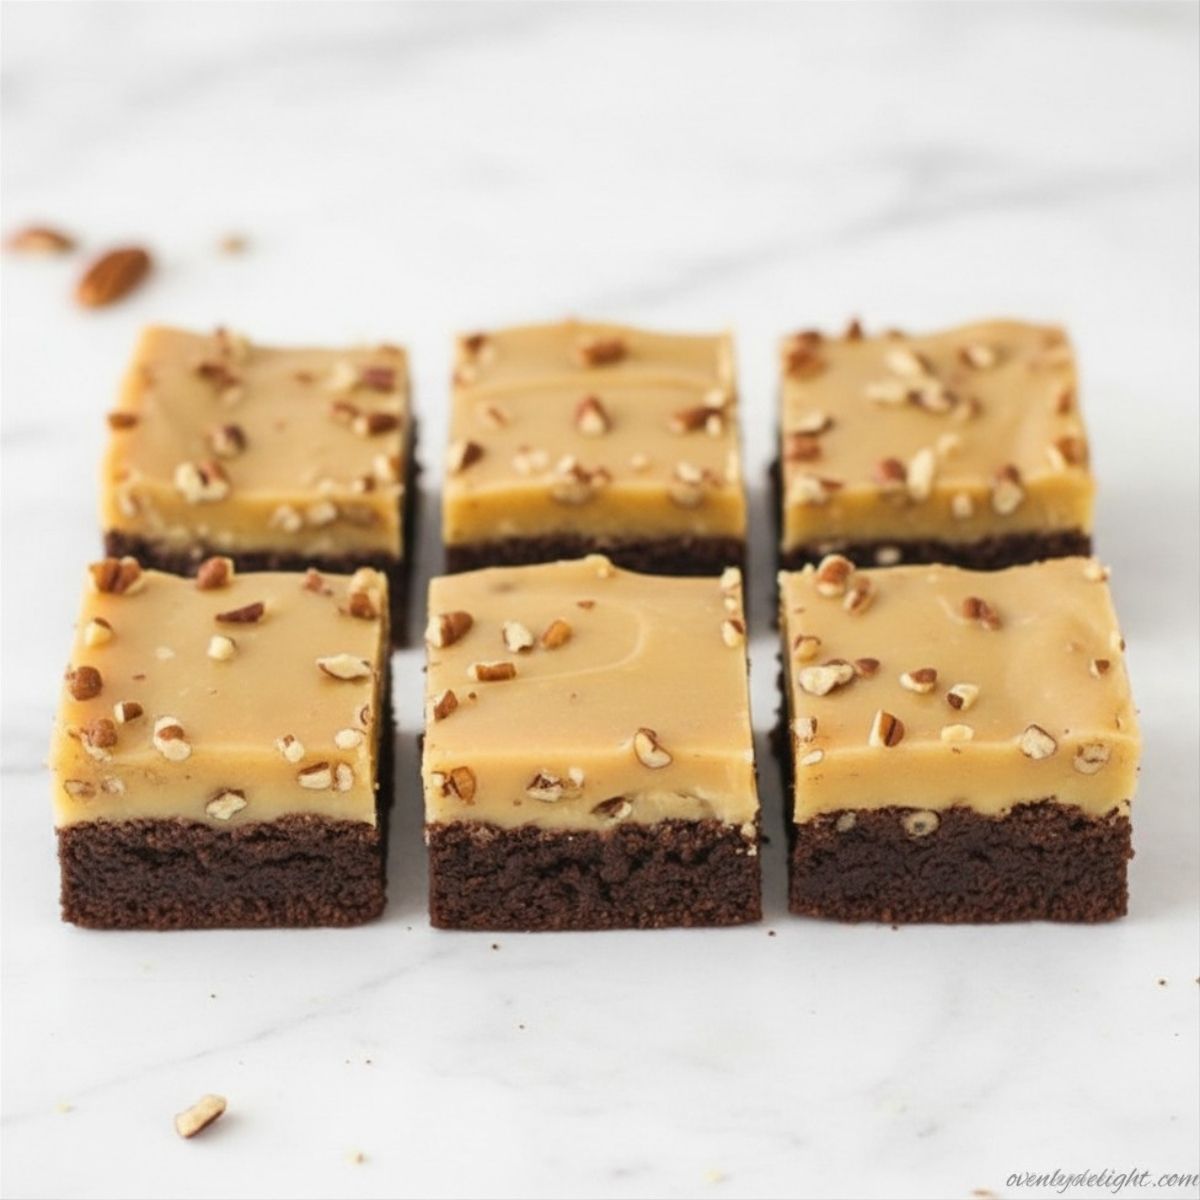
Praline Pecan Brownies (Fudgy, Gooey & Irresistible)
I made these Praline Pecan Brownies for my kid’s first birthday because I wanted something homemade that felt special without being too complicated. I needed a dessert that would look beautiful on the table, be easy to share with family, and still feel like a little celebration in every bite. The fudgy chocolate brownie base paired perfectly with the buttery, crunchy praline pecan topping. They turned out rich, gooey, and full of caramel flavor, and quickly became more than just a dessert for the day. Every time I make these praline pecan brownies now, they bring back that sweet memory of celebrating with family. Why We Love Praline Pecan Brownies Ingredients for Praline Pecan Brownies For the Brownies For the Praline Pecan Topping How to Make Praline Pecan Brownies (Step by Step) 1. Toast the Pecans Spread the chopped pecans in a single layer on a dry skillet over medium heat. Stir constantly for 3–4 minutes until they smell nutty and turn slightly darker. Don’t walk away they can burn quickly. Once toasted, transfer them immediately to a plate and set aside. 2. Preheat the Oven and Prepare the Pan Preheat your oven to 350°F (177°C). Line an 8×8-inch or 9×9-inch baking pan with parchment paper, leaving some overhang for easy removal. Lightly grease the paper. An 8×8 pan gives thicker, fudgier brownies, while a 9×9 pan makes slightly thinner ones. 3. Make the Brownie Batter In a medium bowl, whisk together flour, cocoa powder, baking powder, and salt. In a separate large bowl, whisk oil, sugar, and vanilla until combined. Add eggs one at a time, whisking until the mixture looks smooth and glossy. Fold in the dry ingredients just until combined avoid overmixing. 4. Bake the Brownies Pour the batter into the prepared pan and spread evenly. Bake for 22–26 minutes at 350°F (177°C). The edges should look set, while the center remains slightly soft. A toothpick inserted near the edge should come out with moist crumbs. Don’t overbake they will continue to set as they cool. 5. Prepare the Praline Topping While the brownies bake, add the butter, light brown sugar, heavy whipping cream, and corn syrup to a medium saucepan over medium heat. Stir continuously until the butter melts and the brown sugar starts to dissolve. Bring the mixture to a gentle, even boil, then cook for exactly 2 minutes while stirring constantly. The mixture should look smooth, glossy, and slightly thickened. 6. Finish the Praline Mixture Remove the saucepan from the heat. Immediately whisk in the sifted powdered sugar and vanilla extract until the praline mixture is completely smooth and lump-free. Fold in the toasted chopped pecans until evenly coated. Work quickly because the topping will begin to thicken as it cools. 7. Add the Topping to the Brownies As soon as the brownies come out of the oven, pour the warm praline pecan mixture evenly over the top. Use an offset spatula or the back of a spoon to spread it gently all the way to the edges. Work within 1–2 minutes, as the topping begins to set quickly. 8. Cool and Slice Let the brownies cool completely at room temperature for at least 1 hour so the topping sets properly. Lift them out using the parchment paper and cut into squares. Wipe the knife between cuts for clean edges. Expert Tips for Perfect Praline Pecan Brownies 1. Toast the Pecans and Don’t Rush It Raw pecans can taste flat and slightly bitter. Toasting them for just a few minutes in a dry skillet brings out their natural oils and gives a deeper, richer flavor. It also adds a crunch that holds up beautifully under the praline layer. 2. Sift the Powdered Sugar This is a small step that makes a big difference. Powdered sugar often has lumps that don’t dissolve properly in hot praline, leaving a grainy texture. Sifting it first keeps your topping smooth and glossy. 3. Work Fast with the Praline Once the praline comes off the heat, it starts thickening quickly. Make sure your brownies are ready before you begin. Spread the topping immediately so it goes on smooth and even. 4. Don’t Overbake the Brownie Base The brownies will continue to cook slightly when you pour the hot praline on top. Pull them from the oven when the center still looks a little soft and a toothpick comes out with moist crumbs for that perfect fudgy texture. 5. Use an 8×8 Pan for Maximum Fudginess An 8×8 pan gives thick, dense brownies that stay moist and rich. A 9×9 pan makes thinner brownies that can dry out more easily, especially around the edges. 6. The Corn Syrup Is Worth Adding Corn syrup helps prevent the praline from crystallizing as it sets. Without it, the topping can turn slightly grainy instead of smooth and shiny. Even a small amount makes a noticeable difference. 7. Let the Full Cooling Time Happen It’s tempting to cut into them early, but patience matters here. Letting them cool for at least an hour allows the praline to set properly and gives clean, perfect slices. Cutting too soon can make the texture messy instead of fudgy and set. Ingredient Substitutions 1. Oil Options for Brownies You can replace vegetable oil with melted refined coconut oil or canola oil in equal amounts. Avoid olive oil, as its strong flavor can overpower the chocolate. 2. Nut Substitutes If you don’t have pecans, walnuts or toasted almonds work well. Walnuts give a slightly deeper, more earthy taste that balances the sweetness of the praline. 3. Gluten-Free Option Use a 1:1 gluten-free baking flour like King Arthur Measure for Measure or Bob’s Red Mill instead of all-purpose flour. The texture stays very close to the original brownies. 4. Dairy-Free Praline Option Replace heavy cream with full-fat coconut cream (use the thick part from a chilled can). It sets a bit firmer and adds a light coconut flavor. 5. Sugar Variation in Praline You can use dark brown sugar
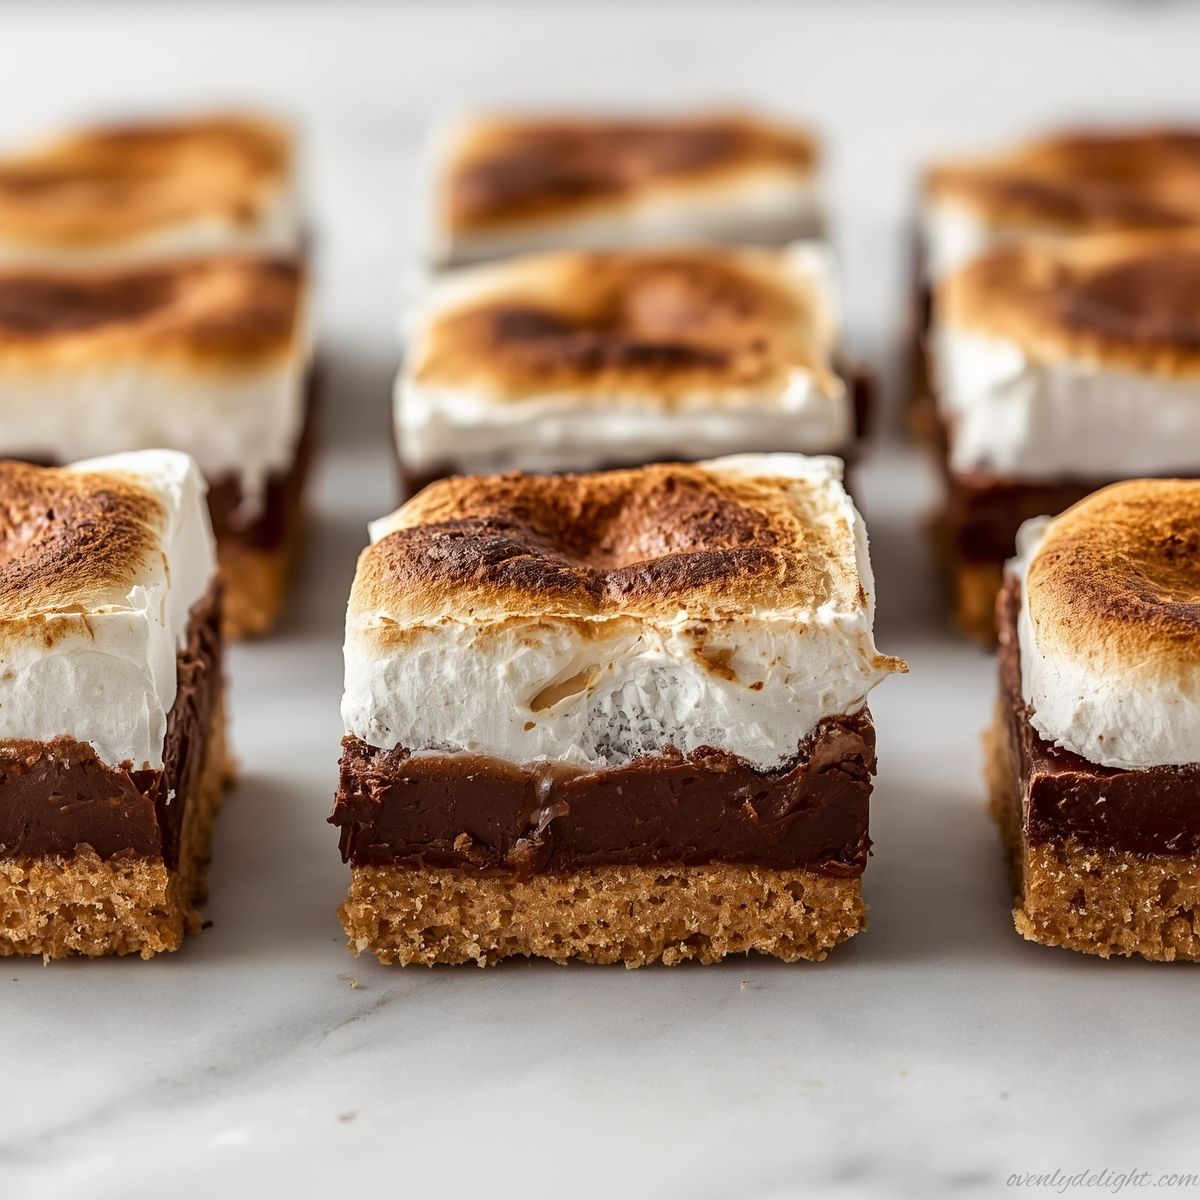
S’mores Fudge Bars — Gooey Marshmallow & Chocolate (No Campfire Needed)
I was inspired to make these after seeing a similar version in a bakery. They looked so good that I couldn’t resist trying my own version at home. I honestly didn’t expect much from my first attempt, but the bars turned out rich, gooey, and even better than I imagined. Since then, they’ve become one of my favorite desserts to make. What surprised me most was how easy they were to put together. With a few simple ingredients and a little patience, I was able to recreate that classic s’mores flavor without ever needing a campfire. Why You’ll Love These S’mores Fudge Bars These S’mores Fudge Bars bring all the cozy flavors of a classic campfire treat into an easy, oven-baked dessert you can make any time of year. The rich chocolate fudge layer stays soft and gooey, the graham cracker base adds a buttery crunch, and the toasted marshmallow topping gives that irresistible sweet finish. They’re simple to prepare, require basic pantry ingredients, and slice beautifully for sharing. Whether you’re making them for a family dessert, a party tray, or just a sweet craving at home, they always feel a little special without needing extra effort. Ingredients for S’mores Fudge Bars For the Crust For the Fudge Filling For the Marshmallow Topping How to Make S’mores Fudge Bars (Step by Step) Step 1: Prep Your Pan Preheat your oven to 325°F. Line an 8×8-inch metal baking pan with parchment paper, leaving overhang on two sides for easy lifting later. Lightly grease the parchment for extra insurance. Using a parchment sling makes a big difference here, I once skipped it and ended up breaking half the batch while trying to remove them. Step 2: Make the Graham Cracker Crust Pulse graham crackers into fine crumbs, then mix in sugar and salt. Add melted butter and pulse until the mixture looks like wet sand. Press firmly into the prepared pan, using the bottom of a measuring cup to compact it evenly. Bake for 10 minutes until lightly golden, then let it cool slightly. Step 3: Make the Fudge Filling In a small saucepan over low heat, melt chocolate chips with sweetened condensed milk, stirring constantly until smooth and glossy (about 4–5 minutes). Pour over the crust and spread evenly. Chill in the refrigerator for at least 1 hour, or until firm. Step 4: Make the Marshmallow Topping Whip egg whites and cream of tartar until foamy. Meanwhile, heat sugar, corn syrup, water, and salt in a saucepan until it reaches 240°F (soft-ball stage). Slowly pour the hot syrup into the whipping egg whites while mixing. Continue whipping until thick, glossy, and stiff peaks form. Add vanilla and mix briefly. Work quickly the marshmallow sets fast as it cools. Step 5: Assemble and Toast Spread marshmallow topping over the chilled fudge layer, creating swirls and peaks. Broil for 1–2 minutes until golden brown on top, watching closely the entire time. It can burn quickly, so don’t walk away. Let cool completely before slicing. Step 6: Slice and Serve Lift the bars out using the parchment overhang and place on a cutting board. Use a sharp knife (warmed and wiped clean between cuts) for neat slices. Cut into 16 bars and serve. Expert Tips for Perfect S’mores Fudge Bars 1. Chill the fudge completely before topping The fudge layer must be fully set in the fridge (at least 1 hour). If it’s even slightly soft, the marshmallow will sink into it and create a swirled, messy layer instead of sitting neatly on top. 2. Pour the hot syrup slowly and steadily Add the syrup in a thin, steady stream down the side of the mixing bowl. Pouring too quickly can shock the egg whites, leading to a grainy or uneven marshmallow texture. 3. Watch the broiler closely The marshmallow topping can go from golden to burnt in less than a minute. Stay near the oven the entire time and remove the pan as soon as the peaks turn lightly toasted. 4. Use a metal pan instead of glass A metal pan heats more evenly and helps the crust bake and set properly. Glass retains heat longer, which can overbake the edges and make lifting the bars harder. 5. Warm your knife for clean slices Run a sharp knife under hot water, wipe it dry, then slice. Repeat between cuts for clean, bakery-style squares without dragging the layers. 6. Make the marshmallow topping at the right time The marshmallow sets quickly, so only prepare it when your fudge base is fully chilled and ready. Timing is key for smooth assembly. 7. Check your thermometer placement Make sure the thermometer probe doesn’t touch the bottom of the pan while cooking the syrup. This can give false readings and affect the final marshmallow texture. Why This Recipe Works These S’mores Fudge Bars are a fully tested, bakery-style recipe that focuses on achieving the perfect balance of texture and flavor. After multiple trials, I found that chilling the fudge layer properly and carefully controlling the marshmallow temperature makes the biggest difference in getting clean layers and a stable topping. From a technique standpoint, heating the sugar syrup to the soft-ball stage (240°F) is essential because it stabilizes the marshmallow structure and helps it hold its shape when whipped. This step ensures a glossy, fluffy topping instead of a runny or grainy texture. Every step in this recipe has been designed to be reliable in a home kitchen, using simple equipment and everyday ingredients, while still delivering a bakery-quality result. Ingredient Substitutions Graham Crackers If you don’t have regular graham crackers, use gluten-free graham crackers (like Kinnikinnick) for a nearly identical crust texture. Digestive biscuits also work well and add a slightly richer, more buttery flavor. Chocolate Chips You can swap semisweet chocolate chips with 70% dark chocolate for a deeper, less sweet fudge layer. This creates a more intense chocolate flavor that balances the sweetness of the marshmallow. Corn Syrup Light corn syrup can be replaced
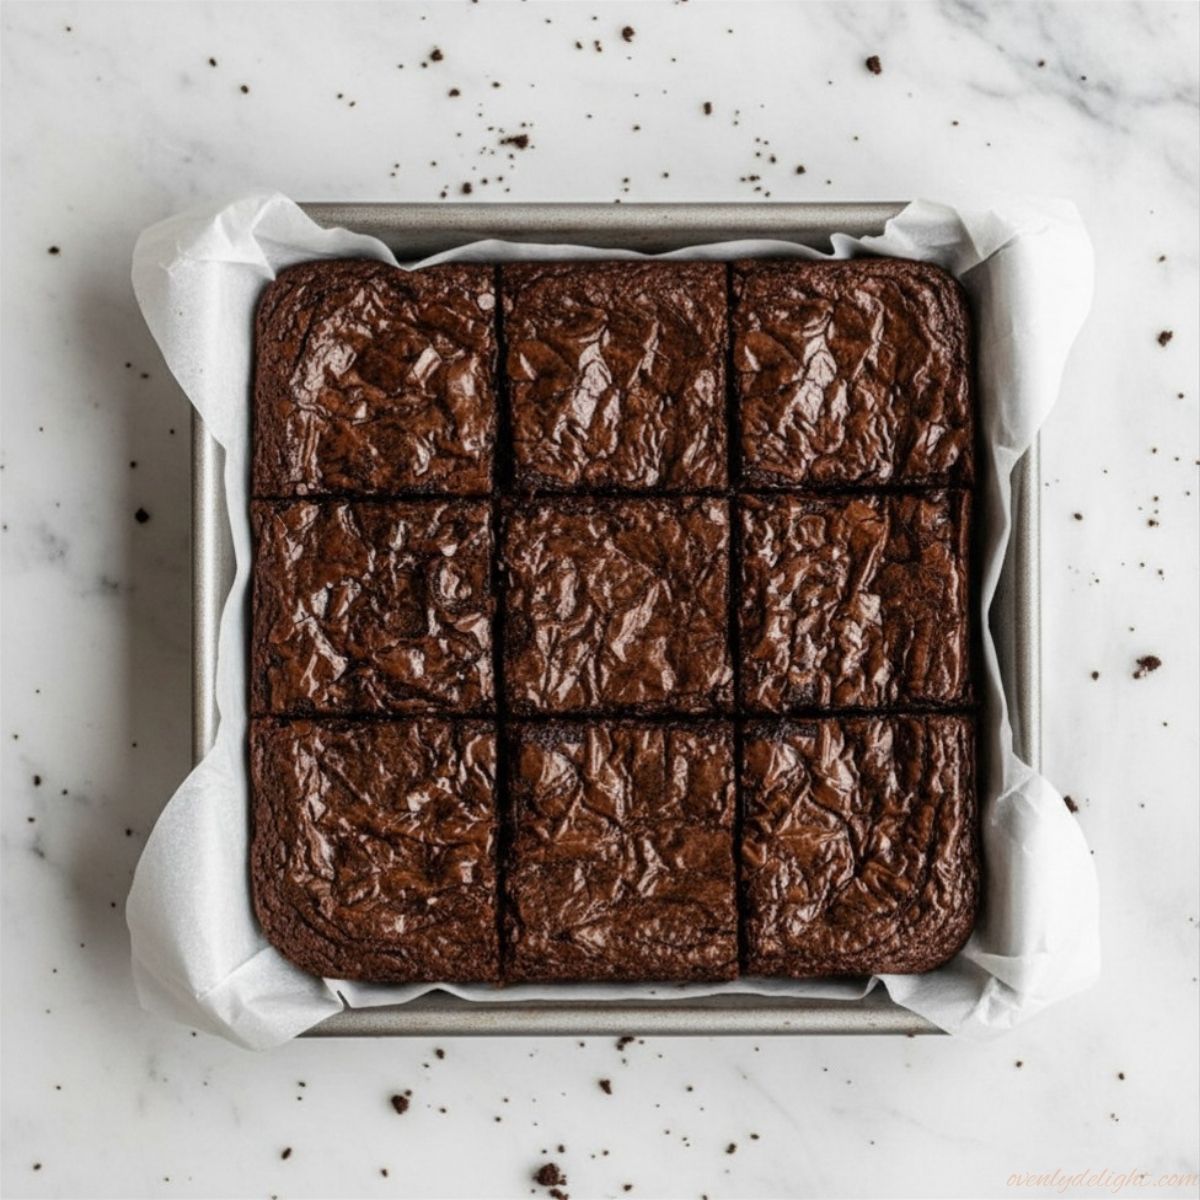
Brown Butter Brownies (Fudgy, Rich & Deeply Chocolatey)
There’s something special about Brown Butter Brownies that makes them impossible to resist. The rich, nutty flavor of browned butter adds a deep caramel-like taste that takes classic brownies to a whole new level. Combined with a fudgy center, crackly top, and plenty of chocolate, every bite is rich, chewy, and incredibly satisfying. I first made these brownies when I wanted something a little more special than a regular chocolate brownie, and they instantly became a favorite. Whether you’re baking for a family gathering, a holiday dessert table, or simply craving a homemade treat, these Brown Butter Brownies deliver bakery-style flavor with surprisingly simple ingredients. Why You’ll Love Brown Butter Brownies These Brown Butter Brownies are everything a brownie lover could want rich, fudgy, chewy, and packed with deep chocolate flavor. The browned butter adds a delicious nutty, caramel-like taste that makes them stand out from traditional brownies and gives them a bakery-style flavor with very little extra effort. Another reason to love this recipe is how simple it is to make. You only need a handful of basic ingredients, and the recipe comes together quickly without any complicated steps. Whether you’re baking for a party, sharing with friends, or treating yourself to a homemade dessert, these brownies always impress. The texture is just as irresistible as the flavor. They have a crackly top, soft center, and perfectly chewy edges that keep everyone reaching for another piece. Plus, they stay fresh for days, making them a great make-ahead dessert for any occasion. Ingredients You’ll Need for Brown Butter Brownies Butter and Chocolate Sugar and Wet Ingredients Dry Ingredients Chocolate Mix-Ins How to Make Brown Butter Brownies (Step by Step) Step 1: Preheat the Oven and Prepare Your Baking Pan Start by preheating your oven to 350°F (175°C) and position the oven rack in the center. This helps the brownies bake evenly from top to bottom. Line an 8×8-inch light-colored metal baking pan with parchment paper, leaving some overhang on two sides so you can easily lift the brownies out later. If you use a dark metal pan, the edges may bake too quickly and become dry before the center is done, so a light metal pan works best for perfectly fudgy Brown Butter Brownies. Step 2: Brown the Butter Place the butter in a medium saucepan over medium heat. As it melts, keep stirring constantly. The butter will first melt completely, then become foamy, and finally start developing golden-brown specks at the bottom of the pan. You’ll also notice a rich, nutty aroma filling the kitchen. This process usually takes about 5 to 7 minutes. Once you see those brown bits and smell that toasted fragrance, immediately remove the pan from the heat. Browned butter can go from perfect to burnt very quickly, so stay nearby and keep an eye on it the entire time. Step 3: Melt the Chocolate into the Browned Butter While the butter is still hot, add the chopped semisweet chocolate directly to the saucepan. Stir gently until the chocolate melts completely and the mixture becomes smooth and glossy. The residual heat from the browned butter should be enough to melt the chocolate without any additional cooking. Once smooth, allow the mixture to cool for about 5 minutes. This small cooling period is important because adding eggs to a mixture that’s too hot can cause them to cook prematurely. Step 4: Mix in the Sugars, Eggs, and Vanilla Add the granulated sugar and brown sugar to the chocolate mixture and whisk until fully combined. Next, add the eggs one at a time, whisking well after each addition. Once all the eggs are incorporated, whisk vigorously for about one minute. This extra mixing helps dissolve some of the sugar and creates the shiny, crackly top that makes homemade brownies look bakery-quality. Finally, whisk in the vanilla extract until everything is smooth and well blended. Step 5: Add the Dry Ingredients Add the flour, cocoa powder, espresso powder, and salt directly to the bowl. Using a spatula, gently fold the dry ingredients into the wet mixture until just combined. Be careful not to overmix. The batter should look thick and rich, and it’s perfectly fine if a few tiny streaks of flour remain. Overmixing develops gluten, which can make brownies more cake-like instead of dense and fudgy. Step 6: Fold in the Chocolate Chips and Bake Add the chocolate chips and gently fold them throughout the batter so every bite has pockets of melted chocolate. Pour the batter into the prepared baking pan and spread it evenly with a spatula. Bake for 28 to 32 minutes. The edges should look set, while the center should still have a very slight jiggle when the pan is gently shaken. To test for doneness, insert a toothpick into the center. It should come out with a few moist crumbs attached, but not wet batter. A completely clean toothpick usually means the brownies are overbaked. Step 7: Cool Completely and Slice Once baked, remove the pan from the oven and place it on a wire rack. Allow the brownies to cool completely in the pan for at least one hour. This cooling time allows the center to set properly and makes slicing much easier. It may be tempting to cut into them right away, but patience pays off here. When fully cooled, use the parchment paper overhang to lift the brownies out of the pan, then slice into squares and enjoy your rich, fudgy Brown Butter Brownies. Expert Tips for Perfect Brown Butter Brownies Keep a Close Eye on the Butter Brown butter can go from perfectly golden to burnt in less than a minute, so don’t leave the stove while it’s cooking. Using a light-colored saucepan makes it much easier to see the color change and spot the tiny brown specks forming at the bottom. As soon as you notice a rich, nutty aroma and golden-brown bits, remove the pan from the heat immediately. Those browned milk solids are what