
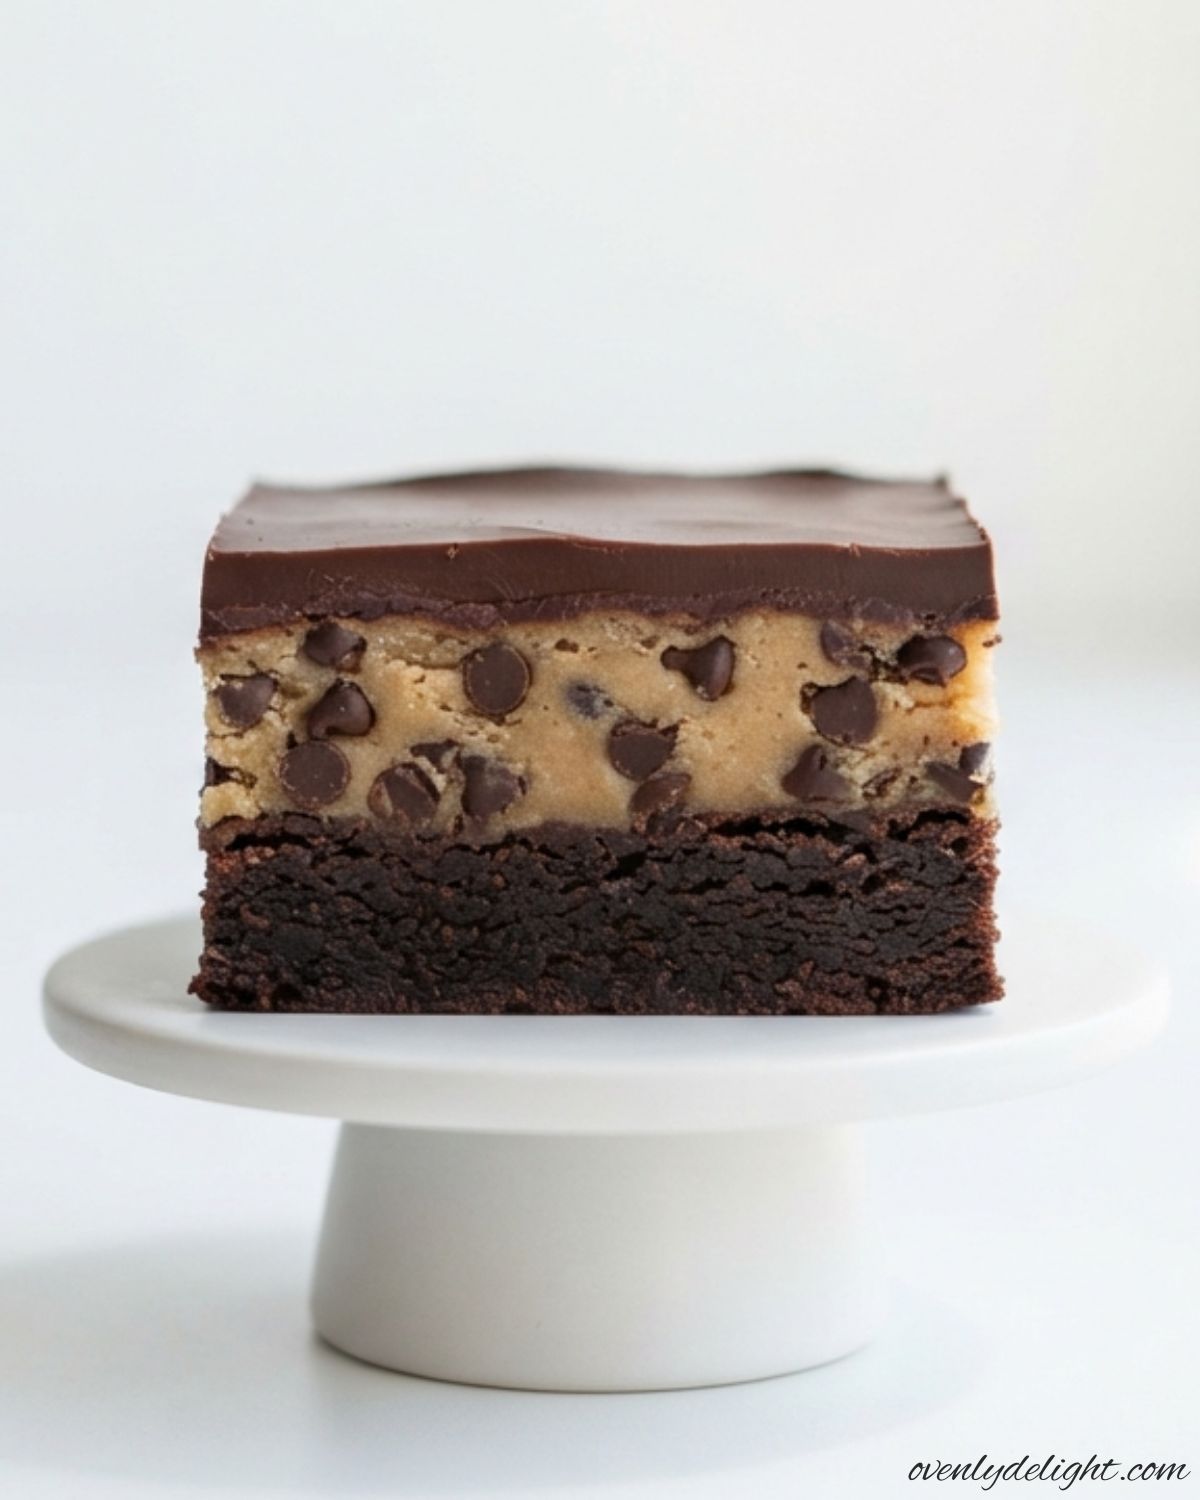
I still remember the first time I made these Cookie Dough Brownies for a family movie night. I couldn’t decide between brownies and chocolate chip cookies, so I combined both into one dessert. The rich fudgy brownie topped with creamy edible cookie dough was an instant hit, and now it’s one of the most requested treats whenever friends or family visit. Why You’ll Love These Cookie Dough Brownies Two Favorite Desserts in One These Cookie Dough Brownies combine a thick, chocolatey brownie base with a layer of creamy edible cookie dough, giving you the best of both worlds in every bite. It’s the perfect dessert for anyone who can’t choose between brownies and cookies. Rich Texture in Every Bite The combination of fudgy brownies, buttery cookie dough, and melty chocolate chips creates an irresistible texture. Every square is soft, satisfying, and packed with delicious chocolate flavor. Easy to Make You don’t need any special baking skills or hard-to-find ingredients to make these brownies. With simple pantry staples and easy-to-follow steps, they’re perfect for beginners and experienced bakers alike. Perfect for Any Occasion Whether you’re baking for a birthday, holiday, bake sale, family gathering, or a cozy weekend at home, these brownies always make a crowd-pleasing dessert. They can also be prepared ahead of time for added convenience. Safe-to-Eat Cookie Dough The cookie dough topping is made without raw eggs and uses heat-treated flour, so you can enjoy the classic cookie dough flavor with confidence. It adds a smooth, creamy finish that makes these brownies even more irresistible. Ingredients You’ll Need Brownie Layer Edible Cookie Dough Layer Chocolate Topping How to Make Cookie Dough Brownies (Step-by-Step) Step 1: Melt the Butter and Chocolate Place the butter and semi-sweet chocolate in a microwave-safe bowl. Heat in 20-second intervals, stirring after each, until completely melted and smooth. Avoid overheating, as chocolate can seize. Step 2: Mix the Brownie Batter Whisk the granulated sugar into the warm chocolate mixture until combined. Add the eggs and vanilla extract, then whisk until smooth. Gently fold in the cocoa powder, flour, and salt until no dry streaks remain. Step 3: Bake the Brownies Pour the batter into a parchment-lined 8×8-inch baking pan and spread it evenly. Bake until the edges are set and a toothpick inserted in the center comes out with a few moist crumbs. Let the brownies cool completely before adding the next layer. Step 4: Beat the Butter and Sugars In a separate bowl, beat the softened butter, brown sugar, and granulated sugar until light and creamy. This creates a smooth, fluffy cookie dough. Step 5: Finish the Cookie Dough Mix in the vanilla extract and salt, then add the heat-treated flour. Pour in the milk one tablespoon at a time until the dough becomes soft and spreadable. Fold in the mini chocolate chips. Step 6: Spread the Cookie Dough Evenly spread the cookie dough over the completely cooled brownie layer using an offset spatula or lightly damp hands for a smooth finish. Step 7: Chill the Layers Refrigerate the brownies for 20–30 minutes. Chilling helps firm the cookie dough so the chocolate topping stays on top without mixing into it. Step 8: Melt the Chocolate Topping Combine the chocolate chips and shortening (or butter) in a microwave-safe bowl. Heat in short intervals, stirring until the mixture is smooth and glossy. Step 9: Add the Chocolate Layer Pour the melted chocolate over the chilled cookie dough. Spread it gently into an even layer, covering the entire surface. Step 10: Chill, Slice, and Serve Return the brownies to the refrigerator until the chocolate topping is fully set. Slice into squares with a sharp knife and enjoy these delicious Cookie Dough Brownies. Expert Tips for the Best Results Let the Brownies Rest Before Slicing After chilling, let the brownies sit at room temperature for about 5 minutes before cutting. This helps prevent the chocolate topping from cracking and makes slicing much easier. Use a Warm Knife for Clean Cuts Run a sharp knife under hot water, dry it completely, and wipe it clean between each cut. This creates smooth, bakery-style squares without dragging the layers. Line the Pan with Parchment Paper Always line your baking pan with parchment paper, leaving an overhang on the sides. It makes lifting the brownies out effortless and helps keep the layers intact. Keep the Cookie Dough Firm If your kitchen is warm or the cookie dough feels too soft, chill it for 10–15 minutes before spreading. Firmer dough creates a smooth, even layer without mixing into the brownies. Measure Ingredients Accurately For the best texture, weigh your flour with a kitchen scale whenever possible. Accurate measurements help the cookie dough hold its shape while keeping the brownies soft and fudgy. Store in the Refrigerator Keep leftover Cookie Dough Brownies in an airtight container in the refrigerator. The chocolate topping stays firm, the cookie dough remains fresh, and the brownies keep their delicious texture for several days. Easy Ingredient Substitutions Use Dark Chocolate Instead of Semi-Sweet Chocolate Dark chocolate is a great substitute for semi-sweet chocolate in the brownie layer. It creates a deeper, more intense chocolate flavor with slightly less sweetness while keeping the brownies rich and fudgy. Replace Unsalted Butter with Plant-Based Butter For a dairy-free option, use a plant-based butter stick instead of regular butter. Choose one that’s designed for baking to maintain the same creamy texture in both the brownie and cookie dough layers. Swap All-Purpose Flour for Gluten-Free Flour A good-quality 1:1 gluten-free baking flour blend can be used in place of all-purpose flour. The cookie dough may be slightly more delicate, but it will still spread well and hold its shape after chilling. Use Dairy-Free Milk If you don’t use dairy, replace the milk with oat milk, almond milk, or another unsweetened plant-based milk. Add it a little at a time until the cookie dough reaches a soft, spreadable consistency. Substitute Shortening with Butter If shortening isn’t available, unsalted butter works well in the
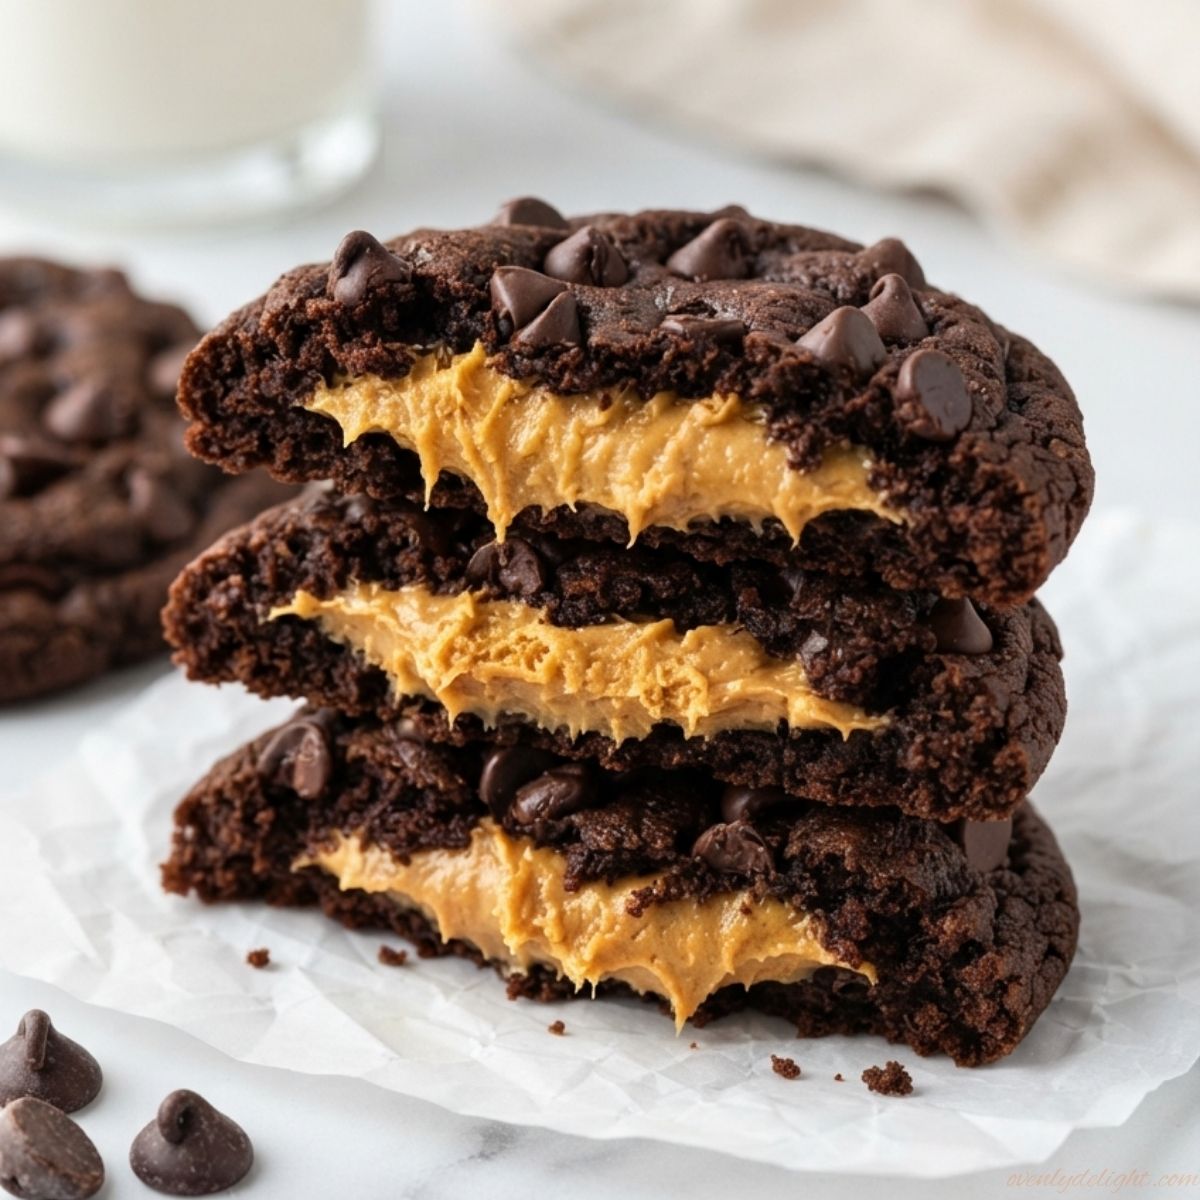
Best Reese’s Double Chocolate Cookies Recipe
If you love the classic combination of chocolate and peanut butter, these Reese’s Double Chocolate Cookies are sure to become a favorite. They’re soft, chewy, and packed with rich cocoa, melty chocolate chips, and chunks of Reese’s Peanut Butter Cups in every bite. Made with simple ingredients, these bakery-style cookies are easy to bake and perfect for holidays, parties, or satisfying any chocolate craving. Why You’ll Love These Reese’s Double Chocolate Cookies These Reese’s Double Chocolate Cookies are the perfect treat for anyone who loves the classic combination of chocolate and peanut butter. Rich cocoa, melty chocolate chips, and chunks of Reese’s Peanut Butter Cups come together to create an irresistible cookie with bold flavor in every bite. The cookies bake up soft, thick, and chewy with a fudgy, bakery-style texture that stays delicious for days. They’re easy to make using simple pantry ingredients, making them perfect for both beginner and experienced bakers. Whether you’re baking for the holidays, a party, a bake sale, or simply satisfying a chocolate craving, this recipe is always a crowd-pleaser. You can even freeze the dough ahead of time, so fresh, homemade cookies are never far away. Ingredients for Reese’s Double Chocolate Cookies Dry Ingredients Wet Ingredients Mix-Ins How to Make Reese’s Double Chocolate Cookies (Step by Step) Step 1: Mix the Dry Ingredients In a medium mixing bowl, whisk together the all-purpose flour, cocoa powder, baking soda, and salt until everything is evenly combined. This helps distribute the leavening and cocoa throughout the dough for consistent flavor and texture. Set the bowl aside. Step 2: Cream the Butter and Sugars In a large mixing bowl, beat the softened butter, brown sugar, and granulated sugar with a stand mixer or hand mixer on medium speed for about 2 minutes. The mixture should become light, creamy, and fluffy. Proper creaming incorporates air into the dough, resulting in soft, thick cookies. Step 3: Add the Egg and Vanilla Add the egg and vanilla extract to the butter mixture and mix just until combined. Scrape down the sides and bottom of the bowl with a rubber spatula to ensure everything is evenly mixed. Avoid overmixing once the egg is added. Step 4: Combine the Dough Gradually add the dry ingredients to the wet ingredients in two batches, mixing on low speed until no streaks of flour remain. Fold in the chocolate chips with a spatula, making sure they’re evenly distributed throughout the dough without overworking it. Step 5: Chill the Dough Cover the bowl tightly with plastic wrap or a lid and refrigerate the dough for at least 3 hours and 30 minutes. Chilling is essential because it firms up the dough, deepens the chocolate flavor, and prevents the cookies from spreading too much while baking. Step 6: Fill with Reese’s Peanut Butter Cups Using a cookie scoop or about 2 tablespoons of dough, flatten each portion in your hand. Place a frozen Reese’s Peanut Butter Cup in the center, then wrap the dough completely around it, sealing the edges well. Roll gently into a smooth ball so the filling stays enclosed during baking. Step 7: Bake the Cookies Preheat your oven to 350°F (175°C) and line a baking sheet with parchment paper. Arrange the dough balls about 2 inches apart to allow room for spreading. Bake for 10–12 minutes, or until the edges are set while the centers still look slightly soft. Avoid overbaking, as the cookies will continue to cook while cooling. Step 8: Cool and Enjoy Leave the cookies on the baking sheet for about 10 minutes before transferring them to a wire rack. This allows them to firm up while keeping the centers soft and fudgy. Enjoy them warm for the ultimate gooey chocolate and peanut butter experience, or let them cool completely before storing. Expert Tips for Perfect Reese’s Double Chocolate Cookies Freeze the Peanut Butter Cups Freeze the Reese’s Peanut Butter Cups for about 15 minutes before stuffing the cookies. This helps them hold their shape and prevents the filling from melting out during baking. Measure Ingredients Accurately For the best texture, use a kitchen scale if possible. Too much flour or cocoa powder can make the cookies dry and crumbly. Don’t Skip Chilling the Dough Chill the dough for at least 3½ hours. Cold dough bakes into thick, chewy cookies and helps keep the peanut butter cups centered. Avoid Overbaking Remove the cookies when the edges are set but the centers still look slightly soft. They will continue to bake on the hot pan as they cool, giving you a fudgy texture. Keep the Dough Cold If the dough becomes soft while shaping, place the filled cookie dough balls in the freezer for 5 minutes before baking. This helps prevent excess spreading. Get Clean Cookie Slices For neat photos or serving, dip a sharp knife in warm water, wipe it dry, and slice the cookies while they’re still slightly warm. Bake on Parchment Paper Always line your baking sheet with parchment paper. It prevents sticking and makes cleanup easier if any melted peanut butter or chocolate leaks out. How to Store Reese’s Double Chocolate Cookies Room Temperature Store the cooled cookies in an airtight container at room temperature for up to 4 days. They will stay soft and chewy. Refrigerator For longer freshness, refrigerate the cookies in an airtight container for up to 10 days. Let them come to room temperature before serving for the best texture. Freezer Freeze baked cookies or unbaked cookie dough balls in a freezer-safe container for up to 3 months. Bake frozen dough directly from the freezer, adding 1–2 extra minutes to the baking time. Reheating Warm a cookie in the microwave for 10–15 seconds to make the chocolate soft and the peanut butter center deliciously gooey. Cookies You’ll Love to Try Next Frequently Asked Questions Final Thoughts If you’re a fan of chocolate and peanut butter, these Reese’s Double Chocolate Cookies are a must-bake. They’re soft, thick, and loaded with rich chocolate flavor,
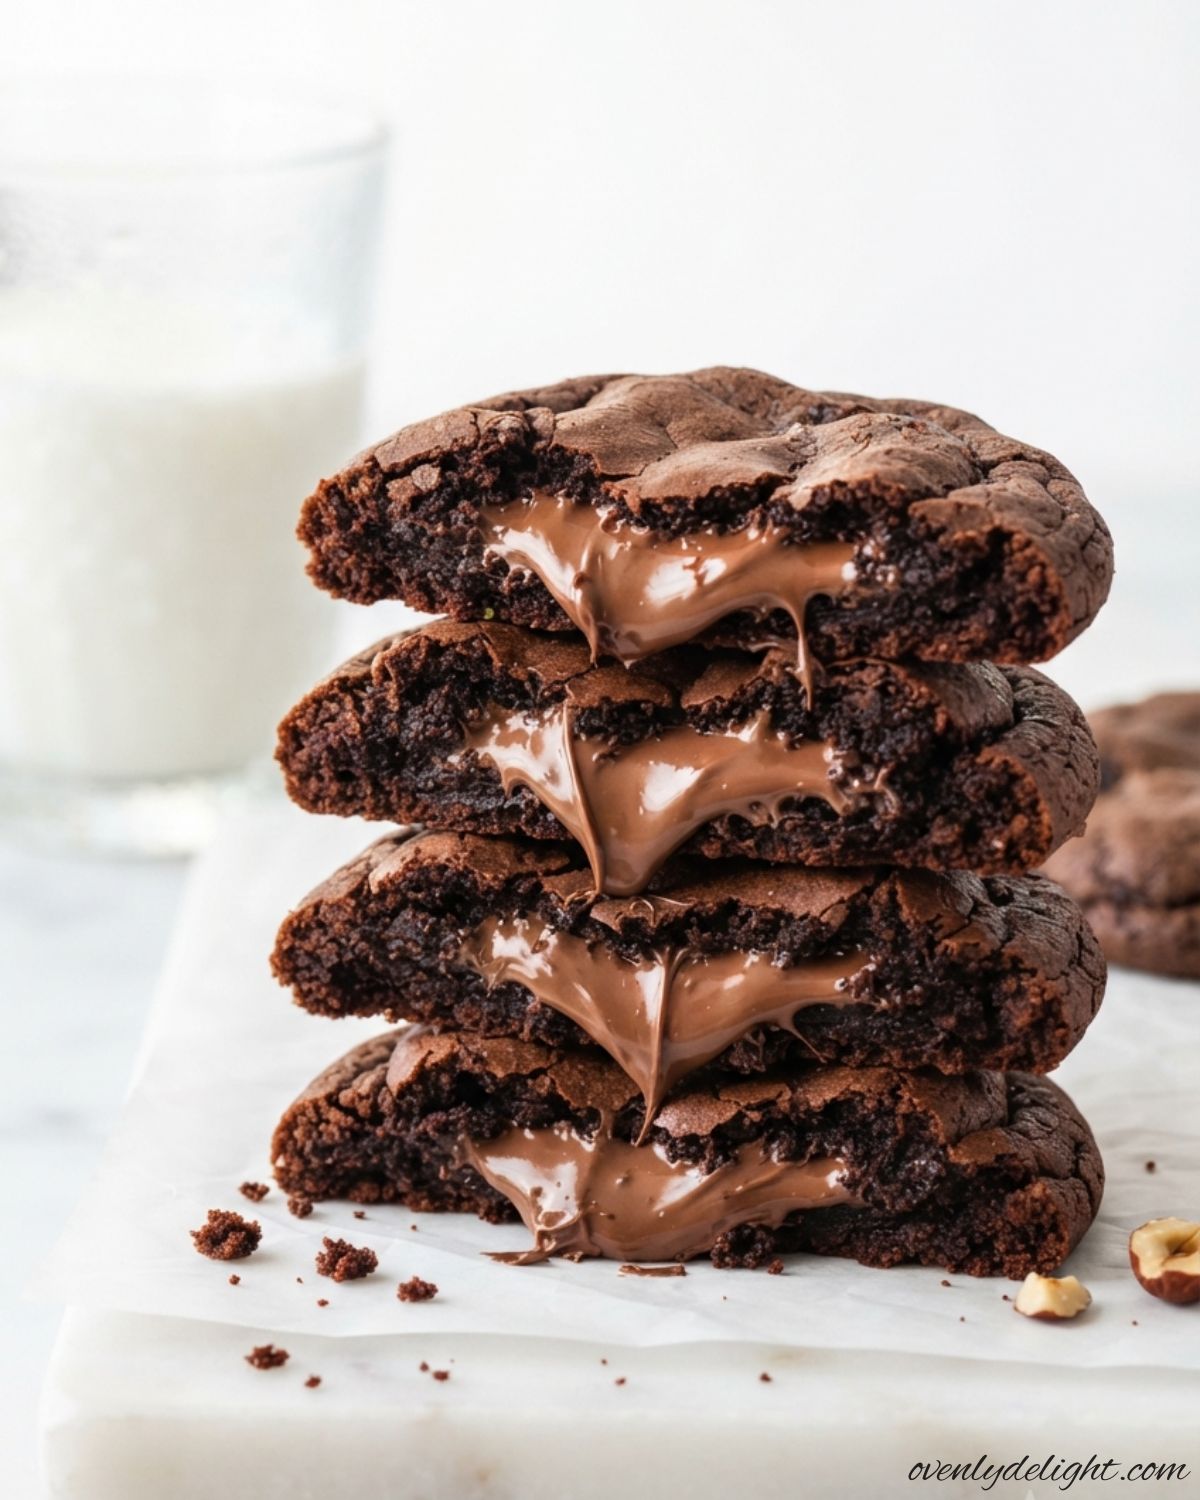
Nutella Stuffed Chocolate Cookies (Easy Bakery-Style)
I love baking these Nutella Stuffed Chocolate Cookies whenever I’m craving something extra chocolatey. Hiding a spoonful of Nutella inside each cookie is such a simple step, but it makes every bite feel like a special treat. These bakery-style cookies are thick, soft, and rich with chocolate flavor, finished with a warm, gooey Nutella center. They’re easy to make, perfect for sharing, and guaranteed to satisfy any chocolate lover. Why You’ll Love These Nutella Stuffed Chocolate Cookies Ingredients for Homemade Nutella Stuffed Chocolate Cookies For the Nutella Filling Dry Ingredients Wet Ingredients Mix-Ins How to Make Nutella Stuffed Chocolate Cookies (Step by Step) Freeze the Nutella Filling Line a small tray with parchment paper and drop the Nutella into rounded teaspoon-sized portions. You should get about 14 dollops. Freeze for at least 1 hour, until the Nutella is firm enough to handle easily. Prepare the Dry Ingredients Whisk the flour, cocoa powder, baking soda, and salt together in a medium bowl. Set aside until ready to use. This helps the ingredients distribute evenly throughout the cookie dough. Mix the Cold Butter and Sugars Beat the cold cubed butter with both sugars until just combined, about 1 minute. Unlike traditional cookies, there is no need to whip the butter until fluffy. Keeping the butter cold helps these cookies stay thick and bakery-style. Add the Wet Ingredients Add the egg, vanilla extract, and 1 teaspoon of milk. Mix until the dough looks smooth and slightly glossy. Combine the Cookie Dough Fold in the dry ingredients by hand using a spatula, mixing only until no flour streaks remain. Add the remaining teaspoon of milk only if the dough feels too dry and doesn’t hold together. Add Chocolate Chips Gently stir in the chocolate chips until they are evenly distributed throughout the dough. Stuff the Cookies with Nutella Scoop a golf-ball-sized portion of dough and flatten it in your palm. Place a frozen Nutella dollop in the center, then wrap the dough completely around it. Roll into a smooth ball, making sure there are no gaps where the filling can leak out. Chill the Stuffed Cookie Dough Place the stuffed cookie dough balls on a parchment-lined tray and freeze for another 15–20 minutes while the oven preheats to 350°F (175°C). Bake the Cookies Arrange 6 cookies at a time on a light-colored metal baking sheet. Bake for 12 minutes, until the edges are set but the centers still look slightly soft. Avoid dark baking pans, as they can make the bottoms brown too quickly. Cool Before Serving Let the cookies cool on the baking tray for 10 minutes before transferring them. The Nutella center will be very hot and gooey right out of the oven, so this resting time helps it set slightly. Expert Tips This section is especially helpful if you’ve ever had stuffed cookies leak in the oven. After making several batches, these are the simple tricks that help create thick cookies with a perfectly gooey Nutella center every time. Easy Ingredient Substitutions How to Store These Nutella Stuffed Chocolate Cookies These cookies are best enjoyed fresh, but with proper storage, you can keep them soft, chewy, and filled with a delicious Nutella center for days. Whether you’re saving leftovers, making them ahead for an event, or freezing a batch for later, these storage methods will help maintain their bakery-style texture. Room Temperature Storage Store baked cookies in an airtight container at room temperature for up to 3 days. Keep them away from direct sunlight or heat, as warm temperatures can make the Nutella filling softer and cause the cookies to lose their shape. Adding a piece of parchment paper between layers helps prevent the cookies from sticking together. Refrigerator Storage If your kitchen is warm or you want to keep the cookies fresh longer, store them in an airtight container in the refrigerator for up to 7 days. Before serving, let them sit at room temperature for a few minutes or warm them slightly to bring back the soft cookie texture and creamy filling. Freezing Baked Cookies These cookies freeze beautifully and can be stored for up to 2 months. Place the cooled cookies in a freezer-safe container or zip-top bag with parchment paper between each layer. This prevents them from sticking and makes it easy to grab one whenever a chocolate craving hits. Freezing Cookie Dough You can also prepare the stuffed cookie dough balls ahead of time and freeze them for up to 3 months. Place the frozen dough balls in a freezer-safe bag or container, then bake directly from frozen when ready. Add about 2 extra minutes to the baking time and check that the edges are set. How to Reheat For that fresh-from-the-oven experience, microwave a cookie for 15–20 seconds before serving. The gentle warmth softens the cookie and brings back the gooey Nutella center, making it taste almost like a freshly baked treat. Room temperature before serving: Let cookies cool for at least 10 minutes before eating because the Nutella filling will be extremely hot. Cookies You’ll Love to Try Next Frequently Asked Questions Final Thoughts These Nutella Stuffed Chocolate Cookies are the kind of homemade treat that feels extra special with every bite. From the rich chocolate cookie dough to the warm, creamy Nutella center, they bring together everything a chocolate lover wants in a bakery-style cookie. I love how simple ingredients can create something that looks impressive and tastes like it came from a fancy bakery. Whether you’re making them for a holiday cookie tray, a family gathering, or just a cozy weekend dessert, these cookies are sure to become a favorite. Serve them slightly warm for the ultimate gooey Nutella experience, and don’t be surprised if everyone asks you for the recipe!
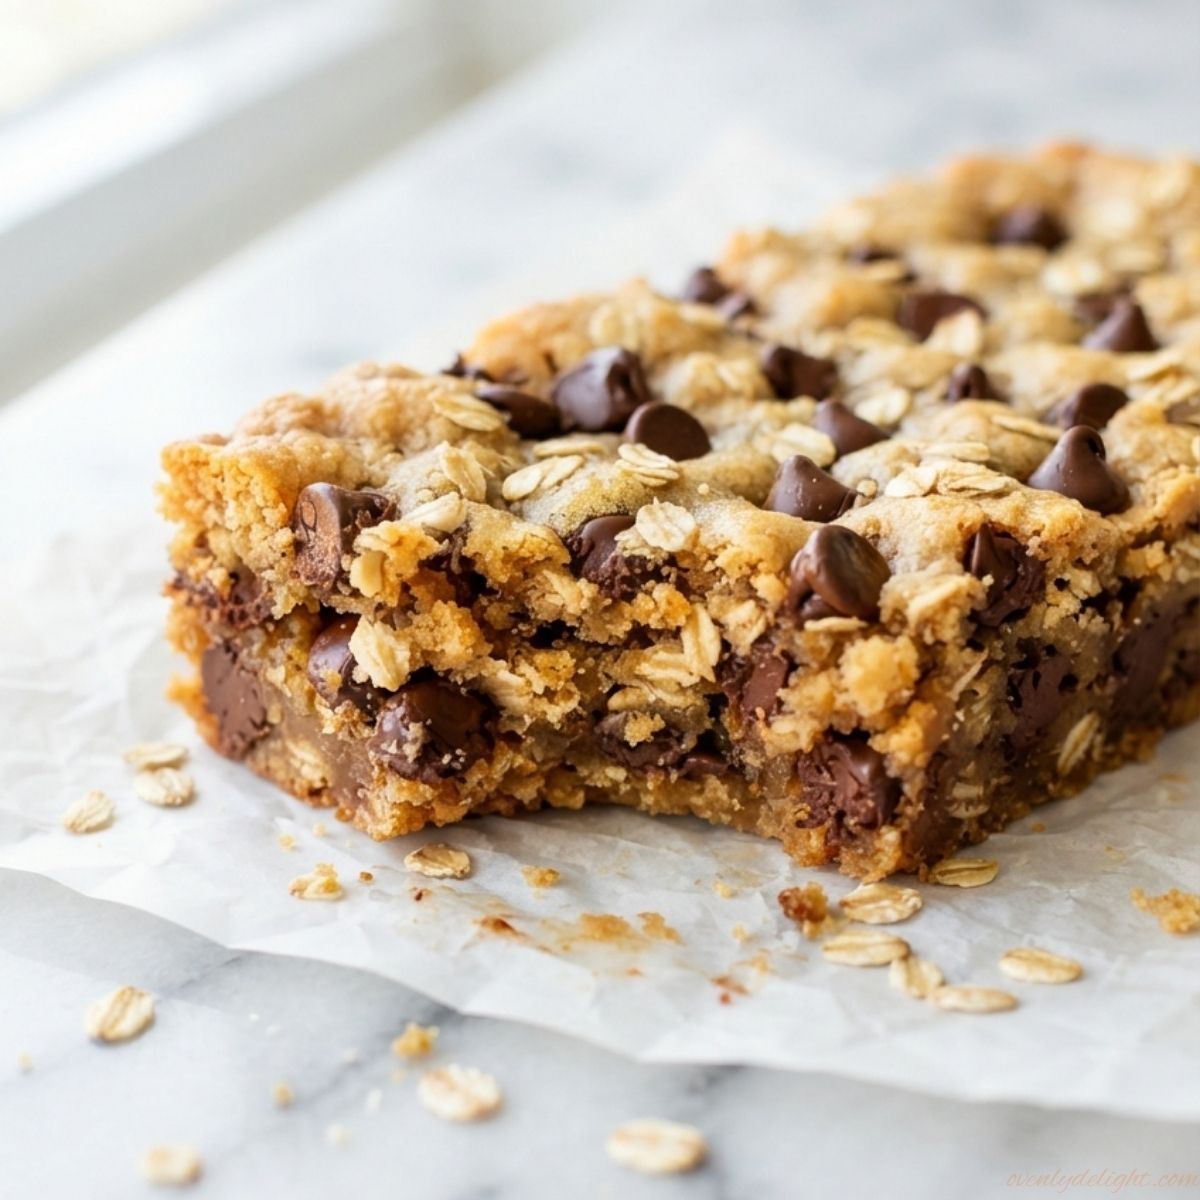
Easy Oatmeal Chocolate Chip Cookie Bars (Soft & Chewy)
I’ve always loved desserts that feel homemade, comforting, and easy to share, and these Oatmeal Chocolate Chip Cookie Bars are one of those recipes I come back to again and again. Instead of scooping individual cookies, this recipe turns a classic oatmeal chocolate chip cookie dough into soft, chewy bars that are simple to prepare and perfect for busy days. What I love most about these cookie bars is their texture they’re thick, buttery, and packed with hearty oats and melty chocolate chips in every bite. They’re the kind of treat that feels cozy enough for a family dessert but special enough to bring to gatherings, bake sales, or holiday cookie trays. With simple pantry ingredients and an easy baking method, these oatmeal chocolate chip cookie bars are a reliable recipe you’ll want to make whenever a sweet craving hits. Why We Love These Oatmeal Chocolate Chip Cookie Bars There’s so much to love about these Oatmeal Chocolate Chip Cookie Bars. They combine the classic flavors of a homemade oatmeal cookie with the convenience of a soft, chewy bar that’s easy to slice and share. The buttery cookie base, hearty oats, and rich chocolate chips create the perfect balance of texture and flavor in every bite. Ingredients for Oatmeal Chocolate Chip Cookie Bars Wet Ingredients Dry Ingredients Mix-Ins How to Make Oatmeal Chocolate Chip Cookie Bars (Step by Step) 1. Prepare the Baking Pan Start by preheating your oven to 350°F (175°C) so it’s ready when your cookie bar dough is finished. Line a 9×13-inch baking pan with parchment paper, leaving a little extra paper hanging over the sides. This overhang works like a handle and makes it easy to lift the baked bars out of the pan for clean, even slicing. Lightly spray the parchment paper with nonstick cooking spray if desired to prevent sticking. 2. Cream the Butter and Sugars In a large mixing bowl, add the softened butter, brown sugar, and granulated sugar. Using a hand mixer or stand mixer, beat the mixture on medium speed for about 2 minutes until it becomes lighter in color, smooth, and slightly fluffy. Properly creaming the butter and sugars helps incorporate air into the dough and creates the soft, chewy texture that makes these cookie bars so delicious. Make sure your butter is softened, not melted, because melted butter can make the bars greasy and overly dense. 3. Add the Eggs and Vanilla Add the two large eggs, extra egg yolk, and vanilla extract to the creamed butter mixture. Mix on medium speed until everything is fully combined and the batter looks smooth and glossy. Add the eggs one at a time if possible, mixing after each addition to help the dough come together evenly. The extra egg yolk adds richness and helps create a thicker, fudgier cookie bar texture. 4. Mix the Dry Ingredients In a separate medium bowl, whisk together the all-purpose flour, cinnamon, baking soda, and salt. Combining the dry ingredients separately ensures the baking soda, salt, and cinnamon are evenly distributed throughout the dough. This prevents bites with too much baking soda or uneven flavor. Whisking also helps break up any flour lumps, giving your cookie bars a smoother texture. 5. Combine the Wet and Dry Ingredients Gradually add the dry ingredient mixture to the wet ingredients. Use a spatula or mix on low speed until the flour is almost completely incorporated. Stop mixing as soon as you no longer see dry streaks of flour. Overmixing can develop too much gluten, which may result in cookie bars that are tough instead of soft and chewy. 6. Fold in the Oats and Chocolate Chips Add the old-fashioned rolled oats and chocolate chips to the dough. Gently fold them in using a spatula until they are evenly distributed throughout the mixture. Folding instead of heavily mixing keeps the dough tender while ensuring every bite has plenty of chewy oats and melty chocolate chips. 7. Press the Dough Into the Pan Transfer the thick cookie dough into the prepared baking pan. Use a spatula, the back of a spoon, or lightly greased hands to press the dough into an even layer from corner to corner. The dough will be thick, so take your time spreading it evenly. A uniform thickness helps the cookie bars bake at the same rate and prevents some areas from becoming overbaked while others remain underdone. 8. Bake the Cookie Bars Place the pan on the center rack of your preheated oven and bake for 25 to 30 minutes. The top should look lightly golden, and the edges should appear set while the center may still look slightly soft. Avoid overbaking because the bars will continue to set as they cool, and baking too long can make them dry instead of chewy. 9. Cool Completely Before Slicing Remove the pan from the oven and allow the cookie bars to cool completely for at least 1 hour before cutting. Use the parchment paper overhang to lift the bars out of the pan, then place them on a cutting board and slice into 15 even bars. Cooling is an important step because it allows the center to firm up and helps the bars hold their shape when sliced. Expert Tips for Perfect Oatmeal Chocolate Chip Cookie Bars 1. Measure Flour Correctly for Soft Bars One of the biggest reasons cookie bars turn out dry and crumbly is using too much flour. Always spoon the flour into your measuring cup and level it off with a knife instead of scooping directly from the bag. This simple step helps you get the perfect soft and chewy texture every time. 2. Don’t Overbake the Cookie Bars The first time I made these, I waited until the center looked completely set before taking them out, and the bars ended up much drier than I wanted. For the best texture, remove them from the oven when the edges are set but the center still looks slightly soft. They will continue baking
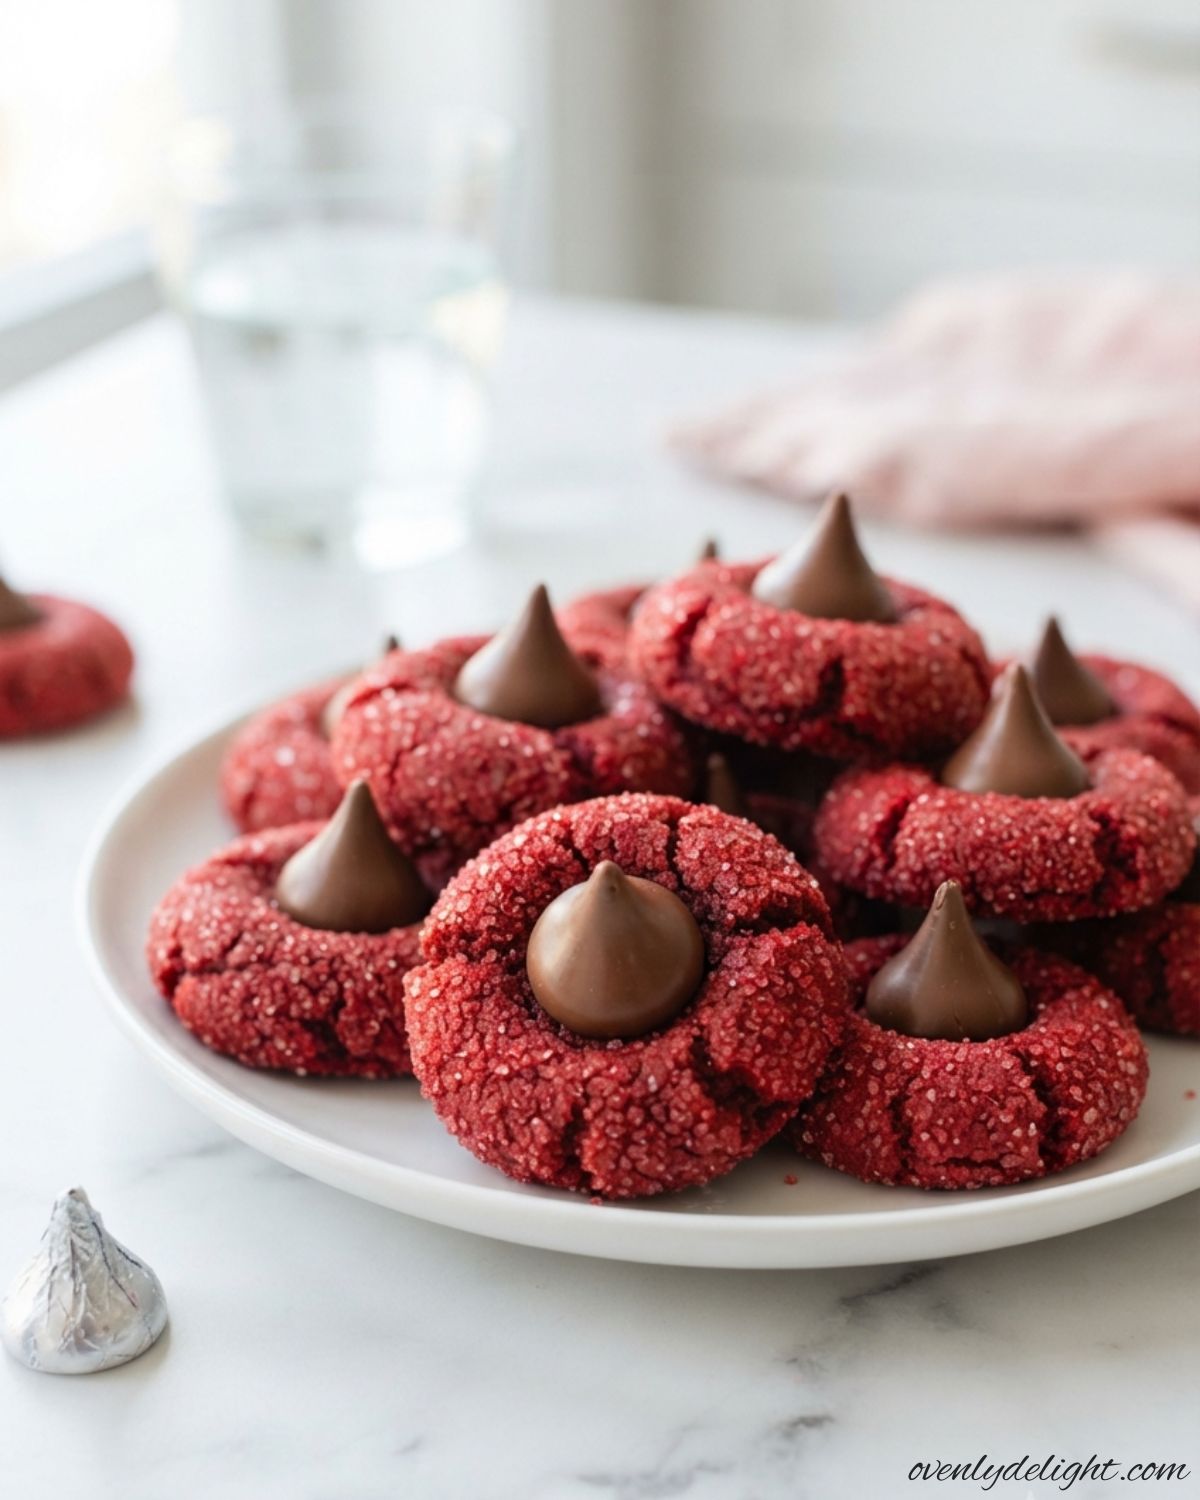
Red Velvet Blossom Cookies (Soft, Chewy & Easy)
These Red Velvet Blossoms are a beautiful twist on classic red velvet cookies, combining a soft, chewy texture with rich chocolate flavor in every bite. I love making these cookies because they are simple to prepare, look stunning on a dessert table, and always feel extra special for holidays and celebrations. With their vibrant red color and sweet chocolate topping, they’re the perfect homemade treat to share with family and friends. Why I Love This Recipe Ingredients for Red Velvet Blossoms Dry Ingredients Wet Ingredients For Rolling & Topping How to Make Red Velvet Blossom Cookies (Step by Step) 1. Whisk the dry ingredients In a medium bowl, whisk together the all-purpose flour, natural cocoa powder, baking soda, and salt until evenly combined. Mixing the dry ingredients first helps distribute the cocoa powder and leavening agents throughout the dough, ensuring every cookie bakes evenly with the perfect red velvet flavor. 2. Cream the butter and sugars In a large mixing bowl, beat the softened butter, brown sugar, and granulated sugar together until the mixture becomes light, smooth, and slightly fluffy, about 2 minutes. This step helps incorporate air into the dough, which creates softer cookies with a tender texture. Make sure your butter is softened but not melted for the best results. 3. Add the egg and flavorings Add the room-temperature egg, red food coloring, white vinegar, and vanilla extract to the butter mixture. Beat until everything is fully combined and the color looks evenly bright red. The mixture may look slightly uneven at first, but continue mixing until the ingredients are completely blended and smooth. 4. Combine the wet and dry ingredients Gradually add the dry ingredients to the wet mixture in two additions, mixing on low speed after each addition. Stop mixing as soon as you no longer see streaks of flour. Overmixing can develop too much gluten and make the cookies less soft. Add the milk at the end and gently mix until the dough comes together. 5. Chill the dough Cover the cookie dough tightly and refrigerate for at least 2 hours. Chilling allows the flavors to develop and helps the butter firm up, which prevents the cookies from spreading too much during baking. This step is important for creating thick, soft, and perfectly shaped Red Velvet Blossoms. 6. Preheat the oven and prepare baking sheets When you are ready to bake, preheat your oven to 350°F (175°C). Line two baking sheets with parchment paper to prevent sticking and help the cookies bake evenly. Allow the oven to fully preheat before baking for the best texture. 7. Roll and coat the cookie dough Scoop the chilled dough into 1-tablespoon portions and roll each piece into a smooth ball. Roll the dough balls in granulated sugar until they are fully coated. The sugar coating gives the cookies their classic crackled appearance and adds a slight sweetness to the outside. 8. Bake the cookies Place the sugar-coated dough balls onto the prepared baking sheets, spacing them about 2 inches apart to allow room for spreading. Bake on the middle rack for 9–10 minutes, or until the edges are set while the centers still look slightly soft. The cookies will continue to firm up as they cool, so avoid overbaking. 9. Add the chocolate kisses Remove the cookies from the oven and let them cool for about 1 minute. While they are still warm and soft, gently press an unwrapped Hershey’s Kiss into the center of each cookie. Let the cookies rest on the baking sheet for 5 minutes before transferring them to a wire rack. This helps the chocolate stay in place and allows the cookies to set properly. 10. Cool and serve Allow the Red Velvet Blossoms to cool completely before serving. Once cooled, the chocolate centers will become slightly firm while the cookies remain soft and chewy. Enjoy them with coffee, milk, or as a festive homemade dessert for any occasion. Expert Tips for Perfect Red Velvet Blossom Cookies Ingredient Substitutions Natural Cocoa Powder Substitute If you don’t have natural cocoa powder, you can use another natural unsweetened cocoa powder. It will give a similar rich chocolate flavor while keeping the classic taste of the cookies. Avoid Dutch-process cocoa because it may slightly change the color and texture. Unsalted Butter Substitute Salted butter can be used instead of unsalted butter. Simply reduce or leave out the added salt in the recipe to maintain the right balance of flavors. Dairy-Free Option For a dairy-free version, replace butter with a plant-based baking stick and use almond milk or oat milk instead of regular milk. The cookies may taste slightly less rich but will still have a soft and tender texture. Gluten-Free Option Use a 1:1 gluten-free flour blend in place of all-purpose flour. Since gluten-free cookies can be more delicate, allow them to cool completely or a few extra minutes before serving. Chocolate Topping Substitute If you don’t have chocolate kisses, you can use small chocolate squares, chocolate chips, or your favorite chocolate candy. Press the chocolate into the warm cookies for a sweet finishing touch. How to Store Blossom Cookies Room Temperature Storage Store completely cooled cookies in an airtight container at room temperature for up to 5 days. Keeping them sealed helps maintain their soft texture and prevents them from drying out. Refrigerator Storage For longer freshness, you can refrigerate the cookies in an airtight container for up to 10 days. The flavors may become even richer after a day or two as the chocolate and cocoa notes develop. Freezing Baked Cookies To freeze baked cookies, place them in a freezer-safe bag or container and store them for up to 3 months. When ready to enjoy, let them thaw at room temperature for about 20 minutes before serving. Freezing Cookie Dough You can also freeze the unbaked dough. Roll the dough into portions, freeze them on a tray until firm, then transfer to a freezer bag. Bake directly from frozen, adding 1–2 extra minutes to
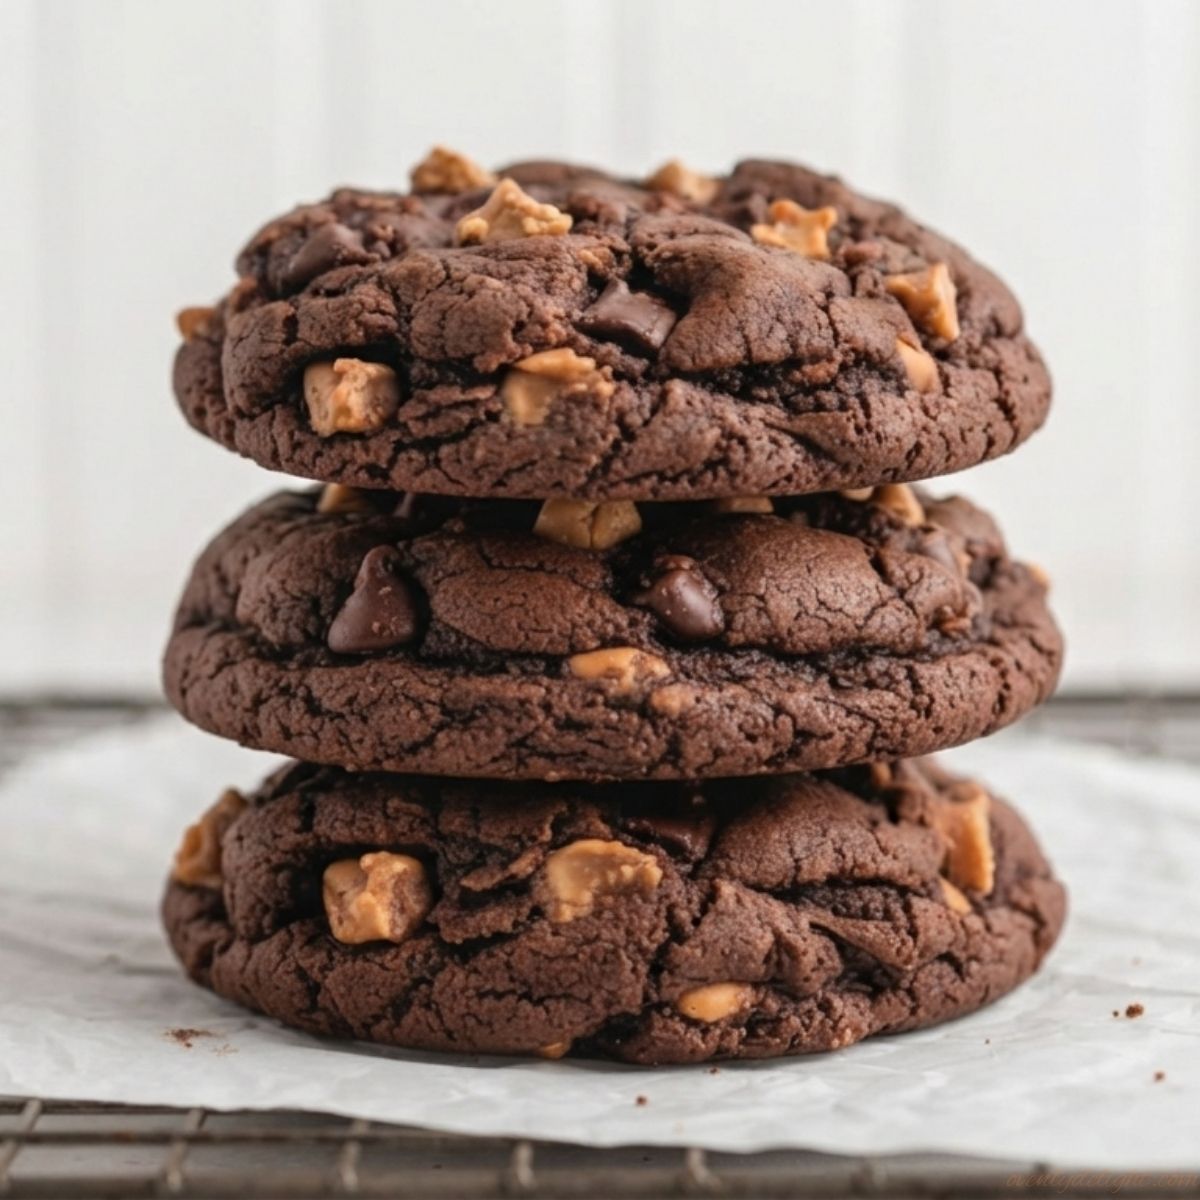
Dark Chocolate Peanut Butter Chip Cookies (Fudgy & Easy)
I always find myself coming back to these Dark Chocolate Peanut Butter Chip Cookies whenever I’m craving something extra chocolatey. The rich cocoa paired with creamy peanut butter chips is one of my favorite flavor combinations, and the smell that fills the kitchen while they bake is impossible to resist. They’re soft, chewy, easy to make, and always disappear quickly whenever I share them with family and friends. Why You’ll Love These Dark Chocolate Cookies Rich Chocolate Flavor If you’re a chocolate lover, these cookies are sure to become a favorite. Made with unsweetened cocoa powder, they have a deep, rich chocolate flavor that’s perfectly balanced without being overly sweet. Every bite is soft, fudgy, and packed with delicious chocolate goodness. Creamy Peanut Butter Chips The creamy peanut butter chips melt into the cookies as they bake, adding little pockets of sweet peanut butter flavor throughout. They perfectly complement the rich chocolate, creating a classic flavor combination that’s hard to resist. Soft and Chewy Texture These cookies bake up thick with soft, chewy centers and lightly crisp edges. They stay tender for days, making them just as enjoyable the next day as they are fresh from the oven. Quick and Easy to Make This recipe uses simple pantry staples and comes together with minimal effort. There’s no need to chill the dough, so you can mix, bake, and enjoy warm homemade cookies in less than 30 minutes. Perfect for Any Occasion Whether you’re baking for a holiday cookie tray, a family gathering, a bake sale, or simply satisfying a chocolate craving, these cookies are always a hit. They’re easy to make, easy to share, and loved by both kids and adults. Great for Make-Ahead Baking Both the cookie dough and the baked cookies freeze beautifully. You can prepare the dough ahead of time or freeze extra cookies, making it easy to enjoy fresh homemade treats whenever you’re in the mood for something chocolatey. Ingredients for Dark Chocolate Peanut Butter Chip Cookies Dry Ingredients Wet Ingredients Peanut Butter Chips How to Make Dark Chocolate Peanut Butter Chip Cookies Step 1: Mix the Dry Ingredients In a medium bowl, whisk together the all-purpose flour, cake flour, Dutch-process cocoa powder, baking powder, baking soda, and salt until everything is evenly combined. This helps distribute the leavening agents and cocoa for consistent flavor and texture in every cookie. Step 2: Cream the Butter and Sugars In a large mixing bowl, beat the softened butter, brown sugar, and granulated sugar for about 2–3 minutes, or until the mixture becomes light and fluffy. Properly creaming the butter creates a soft, tender cookie with beautifully crackled tops. Step 3: Add the Eggs and Vanilla Beat in the eggs one at a time, mixing well after each addition. Stir in the vanilla extract and scrape down the sides of the bowl to make sure everything is fully incorporated. Step 4: Combine the Wet and Dry Ingredients Gradually add the dry ingredients to the butter mixture, mixing on low speed just until no dry streaks remain. Be careful not to overmix, as this can make the cookies dense instead of soft and chewy. Step 5: Fold in the Peanut Butter Chips Using a rubber spatula, gently fold the peanut butter chips into the dough until they’re evenly distributed. This ensures every cookie is packed with creamy peanut butter flavor without breaking the chips apart. Step 6: Chill the Dough Cover the bowl and refrigerate the dough for at least 1 hour. Chilling allows the flour to hydrate and the butter to firm up, resulting in thicker cookies with a richer flavor and less spreading during baking. Step 7: Prepare for Baking Preheat your oven to 350°F (175°C) and line two baking sheets with parchment paper. This prevents sticking and helps the cookies bake evenly. Step 8: Scoop the Dough Use a large cookie scoop or about ¼ cup of dough for each cookie. Place the dough balls about 2 inches apart on the prepared baking sheets to give them room to spread. Step 9: Bake the Cookies Bake for 10–12 minutes, or until the edges are set while the centers still look slightly soft. The cookies will continue to cook as they cool, giving them their signature chewy texture. Step 10: Cool and Enjoy Let the cookies cool on the baking sheet for about 5 minutes, then transfer them to a wire rack to cool completely. Enjoy them warm for gooey peanut butter chips or let them cool for the perfect soft and chewy bite. Pro Tips for Perfect Cookies Chill the Dough Don’t skip the chilling time, even if you’re in a hurry. Chilling the dough for at least an hour firms up the butter, prevents the cookies from spreading too much, and gives them a thicker, chewier texture with better flavor. Measure the Flour Correctly For the best results, spoon the flour into your measuring cup and level it off with a knife instead of scooping directly from the bag. Too much flour can make the cookies dry, dense, and crumbly. Don’t Overbake These cookies should still look slightly soft in the center when you remove them from the oven. The residual heat will finish baking them as they cool, leaving you with perfectly soft and chewy cookies instead of dry ones. Use Dutch-Process Cocoa Dutch-process cocoa powder gives these cookies their deep, rich chocolate flavor and dark color. While natural cocoa powder can be used in a pinch, it won’t provide the same smooth, intense chocolate taste. Check Your Cookies Early Every oven bakes a little differently, so start checking the cookies around the 10-minute mark. The edges should be set while the centers remain slightly underbaked for the perfect chewy texture. Store Them Properly Keep the cooled cookies in an airtight container at room temperature for up to five days. For extra-soft cookies, place a slice of bread in the container the cookies will absorb the moisture and stay fresh and chewy longer. Ingredient
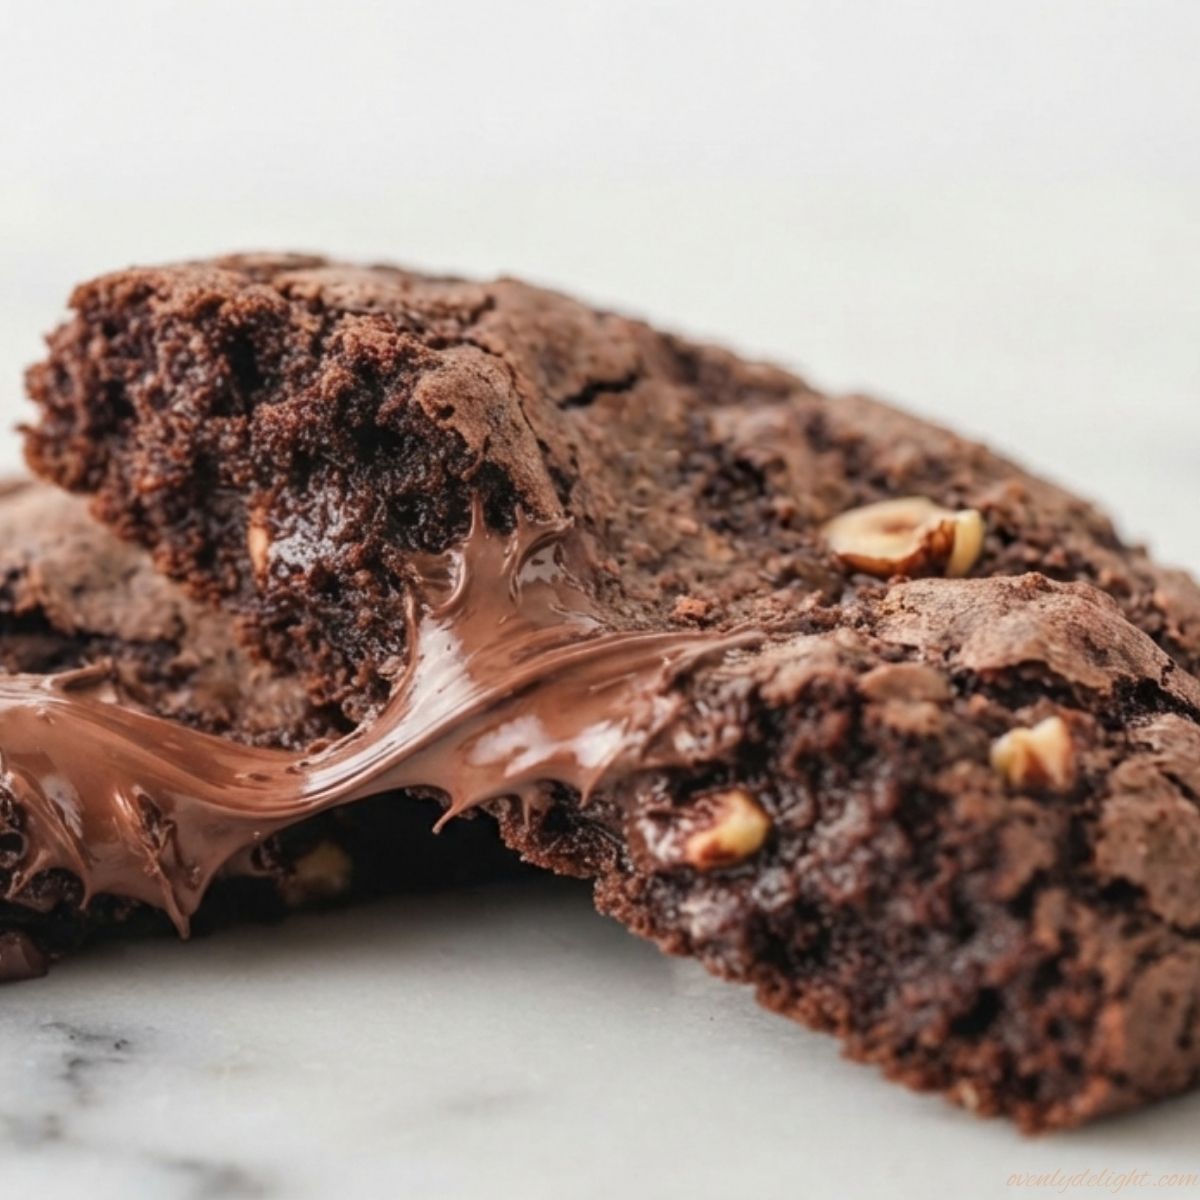
Nutella Cookies (Easy, Chewy Chocolate Hazelnut)
I always keep a jar of Nutella in my pantry because it makes baking feel effortless and a little more special. Whenever friends come over or we’re craving something sweet, these Nutella Cookies are one of my favorite treats to make. They’re soft, chewy, packed with rich chocolate hazelnut flavor, and filled with melty chocolate chips. Every batch disappears fast, which is always a sign they were worth baking. Why I Love These Easy Nutella Cookies Ingredients for Nutella Cookies Dry Ingredients Wet Ingredients Mix-In • Chocolate chips, plus extra for tops (1 cup / 170 g): Add melty chocolate pockets throughout the cookies and make these homemade Nutella cookies look extra bakery-style. How to Make These Cookies Step by Step Making these Nutella Cookies is easier than you might think. With a few simple steps, you’ll get soft, chewy chocolate hazelnut cookies with rich Nutella flavor, melty chocolate chips, and the perfect bakery-style texture. 1. Whisk the Dry Ingredients In a medium bowl, combine the all-purpose flour, cocoa powder, baking soda, and salt. Whisk everything together until evenly mixed. This step helps distribute the cocoa and leavening ingredients throughout the dough, giving every Nutella cookie the same rich chocolate flavor and texture. Set the bowl aside while you prepare the wet ingredients. 2. Cream the Butter and Sugars In a large mixing bowl, beat the softened butter, brown sugar, and granulated sugar together for about 2 minutes until the mixture becomes lighter, creamy, and fluffy. Properly creaming the butter helps create a soft and chewy texture in these easy Nutella cookies while adding a slight crispness to the edges. 3. Add the Nutella, Vanilla, and Egg Add the Nutella and vanilla extract to the butter mixture and mix until smooth and fully combined. Then add the room-temperature egg and beat until the dough becomes creamy. Using a room-temperature egg helps prevent the butter mixture from becoming lumpy and keeps the cookie dough smooth. 4. Combine Wet and Dry Ingredients Gradually add the dry ingredients into the wet mixture. Mix on low speed or stir gently with a spatula until the flour disappears. Avoid overmixing the dough because it can make the cookies dense instead of soft and chewy. The dough should look thick and chocolatey. 5. Fold in the Chocolate Chips Gently fold the chocolate chips into the cookie dough using a spatula. Save a few extra chocolate chips to press on top of the cookies before baking. This gives the homemade Nutella cookies a bakery-style appearance with extra chocolate in every bite. 6. Chill the Cookie Dough Cover the bowl and refrigerate the dough for at least 30 minutes. Chilling helps the flavors develop and prevents the cookies from spreading too much while baking. This short resting time is the secret to getting thick, soft, and chewy Nutella chocolate chip cookies. 7. Prepare the Oven and Baking Sheets Preheat your oven to 350°F (175°C) and line two baking sheets with parchment paper. Preparing the baking sheets ahead of time ensures the cookies bake evenly and release easily after baking. 8. Portion the Dough Use a cookie scoop or spoon to divide the chilled dough into about 28 cookie dough balls, around 1 1/2 tablespoons each. Place them on the prepared baking sheets, leaving about 2 inches of space between each cookie. Press a few extra chocolate chips on top for a beautiful finish. 9. Bake the Nutella Cookies Bake the cookies for 10–12 minutes until the edges look set while the centers still appear slightly soft. Do not overbake them because the cookies will continue to firm up as they cool. This keeps the inside perfectly chewy. 10. Cool and Serve Allow the cookies to cool on the baking sheet for about 5 minutes, then transfer them to a wire rack to cool completely. Once cooled, enjoy these soft Nutella Cookies with coffee, tea, or a glass of milk for the perfect sweet treat. Expert Tips for Perfect Cookies Ingredient Substitutions How to Store These Cookies • Room temperature: Store the cookies in an airtight container at room temperature for up to 5 days. Place a sheet of parchment paper between layers if stacking them to prevent sticking and help keep their soft texture. • Refrigerator: Refrigerating is not necessary, but you can store the cookies in an airtight container for up to 10 days. Let them come to room temperature before serving for the best chewy texture. • Freezer (baked cookies): To freeze baked cookies, arrange them in a single layer on a tray until firm, then transfer them to a freezer-safe bag or container. They can be stored for up to 3 months. Thaw at room temperature before enjoying. • Freezer (cookie dough): You can also freeze the cookie dough for later baking. Scoop and shape the dough into balls, freeze them on a tray until solid, then place them in a freezer bag. When ready to bake, place the frozen dough directly on a baking sheet and add 1–2 extra minutes to the baking time. • Reheat tip: For that fresh-from-the-oven softness, warm a cookie in the microwave for about 10 seconds. This brings back the gooey chocolate texture and makes the cookies taste freshly baked again. More Homemade Cookies to Try Frequently Asked Questions Final Thoughts These Nutella Cookies are the perfect treat for anyone who loves rich chocolate flavor and a soft, chewy cookie texture. I love how simple ingredients come together to create something that feels special, whether I’m baking them for my friends, family, or just enjoying a sweet moment at home. The combination of creamy Nutella, cocoa, and melty chocolate chips makes every bite full of delicious chocolate hazelnut goodness. If you’re looking for an easy cookie recipe that doesn’t require complicated techniques but still tastes bakery-worthy, these cookies are a must-try. They’re perfect for sharing, gifting, or keeping a batch ready whenever a chocolate craving hits.
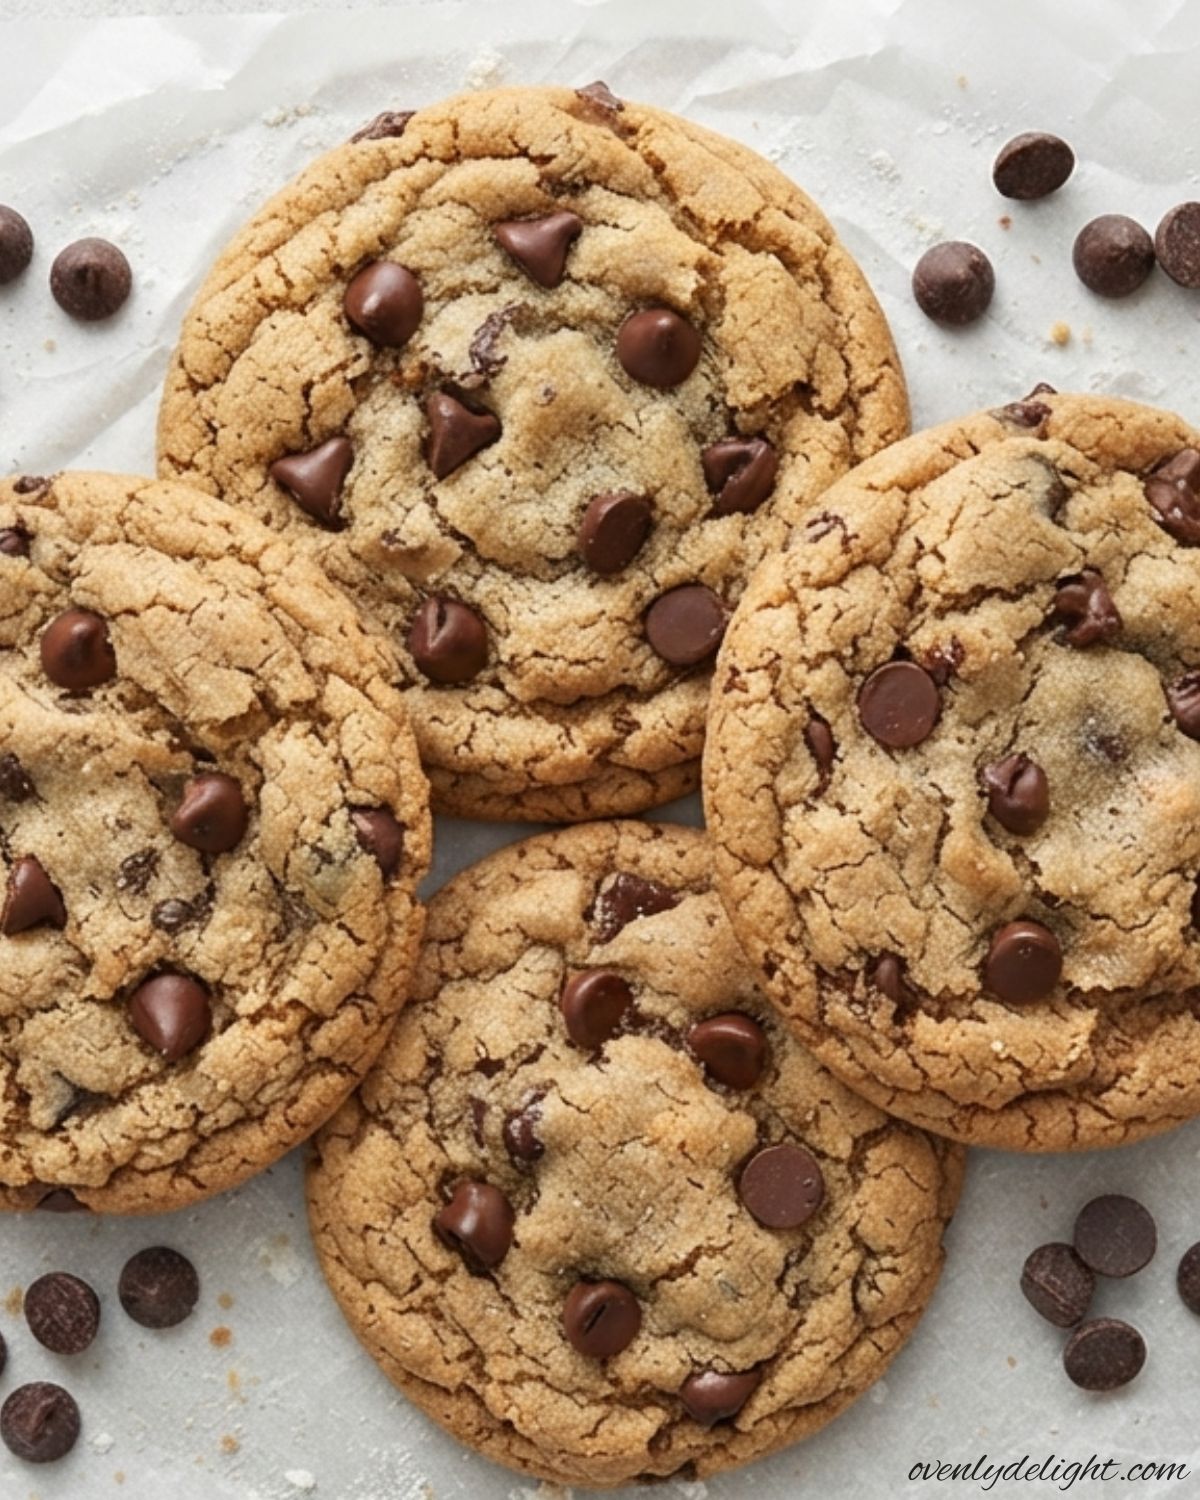
Banana Chocolate Chip Cookies (Soft & Chewy)
Whenever I have a ripe banana sitting on the counter, these Banana Chocolate Chip Cookies are one of my favorite things to bake. They’re soft, chewy, and filled with sweet banana flavor and melty chocolate chips. Made with simple pantry ingredients, they come together quickly and are perfect for an easy dessert, lunchbox treat, or cozy snack with a cup of coffee or a glass of milk. Why You’ll Love These Banana Chocolate Chip Cookies Ingredients You’ll Need For Banana Cookies How to Make Banana Chocolate Chip Cookies 1. Prepare the Oven and Baking Sheets Preheat your oven to 350°F (175°C) and line two large baking sheets with parchment paper. This prevents the cookies from sticking and helps them bake evenly. 2. Cream the Butter and Sugars In a large mixing bowl, beat the softened butter, brown sugar, and granulated sugar together for about 2 minutes, or until the mixture is light, fluffy, and creamy. This step creates a soft, tender cookie texture. 3. Add the Wet Ingredients Mix in the honey, egg yolk, and vanilla extract until smooth and fully combined. These ingredients add richness, moisture, and flavor to the cookie dough. 4. Stir in the Mashed Banana Add the mashed ripe banana and mix until it’s evenly incorporated into the wet ingredients. The banana gives the cookies their signature flavor and helps keep them soft and moist. 5. Combine the Dry Ingredients In a separate bowl, whisk together the all-purpose flour, baking soda, ground cinnamon, and salt until evenly mixed. This ensures the leavening and spices are distributed throughout the dough. 6. Mix the Dough Gradually add the dry ingredients to the wet ingredients, mixing on low speed just until a soft dough forms. Avoid overmixing, as it can make the cookies dense instead of soft and chewy. 7. Fold in the Chocolate Chips Using a spatula or wooden spoon, gently fold the chocolate chips into the dough until they are evenly distributed. This helps keep the dough light while ensuring chocolate in every bite. 8. Scoop the Cookie Dough Scoop about 1½ tablespoons of dough for each cookie and place the dough balls on the prepared baking sheets, leaving about 2 inches of space between each one to allow for spreading. 9. Bake the Cookies Bake for 9–11 minutes, or until the edges are lightly golden and set while the centers still look slightly under baked. They will continue cooking as they cool, resulting in soft, chewy cookies. 10. Cool and Enjoy Let the cookies cool on the baking sheet for 5 minutes, then transfer them to a wire rack to cool completely. Enjoy them warm for gooey chocolate chips or store them in an airtight container once fully cooled. Expert Tips for the Perfect Cookies Substitutions and Variations How to Store Banana Chocolate Chip Cookies More Cookies to Bake Next Frequently Asked Questions Final Thoughts These Banana Chocolate Chip Cookies are one of my favorite ways to use up ripe bananas without making an entire loaf of banana bread. They’re soft, chewy, packed with melty chocolate chips, and made with simple pantry ingredients. Best of all, the dough comes together quickly and bakes in just minutes, making this recipe perfect whenever you’re craving a homemade sweet treat. Whether you’re baking them for your family, sharing them with friends, or enjoying one warm with a glass of milk or a cup of coffee, these cookies are sure to become a regular favorite. I hope you give this recipe a try and love every bite
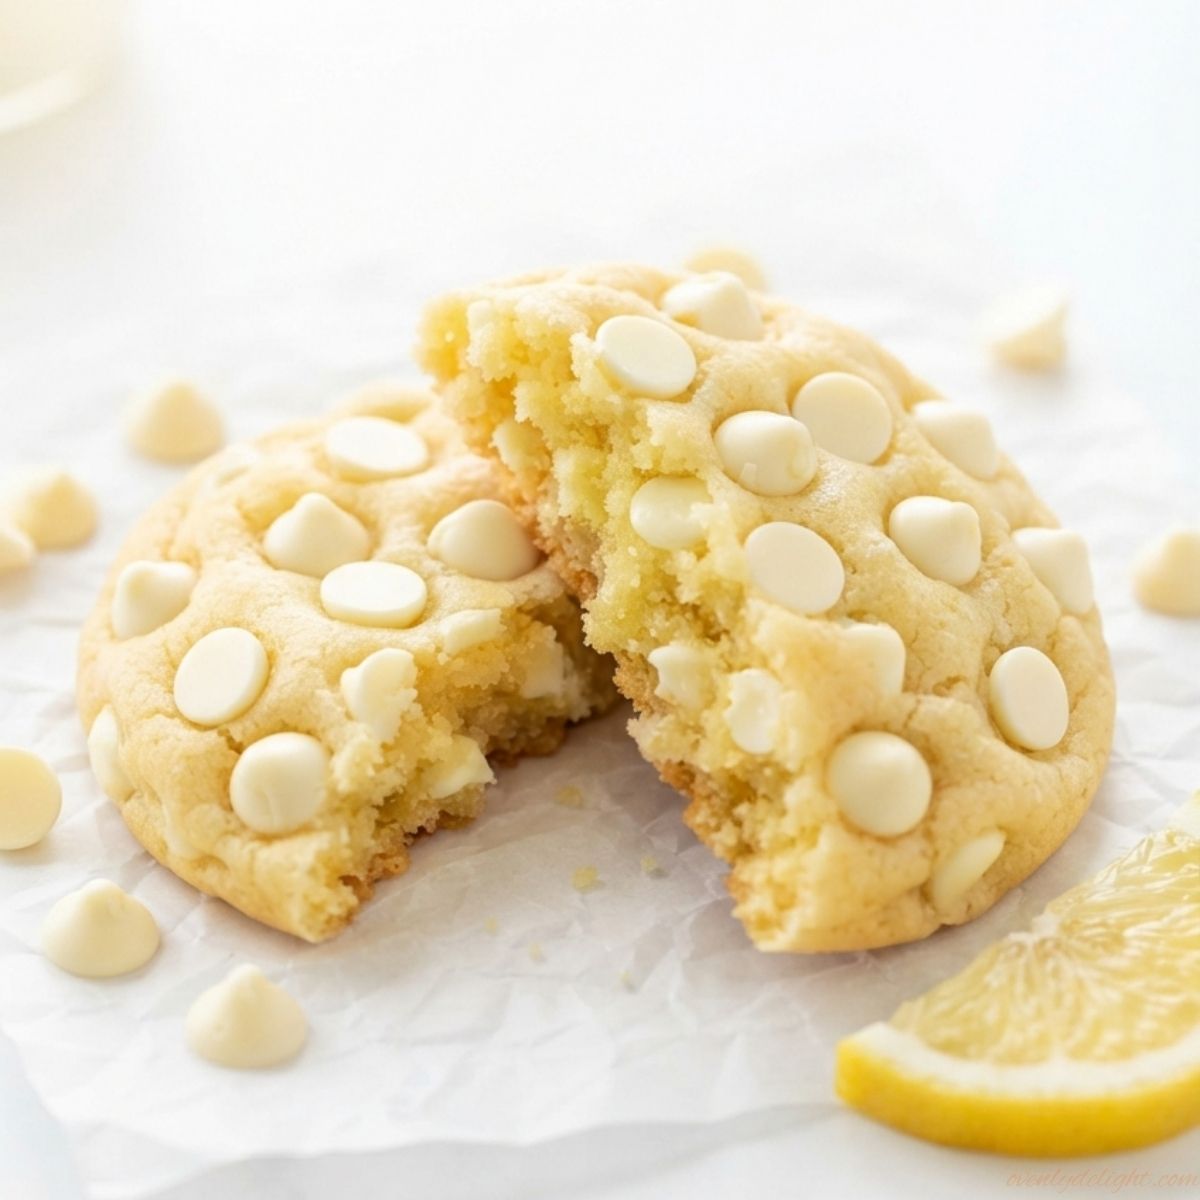
Best Lemon White Chocolate Chip Cookies
There’s something so refreshing about the combination of lemon and white chocolate. These Lemon White Chocolate Chip Cookies are soft, buttery, and packed with bright lemon flavor, while the sweet white chocolate chips add the perfect creamy touch in every bite. I love making these cookies when I want a dessert that feels a little different from the usual chocolate chip cookies. They’re easy to prepare, full of fresh flavor, and make the perfect treat for afternoon coffee, family gatherings, or whenever you’re craving a homemade cookie. Why We Love These Lemon White Chocolate Chip Cookies These Lemon White Chocolate Chip Cookies are the perfect mix of fresh, bright lemon flavor and sweet, creamy white chocolate. Every bite has a soft, buttery texture with just the right amount of sweetness, making them a cookie that feels light yet completely satisfying. What makes this recipe special is how simple it is to make while still tasting like something from a bakery. The fresh lemon zest gives the cookies a refreshing flavor, and the white chocolate chips add little pockets of sweetness throughout. They’re perfect for spring baking, holiday cookie trays, afternoon snacks, or anytime you want a homemade treat that everyone will love. Ingredients for Lemon White Chocolate Chip Cookies How to Make Lemon White Chocolate Chip Cookies (Step by Step) 1. Mix the Dry Ingredients In a large mixing bowl, whisk together the all-purpose flour, cornstarch, baking powder, baking soda, and salt. Mixing these ingredients first helps distribute the leavening agents evenly, so every cookie bakes with the same soft texture and balanced flavor. 2. Cut the Cold Butter Into the Mixture Add the cold, cubed butter to the flour mixture. Use your fingertips to rub the butter into the dry ingredients, or pulse everything in a food processor until the mixture looks like coarse sand with a few small pea-sized pieces of butter remaining. These small pieces of cold butter help create thick, bakery-style cookies with a tender texture. 3. Infuse the Sugar with Lemon Flavor In a separate bowl, combine the granulated sugar, brown sugar, and fresh lemon zest. Use your fingers to gently rub the zest into the sugar for about 30 seconds. This releases the natural lemon oils and gives the cookies a much brighter, fresher citrus flavor. 4. Combine the Sugar and Flour Mixture Add the lemon-infused sugar mixture to the flour and butter mixture. Stir everything together until the ingredients are evenly combined and the lemon sugar is spread throughout the dough. 5. Add the Wet Ingredients In a small bowl, whisk together the eggs, vanilla extract, and lemon extract until smooth. Pour the mixture into the dry ingredients and gently stir until a soft, shaggy dough forms. Be careful not to overmix, as too much mixing can make the cookies dense instead of soft and chewy. 6. Fold in the White Chocolate Chips Add the white chocolate chips to the cookie dough and gently fold them in using a spatula or wooden spoon. Mix just until the chips are evenly distributed so every cookie gets plenty of sweet, creamy chocolate in each bite. 7. Shape the Cookie Dough Use a large cookie scoop or measuring cup to portion the dough into 14 equal-sized balls, about 1/3 cup each. Place them on a parchment-lined tray and lightly press the tops down. Keeping the cookies thick will help create a soft center after baking. 8. Chill the Dough Cover the tray with plastic wrap or a lid and refrigerate the cookie dough for at least 2 hours. This step allows the flavors to develop and prevents the cookies from spreading too much in the oven. For even better flavor, you can chill the dough overnight. 9. Prepare for Baking Preheat your oven to 350°F (175°C). Arrange the chilled cookie dough balls on a parchment-lined baking sheet, leaving about 3 inches of space between each cookie. The extra space allows the cookies to spread evenly while baking. 10. Bake the Cookies Bake the cookies for about 13 minutes, or until the edges look lightly golden and set while the centers still appear slightly soft. They may look a little underbaked at first, but they will continue cooking and setting as they cool. 11. Cool Before Serving Allow the cookies to cool on the baking sheet for 10 minutes before transferring them to a wire rack. This resting time helps the cookies firm up while keeping the centers soft, chewy, and full of lemon white chocolate flavor. Expert Tips for Perfect Lemon Cookies 1. Don’t Skip the Chilling Time I learned this the hard way after one batch spread into a giant cookie sheet. Chilling the dough for at least 2 hours is an important step, not something to skip. It helps the cookies stay thick, chewy, and bake evenly. 2. Rub the Lemon Zest Into the Sugar I used to simply add lemon zest to the dough, but rubbing it into the sugar first makes a noticeable difference. This simple step releases the lemon oils and gives the cookies a much brighter, fresher citrus flavor. 3. Bake the Dough While It’s Still Cold Cold cookie dough helps prevent the cookies from spreading too much. I like to keep the shaped dough balls in the fridge until the oven is fully preheated, then bake them straight away for the best texture. 4. Use Lemon Extract for Strong Lemon Flavor I once tried using only lemon juice, but the flavor faded after baking. Lemon extract helps keep that delicious lemon taste strong throughout the cookies, so it’s worth adding for the best results. 5. Don’t Overbake the Cookies The secret to soft, chewy cookies is pulling them out at the right time. I remove them when the edges are lightly golden and the centers still look slightly underdone because they continue setting as they cool. 6. Freeze Extra Cookie Dough for Later These cookies freeze wonderfully as unbaked dough balls. I love keeping a few in the
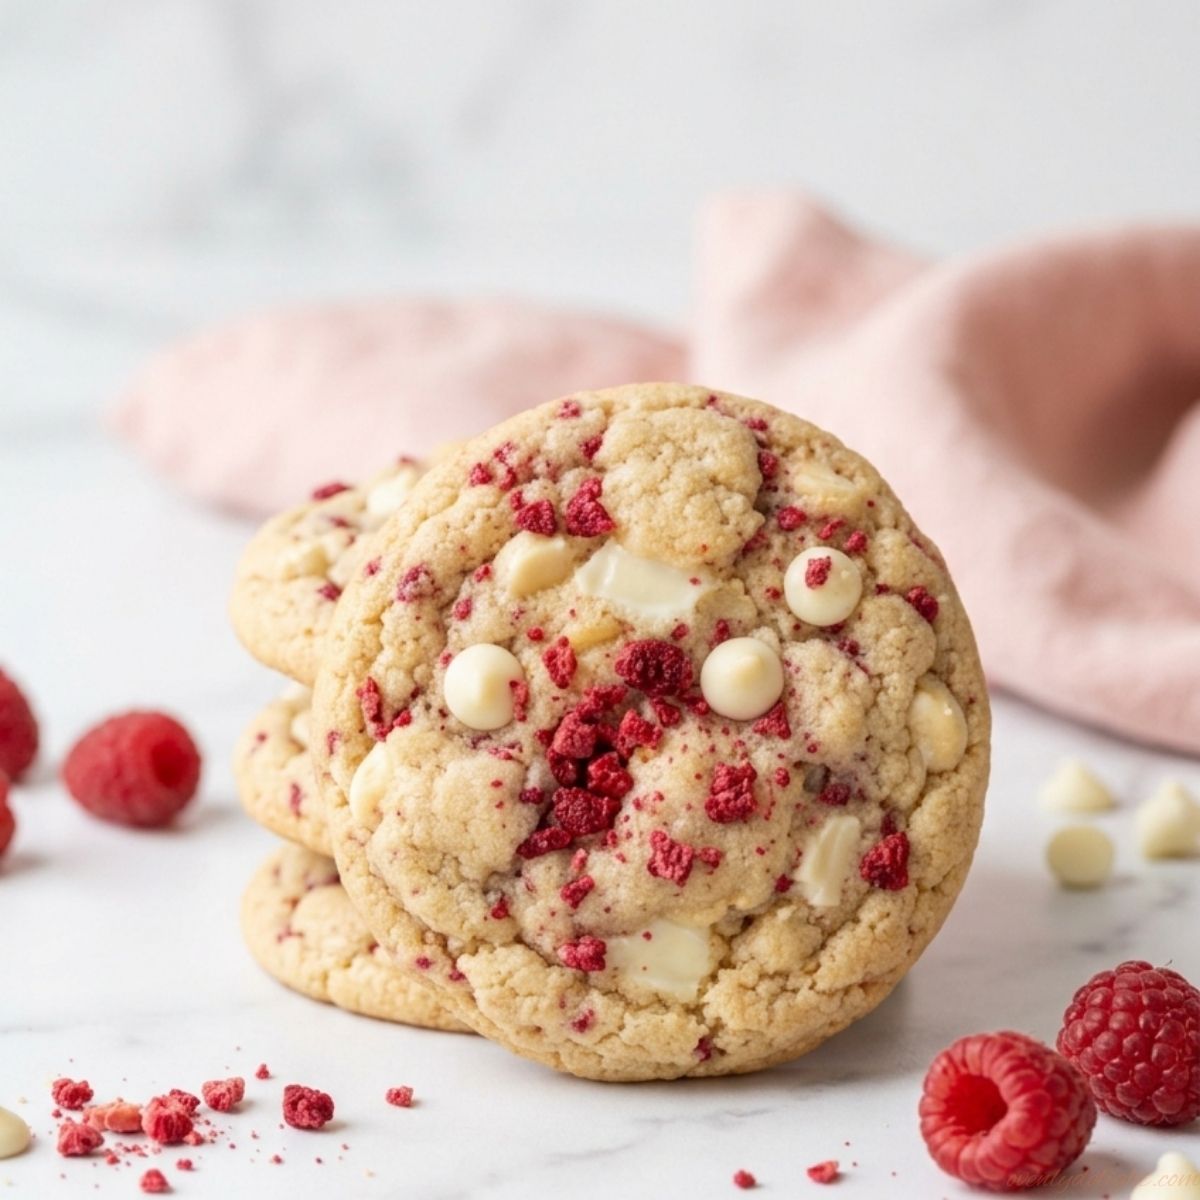
White Chocolate Raspberry Cookies (Soft, Chewy & Easy Recipe)
These White Chocolate Raspberry Cookies are the perfect balance of sweet, creamy, and fruity flavors. Each bite is filled with rich white chocolate chunks and bursts of fresh raspberries, creating a soft and chewy cookie that feels like a bakery treat made right at home. I love making these cookies whenever I want something simple but extra special. They come together easily, look beautiful on a dessert table, and are always a favorite with family and friends. Why You’ll Love These White Chocolate Raspberry Cookies Soft and Chewy Texture These cookies have the perfect soft and chewy texture with slightly crisp edges and a tender center. Every bite feels rich and satisfying, making them the kind of cookies you’ll want to bake again and again. Perfect Sweet and Fruity Flavor The combination of creamy white chocolate and juicy raspberries creates a delicious balance of flavors. The sweetness of the chocolate pairs beautifully with the fresh, slightly tart berries, giving these cookies a bright and refreshing taste. Easy to Make You don’t need complicated ingredients or special baking skills to make these cookies. With simple pantry staples and an easy-to-follow process, you can have a batch of homemade cookies ready for any occasion. Beautiful and Bakery-Style These cookies look just as impressive as they taste. The melted white chocolate pieces and colorful raspberry bursts make them a beautiful addition to dessert tables, cookie boxes, or homemade gifts. Perfect for Any Occasion Whether you’re baking for holidays, family gatherings, parties, or simply enjoying a sweet treat with your coffee, these white chocolate raspberry cookies are always a delicious choice. They’re loved by both kids and adults and are perfect for sharing. Ingredients for White Chocolate Raspberry Cookies Dry Ingredients Wet Ingredients Mix-Ins How to Make the Best White Chocolate Raspberry Cookies Making these White Chocolate Raspberry Cookies is easier than you might think, but a few simple techniques help create that perfect bakery-style texture. From keeping the butter cold to chilling the dough before baking, each step helps you achieve thick cookies with soft centers, lightly golden edges, and delicious bursts of raspberry and white chocolate in every bite. 1. Prepare the Dry Ingredients Start by combining the dry ingredients to create the perfect cookie base. In a medium bowl, whisk together the all-purpose flour, cake flour, baking powder, baking soda, and salt until evenly mixed. Combining these ingredients first helps distribute the leavening agents and salt throughout the dough, ensuring every cookie bakes evenly. 2. Mix Cold Butter with Sugars In a stand mixer fitted with a paddle attachment, add the cold cubed butter, brown sugar, and granulated sugar. Beat on medium speed for about 2 minutes until the mixture is fully combined but not fluffy. Using cold butter is the secret to thick, bakery-style cookies because it prevents the dough from spreading too quickly in the oven while helping create a soft and chewy texture. 3. Add the Eggs and Vanilla Flavor Add the cold eggs one at a time, mixing briefly after each addition until incorporated. Then add the vanilla extract and mix until combined. The eggs provide structure and moisture, while vanilla enhances the sweet flavors of the white chocolate and raspberries. 4. Combine the Dough Ingredients Lower the mixer speed and gradually add the dry ingredients in two batches. Mix only until the flour is just incorporated and no dry streaks remain. Avoid overmixing at this stage because too much mixing can develop excess gluten and make the cookies less tender. 5. Add Raspberry and White Chocolate Pieces Gently fold the freeze-dried raspberries and white chocolate chips into the dough using a spatula. Fold carefully to keep the raspberries intact and evenly spread throughout the cookie dough. Mixing too aggressively can crush the berries and change the color and texture of the cookies. 6. Chill the Dough for Better Texture Cover the cookie dough and refrigerate it for at least 2 hours, or up to 24 hours if you want to prepare it ahead. Chilling allows the flavors to develop and helps the cookies maintain their thick shape while baking. This step is important for achieving soft centers and perfectly chewy edges. 7. Prepare for Baking When you’re ready to bake, preheat your oven to 350°F (175°C). Line two baking sheets with parchment paper and position the oven rack in the center. Proper preparation helps the cookies bake evenly and prevents sticking. 8. Shape the Cookie Dough Scoop the chilled dough into 16 portions, about 3 tablespoons each, and gently roll them into balls. Place the dough balls on the prepared baking sheets, leaving about 2 inches of space between each cookie to allow room for spreading. 9. Bake Until Perfectly Golden Bake the cookies for 12–14 minutes, until the edges are lightly golden and set while the centers still appear slightly soft. Avoid overbaking because the cookies will continue to firm up as they cool, keeping the centers soft and chewy. 10. Cool and Enjoy Let the cookies rest on the baking sheet for about 10 minutes before moving them to a wire rack. This short cooling period allows the cookies to set properly while keeping their deliciously soft texture. Once cooled, they’re ready to enjoy with a cup of coffee, tea, or a glass of milk. Tips for Perfectly Soft and Chewy Cookies These simple baking tips can make a big difference when making White Chocolate Raspberry Cookies. After testing different methods, I found that small details like ingredient temperature, measuring correctly, and proper chilling are what create thick, soft, and bakery-style cookies every time. Use Cold Ingredients for Thick Cookies Cold butter and cold eggs are key to keeping these cookies thick instead of thin and crispy. Softened butter can cause the dough to spread too quickly in the oven, while starting with cold ingredients helps the cookies hold their shape and maintain a soft, chewy center. Measure Flour Correctly For the most consistent results, use a kitchen scale to weigh your flour