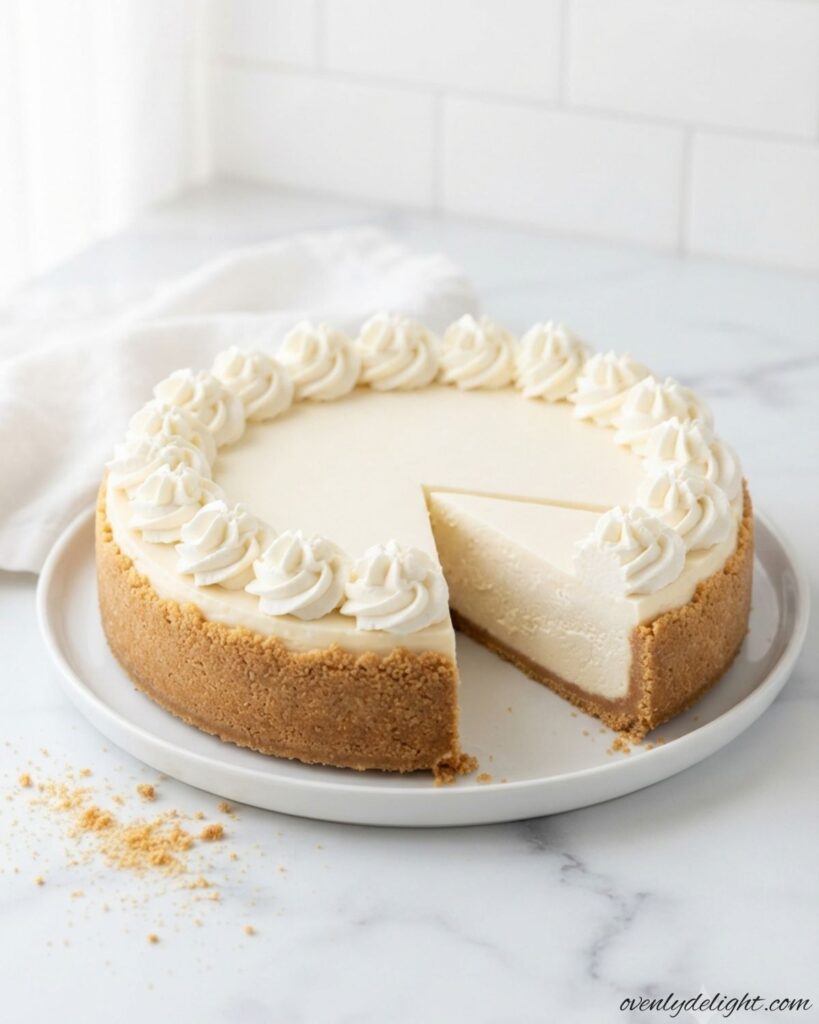
I love making this Easy No-Bake Cheesecake whenever I want a simple dessert that feels special without spending hours in the kitchen. With a buttery crust and a creamy, smooth filling, this chilled treat is perfect for family gatherings, holidays, or whenever you’re craving a delicious homemade cheesecake without turning on the oven.
Why You’ll Love This Easy No-Bake Cheesecake Recipe
Simple and No Oven Needed:
This no-bake dessert comes together easily without using an oven, making it perfect for warm days or when you want a quick and hassle-free sweet treat.
Creamy Texture and Classic Flavor:
The rich filling creates a smooth, melt-in-your-mouth experience with the traditional cheesecake taste everyone loves.
Perfect for Any Occasion:
Whether you’re preparing a holiday dessert, a family gathering treat, or a weekend sweet craving, this chilled cheesecake is always a crowd-pleaser.
Easy to Make Ahead:
You can prepare this cheesecake in advance and let it chill until perfectly set, making it a convenient choice for entertaining guests.
Ingredients You’ll Need for This Easy No-Bake Cheesecake
For the Graham Cracker Crust
- Graham cracker crumbs: 2 ½ cups (250g)
Use store-bought crumbs or crush whole graham crackers in a food processor until fine. - Granulated sugar: 3 tablespoons (37g)
Adds the right amount of sweetness while keeping the crust balanced. - Unsalted butter, melted: 10 tablespoons (142g)
Helps bind the crumbs together and creates a firm, buttery base.
For the Cheesecake Filling
- Full-fat brick-style cream cheese, softened: 24 ounces (680g)
Use brick-style cream cheese for a thick and stable filling. Tub-style cream cheese may make the cheesecake too soft. - Powdered sugar: 1 ¼ cups (150g)
Creates a smooth sweetness without a grainy texture. - Full-fat sour cream: ¼ cup (60g)
Adds a light tang and makes the filling extra creamy. - Fresh lemon juice: 1 tablespoon (15ml)
Gives the cheesecake a fresh flavor and balances the sweetness. - Vanilla extract: 1 teaspoon (5ml)
Enhances the overall taste of the filling. - Cold heavy whipping cream (33%+ milk fat): 1 ¼ cups (300ml)
Whipped until stiff peaks form to give the cheesecake a light and fluffy texture without gelatin or eggs.
For Serving (Optional)
- Whipped cream: 1 cup (240ml)
- Fresh berries: 1 cup (150g)
Add on top before serving for a fresh and beautiful finish.
How to Make This Easy No-Bake Cheesecake (Step by Step)
Prepare the Graham Cracker Crust
- Lightly grease the bottom and sides of a 9-inch spring form pan to make removing the cheesecake easier.
- In a medium bowl, combine 2 ½ cups (250g) graham cracker crumbs, 3 tablespoons (37g) granulated sugar, and 10 tablespoons (142g) melted unsalted butter. Mix until the crumbs look like wet sand and are evenly coated.
- Press the crust mixture firmly into the bottom of the pan and slightly up the sides. Use the flat bottom of a measuring cup or glass to compact it tightly, which helps prevent crumbling when sliced.
- Place the crust in the freezer while preparing the filling so it can firm up.
Make the Creamy Cheesecake Filling
- Beat the softened 24 ounces (680g) cream cheese with 1 ¼ cups (150g) powdered sugar until completely smooth and creamy. Scrape the sides and bottom of the bowl to remove any lumps.
- Add ¼ cup (60g) sour cream, 1 tablespoon (15ml) fresh lemon juice, and 1 teaspoon (5ml) vanilla extract. Mix until everything is fully combined.
- Use 1 cup powdered sugar in cream cheese mixture and ¼ cup powdered sugar with whipped cream.
- Gently fold the whipped cream into the cream cheese mixture using a rubber spatula. Fold slowly to keep the filling light, fluffy, and airy.
- Spread the cheesecake filling evenly over the chilled crust. Smooth the top and refrigerate for at least 6 hours, or overnight for the best results.
Add Toppings and Serve
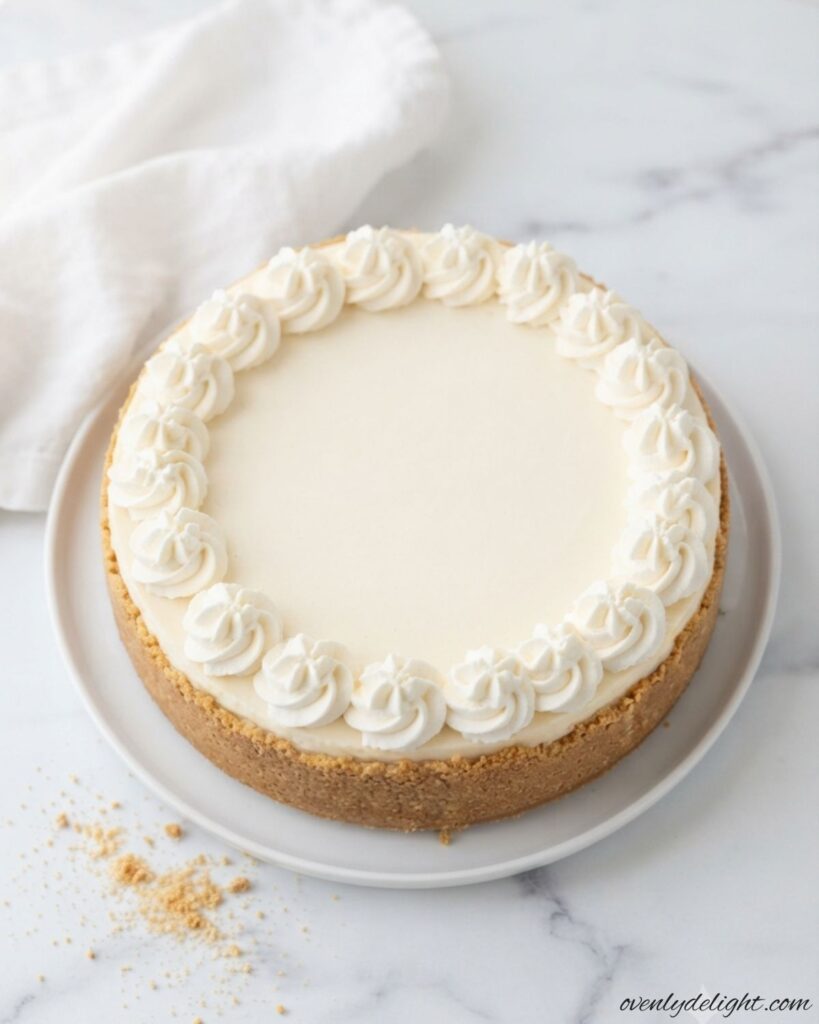
- Before serving, carefully run a thin knife around the edge of the cheesecake, then remove the springform pan ring.
- Add toppings like whipped cream and fresh berries or your favorite cheesecake toppings.
- Slice and serve chilled. Keep any leftover cheesecake covered and stored in the refrigerator.
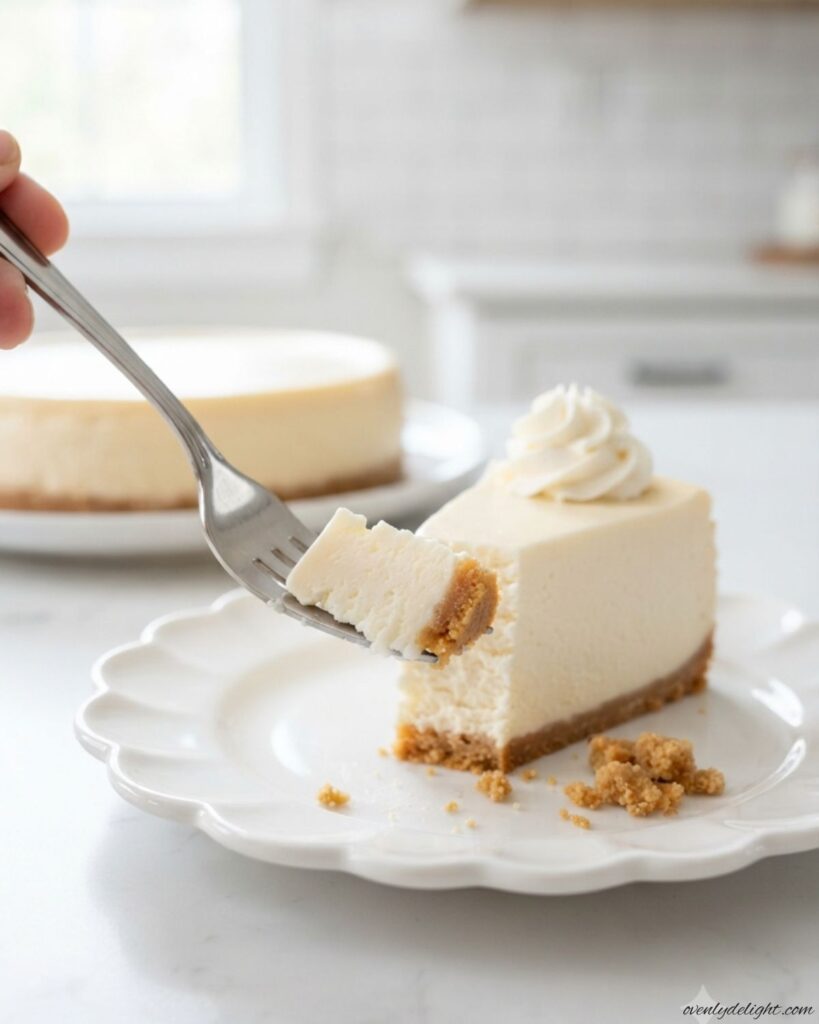
Tips for Creating the Perfect No-Bake Cheesecake
Choose the Right Cream Cheese for a Firm Filling
Always use full-fat, brick-style cream cheese instead of spreadable tub varieties. Brick cream cheese has a thicker consistency and less moisture, which helps the cheesecake hold its shape after chilling. Allow it to soften properly before mixing so the filling becomes smooth and free of lumps.
Whip the Cream Until It Holds Its Shape
Cold heavy cream is essential for creating a light and fluffy cheesecake filling. Whip it until stiff peaks form, meaning the cream should stand up when the beaters are lifted. Under-whipped cream can make the dessert too soft, while properly whipped cream helps maintain the structure.
Fold the Mixture Gently for a Fluffy Texture
When combining the whipped cream with the cheesecake base, use a gentle folding motion instead of vigorous stirring. This keeps the air in the whipped cream, creating a smooth and creamy texture that feels light with every bite.
Make a Strong and Buttery Crust
Press the graham cracker crust firmly into the pan using the bottom of a measuring cup or glass. A tightly packed base prevents the crust from breaking apart when sliced and provides a sturdy foundation for the creamy filling.
Give the Cheesecake Enough Time to Chill
Patience is important when making a chilled cheesecake. Let it refrigerate for at least 6 hours, although leaving it overnight gives the filling more time to set perfectly. This results in cleaner slices and a richer texture.
Add Fresh Ingredients for Better Flavor
Use fresh lemon juice instead of bottled juice for a brighter, cleaner taste. Chilling your bowl and beaters before whipping the cream can also improve the texture, especially when working in a warm kitchen. These small details make a noticeable difference in the final dessert.
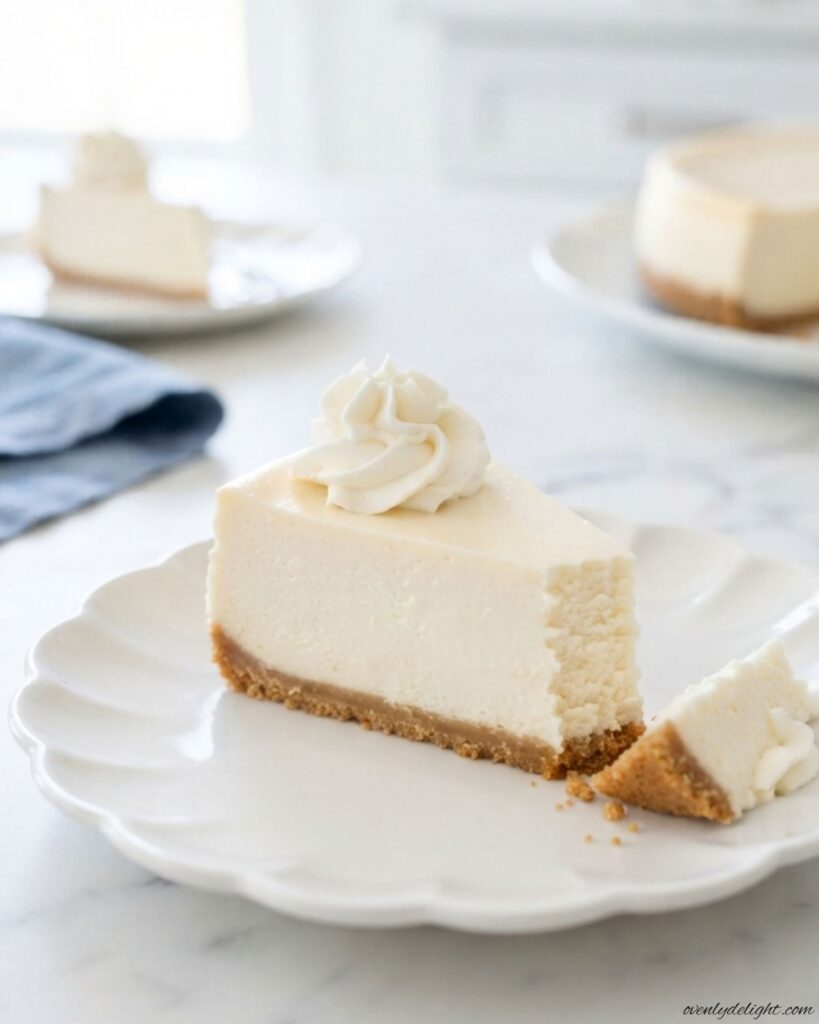
Easy No-Bake Cheesecake Ingredient Substitutions
Swap Graham Cracker Crumbs with Digestive Biscuits
Instead of graham cracker crumbs, you can use crushed digestive biscuits for the crust. They create a similar buttery base with a slightly less sweet flavor. If you use this alternative, you can reduce or skip the added sugar in the crust mixture.
Use Greek Yogurt Instead of Sour Cream
Plain full-fat Greek yogurt is a great substitute for sour cream in this recipe. It keeps the filling creamy while adding a slightly tangy flavor that balances the sweetness of the cheesecake.
Try Dairy-Free Alternatives
For a dairy-free version, replace traditional cream cheese with a full-fat dairy-free cream cheese alternative and use coconut whipping cream instead of regular heavy cream. The texture may be a little softer, but the dessert will still have a rich and creamy taste.
Replace Heavy Whipping Cream When Needed
If heavy whipping cream is unavailable, use about 2 cups of thawed whipped topping as an alternative. Fold it directly into the cream cheese mixture to create a smooth and fluffy filling without whipping it separately.
Choose Quality Ingredients for Better Results
Using reliable ingredients can make a difference in the final texture and flavor. Brands like Philadelphia cream cheese and Nabisco graham crackers are popular choices and are commonly available in many grocery stores.
How to Store No-Bake Cheesecake Properly
Keep This Chilled Dessert Fresh in the Refrigerator
Store your No-Bake Cheesecake in an airtight container or cover it tightly with plastic wrap before placing it in the fridge. It will stay fresh for up to 3 days while maintaining its creamy filling and buttery crust. The base may soften slightly after a couple of days, but the flavor and texture will still remain enjoyable.
Freeze the Creamy Cheesecake for Longer Storage
For longer storage, wrap the homemade chilled cheesecake tightly with plastic wrap and then add a layer of foil to protect it from freezer moisture. You can freeze the whole dessert or individual slices for up to 1 month. When ready to enjoy, thaw it overnight in the refrigerator so the filling returns to a smooth and creamy consistency.
Serve Cold for the Best Texture
This easy no-bake dessert is meant to be served chilled, so avoid warming it in the microwave. Keeping it refrigerated helps preserve the rich cheesecake filling, firm crust, and refreshing taste. Remove it from the fridge just before serving for the best experience.
Transport It Carefully for Special Occasions
If you are taking this creamy cheesecake recipe to a gathering, keep it inside the springform pan until you reach your destination. The pan helps maintain the shape and keeps the edges neat. Remove the ring before serving to create clean, attractive slices.
Store Leftovers Correctly
Place any remaining slices in a covered container and return them to the refrigerator as soon as possible. Proper storage helps maintain the dessert’s smooth texture and fresh flavor for the next few days.
More Dessert Recipes You’ll Love
Frequently Asked Questions
How long does No-Bake Cheesecake need to chill before serving?
A No-Bake Cheesecake needs at least 6 hours in the refrigerator to set properly. For the best texture and cleaner slices, chilling it overnight is recommended. Allowing enough time helps the creamy filling become firm while still keeping its smooth consistency.
Why is my No-Bake Cheesecake not setting properly?
The most common reasons are using soft tub-style cream cheese, not whipping the cream enough, or skipping the required chilling time. For a stable dessert, use full-fat brick cream cheese, whip the heavy cream until stiff peaks form, and refrigerate it for the recommended time.
Can I make this no-bake dessert ahead of time?
Yes, this creamy cheesecake recipe is a great make-ahead dessert. Preparing it the night before allows the filling to fully set and makes it easier to slice when serving at parties, holidays, or special gatherings.
How long can No-Bake Cheesecake stay fresh in the refrigerator?
This homemade chilled dessert can be stored in the refrigerator for up to 3 days when properly covered. The crust is usually firmest during the first couple of days, while the texture may soften slightly later.
Can I freeze No-Bake Cheesecake for later?
Yes, you can freeze No-Bake Cheesecake for up to 1 month. Wrap it tightly with plastic wrap and foil to protect the texture. Thaw it overnight in the refrigerator before serving for the best creamy consistency.
Can I use digestive biscuits instead of graham crackers?
Yes, crushed digestive biscuits work well as a substitute for graham crackers. Use around 2 ½ cups of finely crushed biscuits and reduce or skip the sugar in the crust since digestive biscuits already have sweetness.
Final Thoughts
This Easy No-Bake Cheesecake is proof that a delicious homemade dessert doesn’t need complicated steps or an oven. With its buttery crust, creamy filling, and refreshing flavor, it’s a simple treat that feels special enough for holidays, celebrations, or everyday cravings. Once you try this recipe, you’ll love how easy it is to prepare ahead and enjoy whenever you need a crowd-pleasing sweet dish. Serve it with fresh berries, whipped cream, or your favorite topping for a beautiful finishing touch.
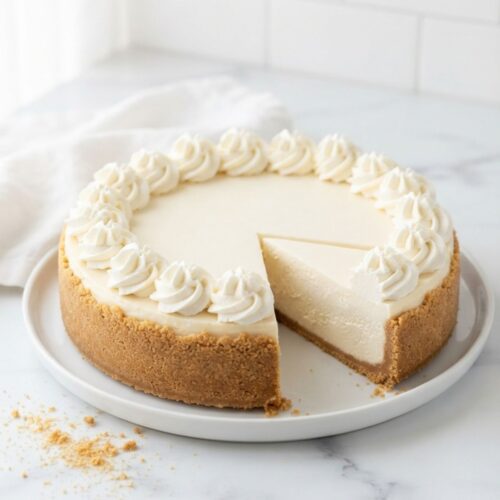
Card: No-Bake Cheesecake

Ingredients
Graham Cracker Crust
- 2 ½ cups 250g graham cracker crumbs
- 3 tablespoons 37g granulated sugar
- 10 tablespoons 142g unsalted butter, melted
Cheesecake Filling
- 24 oz 680g full-fat, brick-style cream cheese, softened
- 1 ¼ cups 150g powdered sugar, divided
- ¼ cup 60g full-fat sour cream
- 1 tablespoon fresh lemon juice
- 1 teaspoon vanilla extract
- 1 ¼ cups 300ml cold heavy whipping cream (33%+ MF)
For Serving
- Whipped cream as needed
- Fresh berries as needed
Instructions
- Lightly grease the bottom of a 9-inch springform pan.
- Mix graham cracker crumbs, sugar, and melted butter until the mixture is well combined.
- Press the crust mixture firmly into the bottom and halfway up the sides of the pan.
- Place the crust in the freezer while preparing the filling.
- Beat softened cream cheese with 1 ¼ cups powdered sugar until smooth and creamy.
- Add sour cream, lemon juice, and vanilla extract, then mix until fully combined.
- In a separate bowl, whip cold heavy cream with the remaining powdered sugar until stiff peaks form.
- Gently fold the whipped cream into the cream cheese mixture until smooth and evenly combined.
- Spread the filling over the chilled crust, smooth the top, and refrigerate for at least 6 hours.
- Run a thin knife around the edge of the cheesecake and carefully remove the springform ring.
- Top with whipped cream and fresh berries if desired.
- Slice and serve chilled. Store any leftovers covered in the refrigerator.